. To make cheesy zucchini breadsticks, start by squeezing out the excess moisture from the zucchini. This step is key. If the zucchini stays wet, it makes the breadsticks soggy. After that, ensure you mix all the ingredients evenly. This helps every bite taste the same and gets the right texture. You can easily customize the flavor of your zucchini breadsticks. Add herbs or spices that you love. For a stronger taste, use fresh garlic instead of garlic powder. This small change can make a big difference. Think about adding Italian seasoning for an extra kick. When serving your cheesy zucchini breadsticks, consider some tasty dipping sauces. Marinara sauce is classic, but you can try ranch or garlic aioli for a twist. For a nice touch, garnish your breadsticks with fresh herbs. Chopped parsley or basil looks great and adds flavor too. {{image_2}} You can spice up your cheesy zucchini breadsticks easily. Try adding red pepper flakes. This gives a nice kick. You can also mix in fresh herbs like basil or thyme. These herbs add a great aroma and flavor. Both options let you customize the taste. If you have dietary needs, there are options for you. Use almond flour instead of regular flour for gluten-free breadsticks. This keeps the texture nice and light. For those avoiding dairy, try dairy-free cheese. It melts well and tastes great. You can add more fun to your breadsticks with toppings. Sprinkle extra cheese before the final bake. This gives a gooey, cheesy layer on top. You can also add more vegetables. Chopped spinach or bell peppers are great choices. They boost the nutrition while adding color. Enjoy these fun variations in your cheesy zucchini breadsticks for a tasty twist! For the full recipe, check out the details above. To keep your cheesy zucchini breadsticks fresh, store them in an airtight container. This helps lock in moisture and flavors. Make sure the container is clean and dry before adding the breadsticks. If you plan to eat them within a few days, keep them in the fridge. I find that they stay tasty for about 3 to 4 days this way. When it's time to enjoy your leftovers, you can choose between the microwave or the oven. The microwave is quick but can make the breadsticks a bit soggy. To avoid this, heat them in short bursts of 15 seconds. If you want a nice, crispy texture, the oven is best. Preheat it to 350°F (175°C) and bake for about 10 minutes. This method keeps them crunchy and warm. If you have extra breadsticks, freezing is a great option. To freeze them, wait until they cool down completely. Then, wrap each stick in plastic wrap or foil. Place them in a freezer-safe bag or container. They can last up to 2 months in the freezer. When you're ready to eat them, thaw in the fridge overnight. After thawing, reheat them in the oven for the best results. To cut your breadsticks, a sharp knife or pizza cutter works best. Use a gentle hand to slice through the crispy edges and soft center. This will help keep the shape intact. A serrated knife can also work well for a clean cut. Yes, you can use frozen zucchini. Just remember to thaw it first and squeeze out the water. Fresh zucchini has a better texture and taste, but frozen works in a pinch. You may need to adjust the moisture in your mixture when using frozen zucchini. You can prepare the mixture and store it in the fridge for one day. This makes meal prep easy. For longer storage, bake the breadsticks, let them cool, and freeze them. Reheat in the oven for a quick snack. Mozzarella is my favorite cheese for its meltiness. Parmesan adds a nice flavor too. You can swap mozzarella with cheddar or gouda for different tastes. Vegan cheese works well if you need a dairy-free option. Just choose a cheese that melts nicely. For the full recipe, check out the Cheesy Zucchini Breadsticks. These zucchini breadsticks are easy to make and delicious. You need simple ingredients like zucchini, cheese, and flour. Follow the steps to mix, bake, and serve these tasty treats. Remember to add your favorite dipping sauce for extra flavor. With so many variations and tips, you can customize them for any meal. Store leftovers well for a quick snack later. Enjoy your tasty, healthy breadsticks!](https://pagosarecipes.com/wp-content/uploads/2025/06/a699aebb-620e-4d8a-9105-410bc3460dd0-768x768.webp)
If you’re looking for a fun, easy snack, these Cheesy Zucchini Breadsticks are for you! Made with just simple ingredients, they are both tasty and healthy. You’ll enjoy the cheesy goodness, plus the crunch of fresh zucchini. Perfect for a quick treat or as a party appetizer, these breadsticks will impress your family and friends. Let’s dive into this delicious recipe!
Ingredients
Main Ingredients
- 2 medium zucchinis, grated
- 1 cup shredded mozzarella cheese
- 1/2 cup grated Parmesan cheese
- 1/2 cup almond flour or regular flour
Additional Ingredients
- 2 large eggs
- 1 teaspoon garlic powder
- 1 teaspoon dried oregano
- Salt and pepper to taste
Dipping Sauce
- Marinara sauce, for dipping
To make Cheesy Zucchini Breadsticks, you need a few key items. Start with two medium zucchinis. They add moisture and flavor. Grate them and squeeze out excess water. This step is crucial for a good texture.
Next, gather your cheeses. Use one cup of shredded mozzarella for its meltiness. Then, add half a cup of grated Parmesan for a sharp taste.
You also need half a cup of almond flour or regular flour. This helps bind the ingredients.
In addition, you will need two large eggs. They help hold everything together. For flavor, include one teaspoon of garlic powder and one teaspoon of dried oregano. Finally, add salt and pepper to taste.
For dipping, I recommend marinara sauce. It pairs perfectly with the cheesy breadsticks.Enjoy making this tasty snack!
Step-by-Step Instructions
Preparation Steps
- Preheat oven to 425°F (220°C).
- Line a baking sheet with parchment paper.
Mixing Ingredients
- In a large bowl, combine grated zucchini and cheeses.
- Add flour, eggs, garlic powder, oregano, salt, and pepper. Mix well.
Baking Process
- Spread the mixture onto the baking sheet.
- Bake for 20-25 minutes until golden brown.
Make sure you check the breadsticks before baking time ends. If the edges turn golden, they are ready to come out. Enjoy these cheesy delights fresh from the oven! For the complete recipe, you can find it [here](#).
Tips & Tricks
Achieving the Perfect Texture
To make cheesy zucchini breadsticks, start by squeezing out the excess moisture from the zucchini. This step is key. If the zucchini stays wet, it makes the breadsticks soggy. After that, ensure you mix all the ingredients evenly. This helps every bite taste the same and gets the right texture.
Enhancing Flavor
You can easily customize the flavor of your zucchini breadsticks. Add herbs or spices that you love. For a stronger taste, use fresh garlic instead of garlic powder. This small change can make a big difference. Think about adding Italian seasoning for an extra kick.
Serving Suggestions
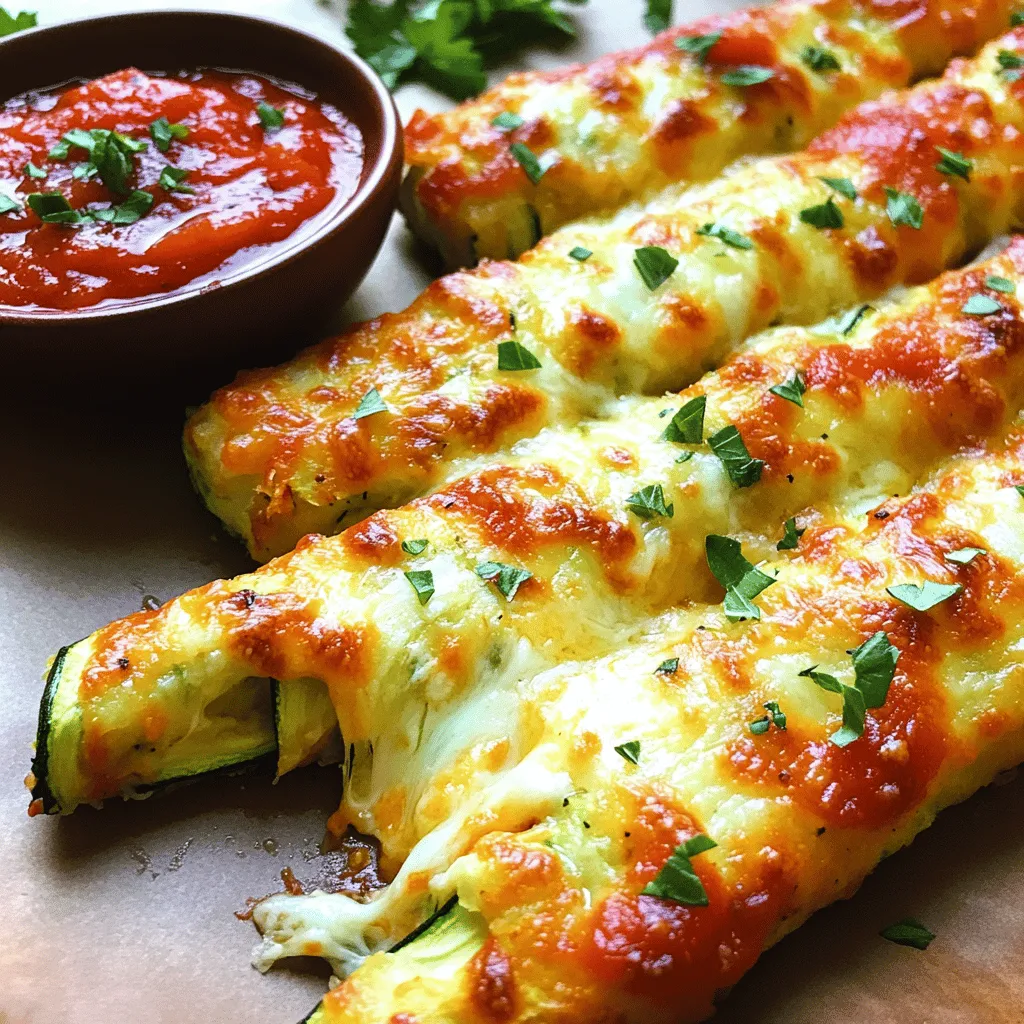
When serving your cheesy zucchini breadsticks, consider some tasty dipping sauces. Marinara sauce is classic, but you can try ranch or garlic aioli for a twist. For a nice touch, garnish your breadsticks with fresh herbs. Chopped parsley or basil looks great and adds flavor too.
Variations
Flavor Variations
You can spice up your cheesy zucchini breadsticks easily. Try adding red pepper flakes. This gives a nice kick. You can also mix in fresh herbs like basil or thyme. These herbs add a great aroma and flavor. Both options let you customize the taste.
Dietary Substitutions
If you have dietary needs, there are options for you. Use almond flour instead of regular flour for gluten-free breadsticks. This keeps the texture nice and light. For those avoiding dairy, try dairy-free cheese. It melts well and tastes great.
Additional Toppings
You can add more fun to your breadsticks with toppings. Sprinkle extra cheese before the final bake. This gives a gooey, cheesy layer on top. You can also add more vegetables. Chopped spinach or bell peppers are great choices. They boost the nutrition while adding color. Enjoy these fun variations in your cheesy zucchini breadsticks for a tasty twist!
Storage Info
Proper Storage Techniques
To keep your cheesy zucchini breadsticks fresh, store them in an airtight container. This helps lock in moisture and flavors. Make sure the container is clean and dry before adding the breadsticks. If you plan to eat them within a few days, keep them in the fridge. I find that they stay tasty for about 3 to 4 days this way.
Reheating Suggestions
When it’s time to enjoy your leftovers, you can choose between the microwave or the oven. The microwave is quick but can make the breadsticks a bit soggy. To avoid this, heat them in short bursts of 15 seconds. If you want a nice, crispy texture, the oven is best. Preheat it to 350°F (175°C) and bake for about 10 minutes. This method keeps them crunchy and warm.
Freezing Instructions
If you have extra breadsticks, freezing is a great option. To freeze them, wait until they cool down completely. Then, wrap each stick in plastic wrap or foil. Place them in a freezer-safe bag or container. They can last up to 2 months in the freezer. When you’re ready to eat them, thaw in the fridge overnight. After thawing, reheat them in the oven for the best results.
FAQs
What is the best way to cut the breadsticks?
To cut your breadsticks, a sharp knife or pizza cutter works best. Use a gentle hand to slice through the crispy edges and soft center. This will help keep the shape intact. A serrated knife can also work well for a clean cut.
Can I use frozen zucchini?
Yes, you can use frozen zucchini. Just remember to thaw it first and squeeze out the water. Fresh zucchini has a better texture and taste, but frozen works in a pinch. You may need to adjust the moisture in your mixture when using frozen zucchini.
How can I make these breadsticks ahead of time?
You can prepare the mixture and store it in the fridge for one day. This makes meal prep easy. For longer storage, bake the breadsticks, let them cool, and freeze them. Reheat in the oven for a quick snack.
What type of cheese works best?
Mozzarella is my favorite cheese for its meltiness. Parmesan adds a nice flavor too. You can swap mozzarella with cheddar or gouda for different tastes. Vegan cheese works well if you need a dairy-free option. Just choose a cheese that melts nicely.
These zucchini breadsticks are easy to make and delicious. You need simple ingredients like zucchini, cheese, and flour. Follow the steps to mix, bake, and serve these tasty treats. Remember to add your favorite dipping sauce for extra flavor. With so many variations and tips, you can customize them for any meal. Store leftovers well for a quick snack later. Enjoy your tasty, healthy breadsticks!
. To make cheesy zucchini breadsticks, start by squeezing out the excess moisture from the zucchini. This step is key. If the zucchini stays wet, it makes the breadsticks soggy. After that, ensure you mix all the ingredients evenly. This helps every bite taste the same and gets the right texture. You can easily customize the flavor of your zucchini breadsticks. Add herbs or spices that you love. For a stronger taste, use fresh garlic instead of garlic powder. This small change can make a big difference. Think about adding Italian seasoning for an extra kick. When serving your cheesy zucchini breadsticks, consider some tasty dipping sauces. Marinara sauce is classic, but you can try ranch or garlic aioli for a twist. For a nice touch, garnish your breadsticks with fresh herbs. Chopped parsley or basil looks great and adds flavor too. {{image_2}} You can spice up your cheesy zucchini breadsticks easily. Try adding red pepper flakes. This gives a nice kick. You can also mix in fresh herbs like basil or thyme. These herbs add a great aroma and flavor. Both options let you customize the taste. If you have dietary needs, there are options for you. Use almond flour instead of regular flour for gluten-free breadsticks. This keeps the texture nice and light. For those avoiding dairy, try dairy-free cheese. It melts well and tastes great. You can add more fun to your breadsticks with toppings. Sprinkle extra cheese before the final bake. This gives a gooey, cheesy layer on top. You can also add more vegetables. Chopped spinach or bell peppers are great choices. They boost the nutrition while adding color. Enjoy these fun variations in your cheesy zucchini breadsticks for a tasty twist! For the full recipe, check out the details above. To keep your cheesy zucchini breadsticks fresh, store them in an airtight container. This helps lock in moisture and flavors. Make sure the container is clean and dry before adding the breadsticks. If you plan to eat them within a few days, keep them in the fridge. I find that they stay tasty for about 3 to 4 days this way. When it's time to enjoy your leftovers, you can choose between the microwave or the oven. The microwave is quick but can make the breadsticks a bit soggy. To avoid this, heat them in short bursts of 15 seconds. If you want a nice, crispy texture, the oven is best. Preheat it to 350°F (175°C) and bake for about 10 minutes. This method keeps them crunchy and warm. If you have extra breadsticks, freezing is a great option. To freeze them, wait until they cool down completely. Then, wrap each stick in plastic wrap or foil. Place them in a freezer-safe bag or container. They can last up to 2 months in the freezer. When you're ready to eat them, thaw in the fridge overnight. After thawing, reheat them in the oven for the best results. To cut your breadsticks, a sharp knife or pizza cutter works best. Use a gentle hand to slice through the crispy edges and soft center. This will help keep the shape intact. A serrated knife can also work well for a clean cut. Yes, you can use frozen zucchini. Just remember to thaw it first and squeeze out the water. Fresh zucchini has a better texture and taste, but frozen works in a pinch. You may need to adjust the moisture in your mixture when using frozen zucchini. You can prepare the mixture and store it in the fridge for one day. This makes meal prep easy. For longer storage, bake the breadsticks, let them cool, and freeze them. Reheat in the oven for a quick snack. Mozzarella is my favorite cheese for its meltiness. Parmesan adds a nice flavor too. You can swap mozzarella with cheddar or gouda for different tastes. Vegan cheese works well if you need a dairy-free option. Just choose a cheese that melts nicely. For the full recipe, check out the Cheesy Zucchini Breadsticks. These zucchini breadsticks are easy to make and delicious. You need simple ingredients like zucchini, cheese, and flour. Follow the steps to mix, bake, and serve these tasty treats. Remember to add your favorite dipping sauce for extra flavor. With so many variations and tips, you can customize them for any meal. Store leftovers well for a quick snack later. Enjoy your tasty, healthy breadsticks!](https://pagosarecipes.com/wp-content/uploads/2025/06/a699aebb-620e-4d8a-9105-410bc3460dd0-250x250.webp)
