
One Pot Cajun Chicken Orzo Flavorful Dinner Recipe
If you’re craving a comforting, zesty meal, look no further than One Pot Cajun Chicken Orzo. This easy recipe packs

If you’re craving a comforting, zesty meal, look no further than One Pot Cajun Chicken Orzo. This easy recipe packs

When the leaves turn and the air cools, it’s time for warm drinks. My Apple Caramel Cider Punch is the
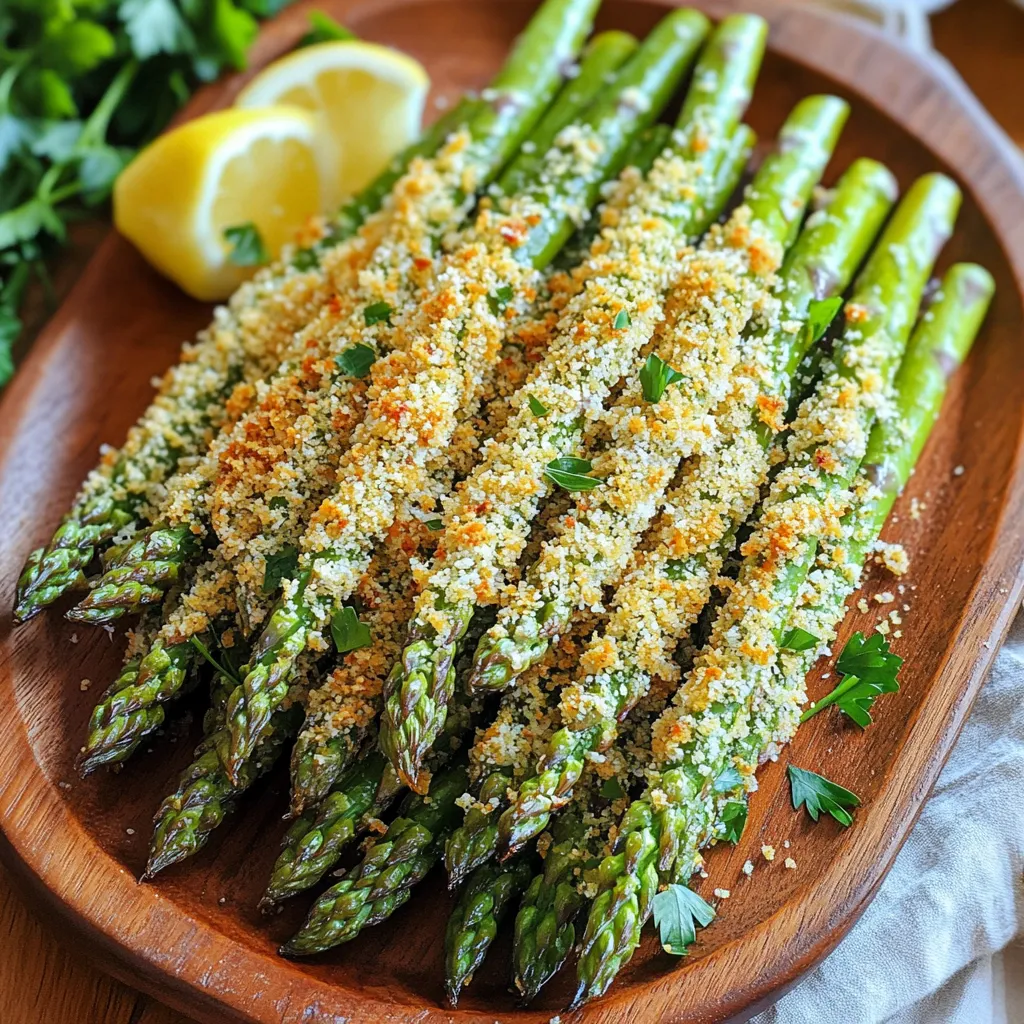
Are you ready to transform your snack game? These Air Fryer Parmesan Asparagus Fries are crunchy, cheesy, and oh-so-delicious! Perfect
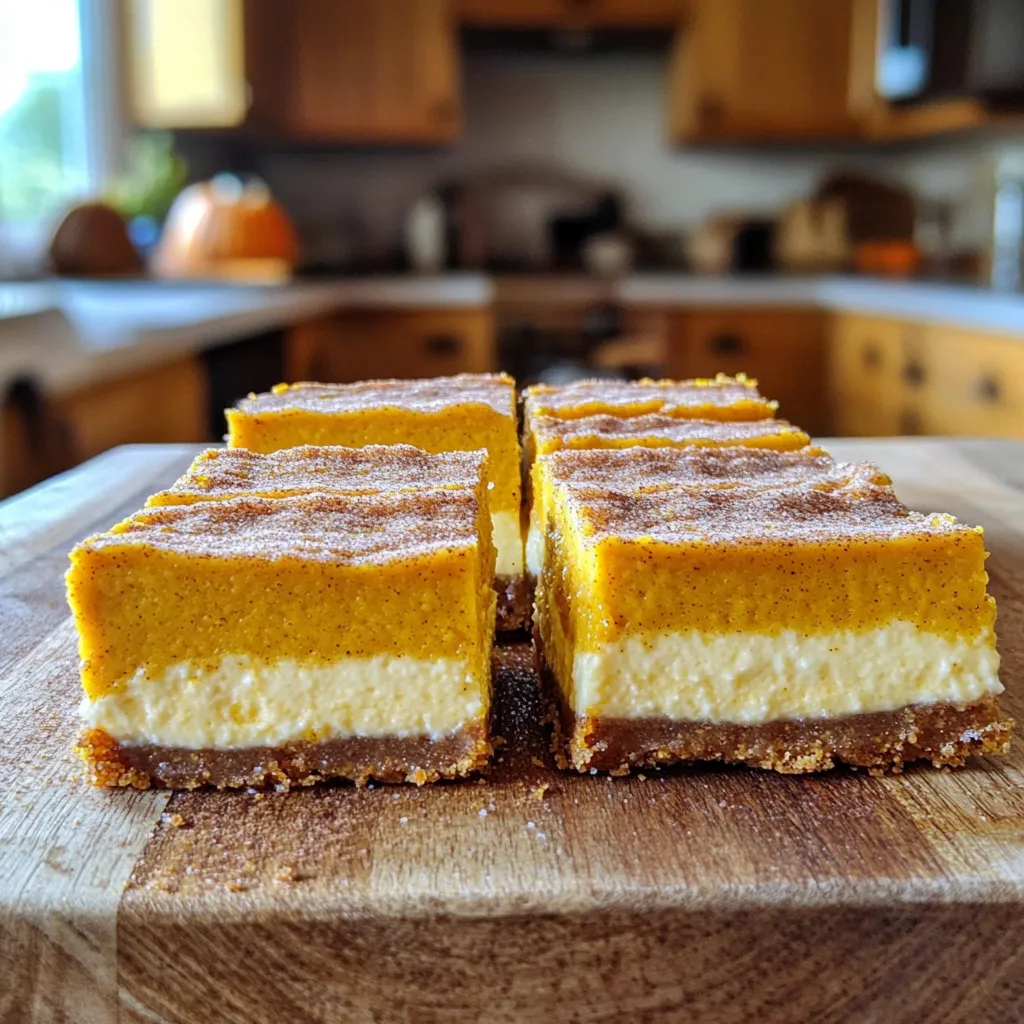
Looking for a tasty treat that captures the essence of fall? Let me introduce you to Pumpkin Churro Cheesecake Bars!
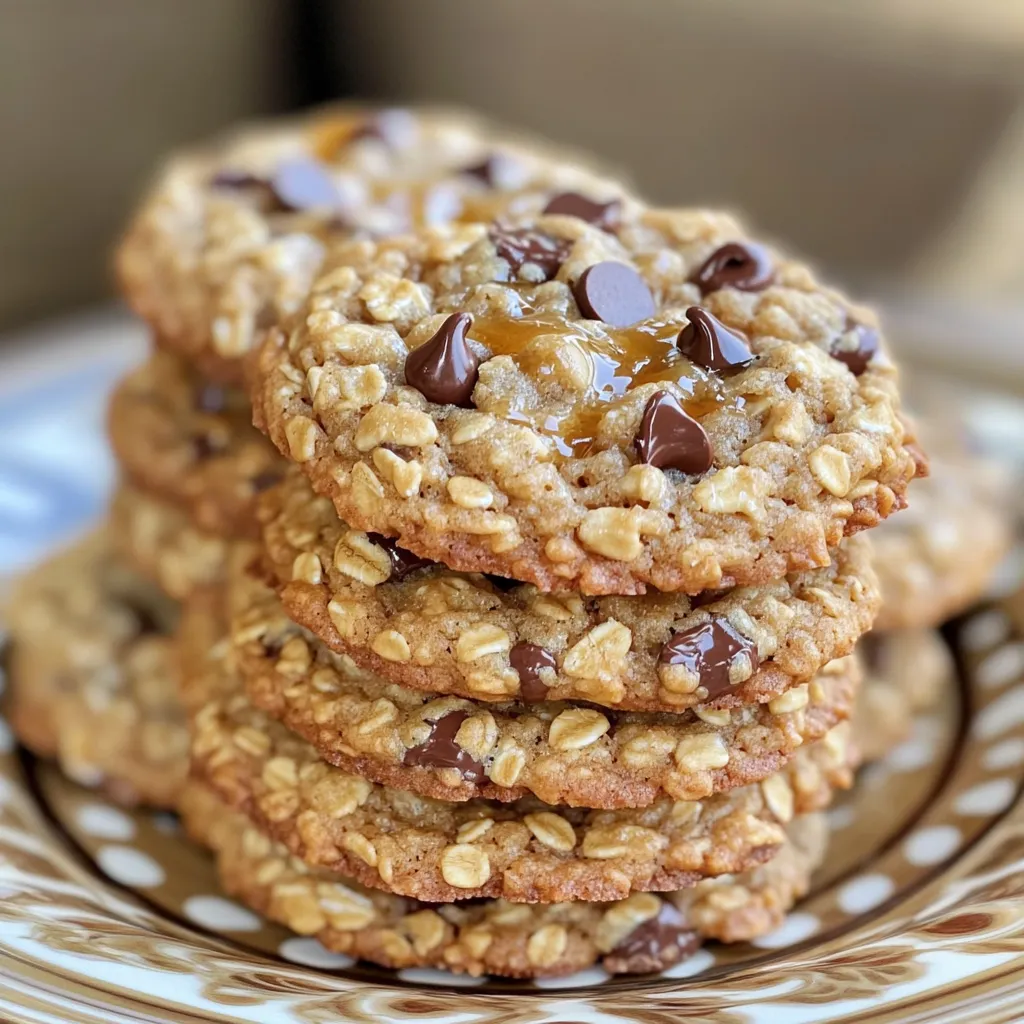
Are you ready to bake a sweet treat that combines warmth and comfort? Maple Brown Sugar Oatmeal Cookies are not
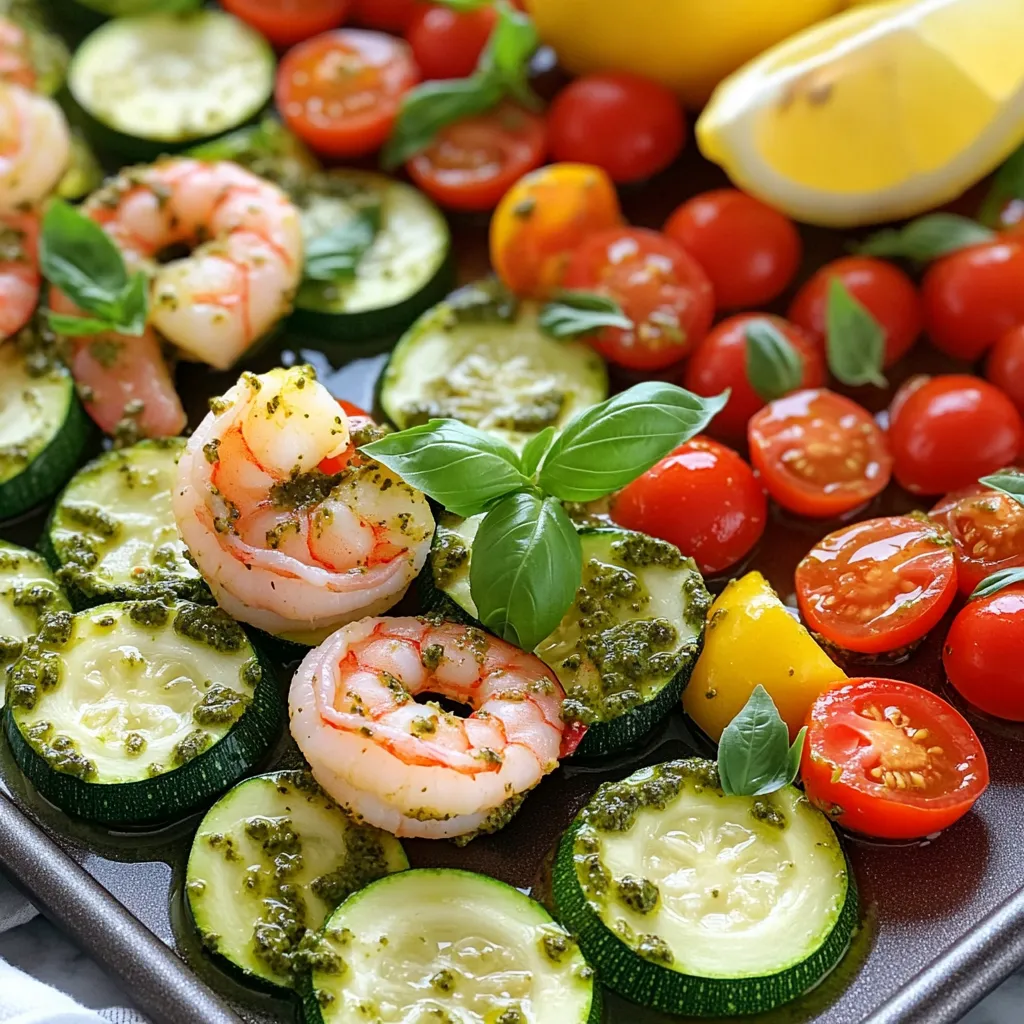
Are you looking for a fresh and easy meal? Try my Sheet Pan Pesto Shrimp & Zucchini. This dish comes

Are you ready to enjoy a tasty treat without turning on the oven? These No Bake Pumpkin Cookie Dough Bites

Warm up your dinner routine with my Slow Cooker Sausage Potato Soup! This rich and hearty recipe combines savory Italian
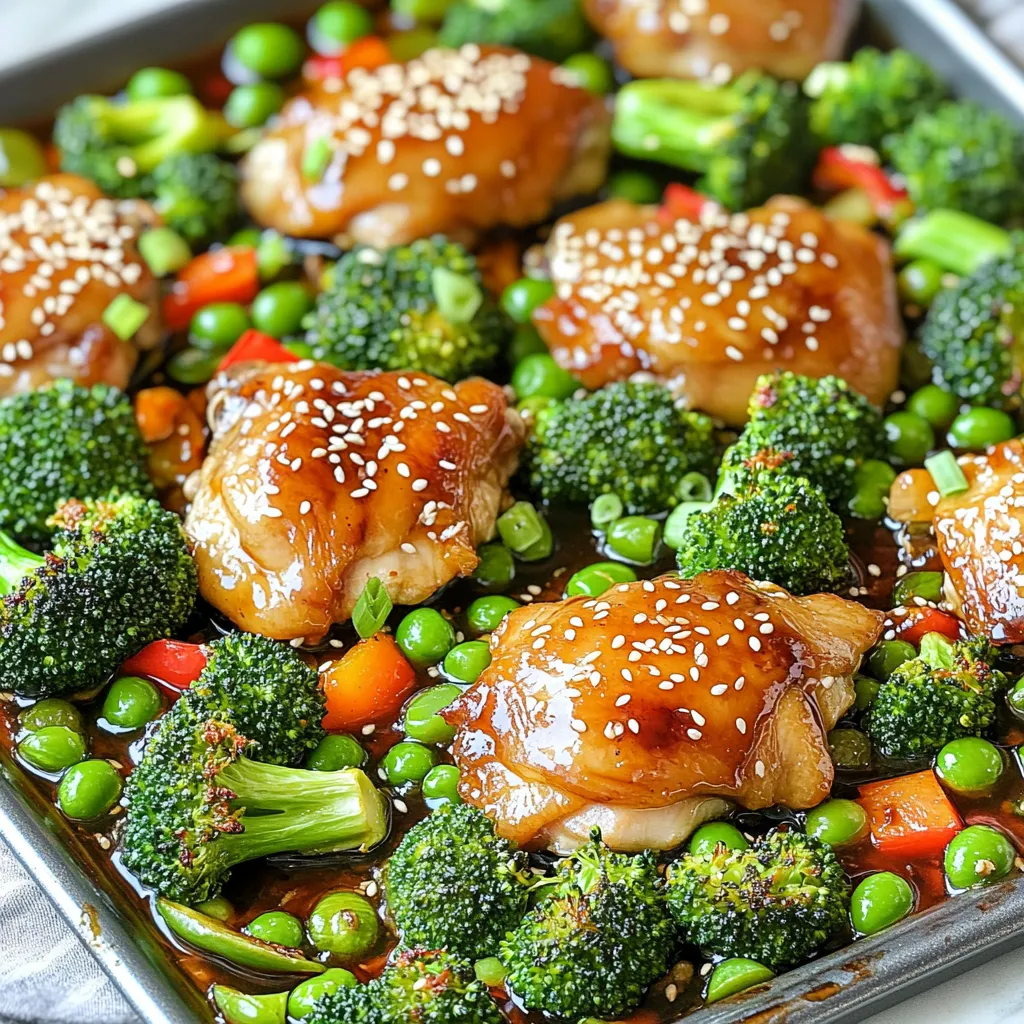
Looking for a quick and tasty dinner? This Sheet Pan Teriyaki Chicken Broccoli recipe is the perfect solution. With simple

If you’re looking for a tasty and easy dish, try Air Fryer Parmesan Salmon Bites. These bite-sized delights are full
