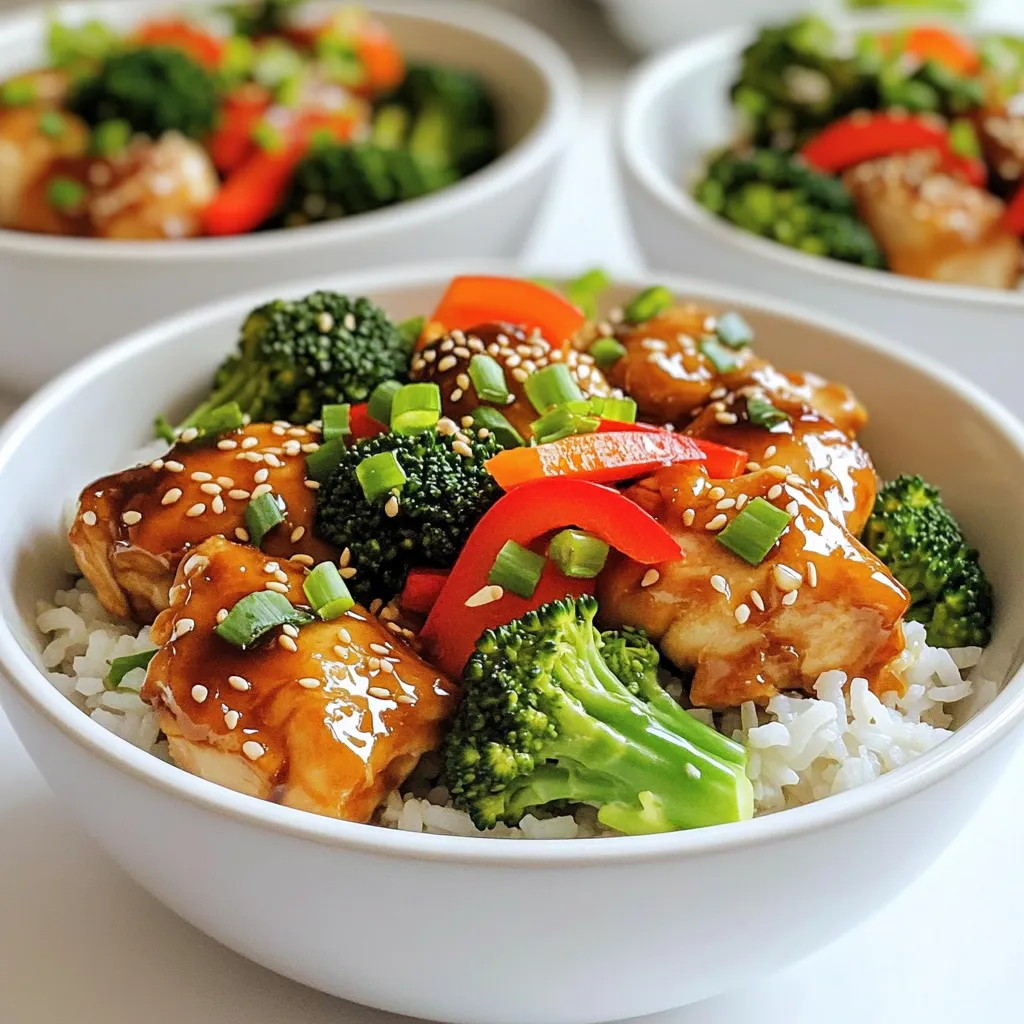
Teriyaki Chicken Bowls Delicious and Better Than Takeout
Are you tired of takeout meals that just don’t satisfy? I’ve got the perfect answer: Teriyaki Chicken Bowls that are

Are you tired of takeout meals that just don’t satisfy? I’ve got the perfect answer: Teriyaki Chicken Bowls that are
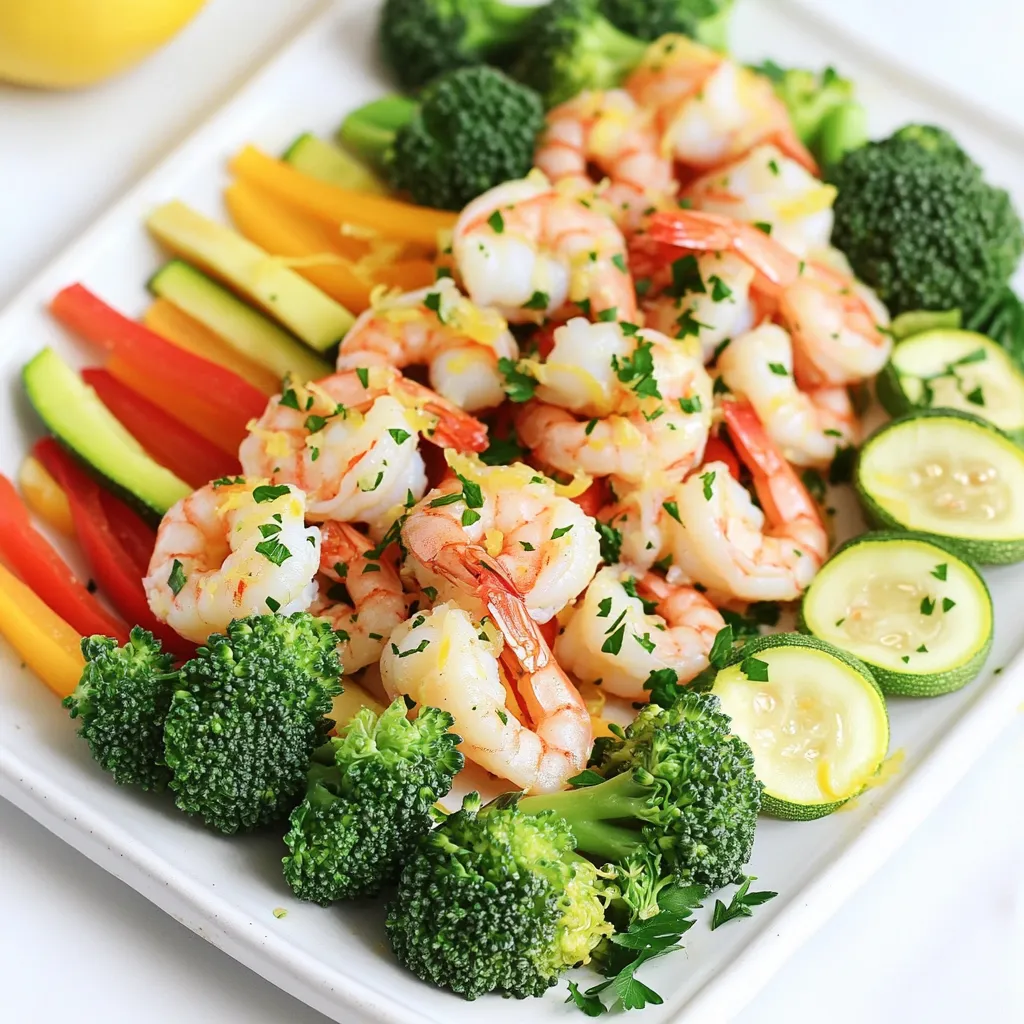
Looking to impress at dinner without the fuss? My Lemon Garlic Shrimp and Veggies Sheet Pan Delight is the answer!

Get ready to indulge! These Pumpkin Spice Latte Cheesecake Bars blend creamy cheesecake, pumpkin, and espresso flavors into a delightful
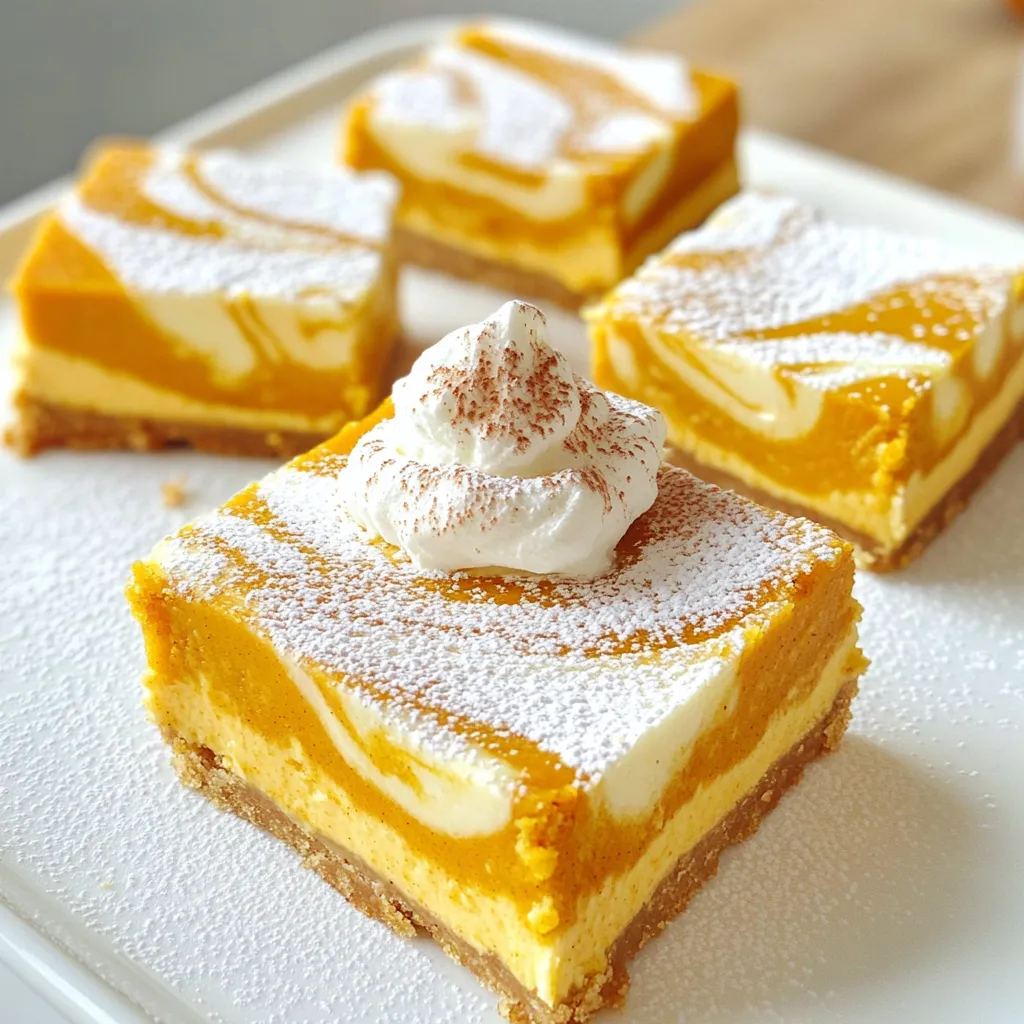
If you love fall flavors, you’ll adore my Pumpkin Cheesecake Swirl Bars! These bars combine creamy pumpkin cheesecake with a
Craving a sweet treat without turning on the oven? You’re in the right place! In just minutes, you can whip
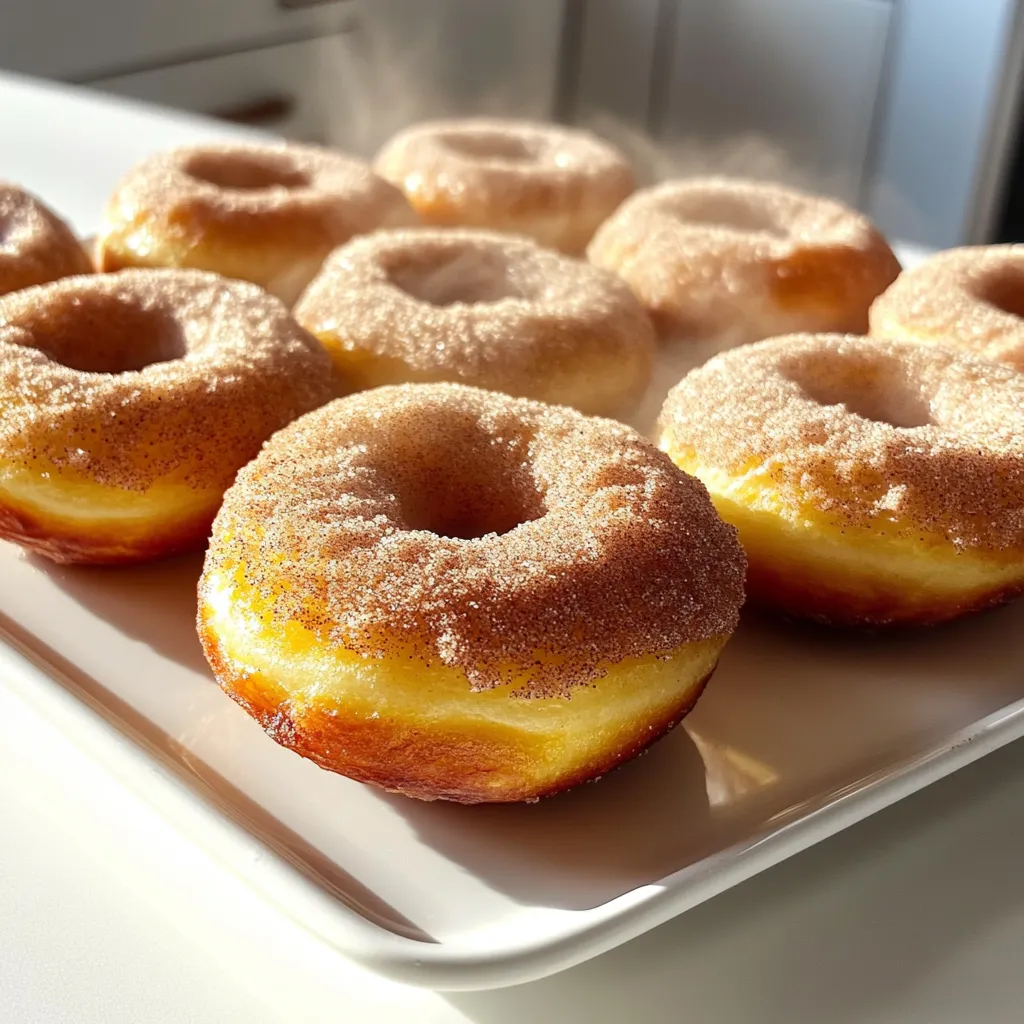
Craving a cozy treat that screams fall? Look no further! My easy Apple Cider Donuts Bakery Style recipe makes luscious,
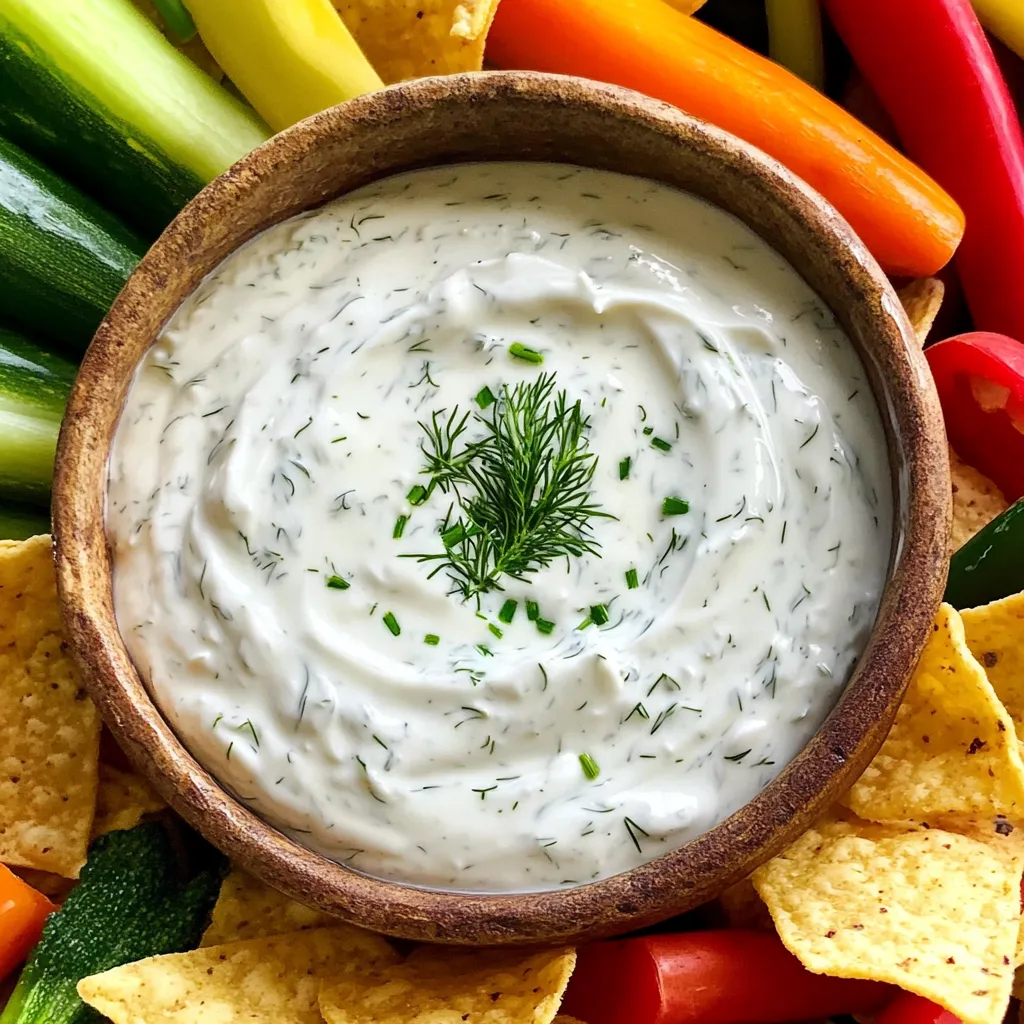
Looking for a fresh twist on your favorite dip? Greek Yogurt Ranch Dip is here to brighten your snacking! Packed
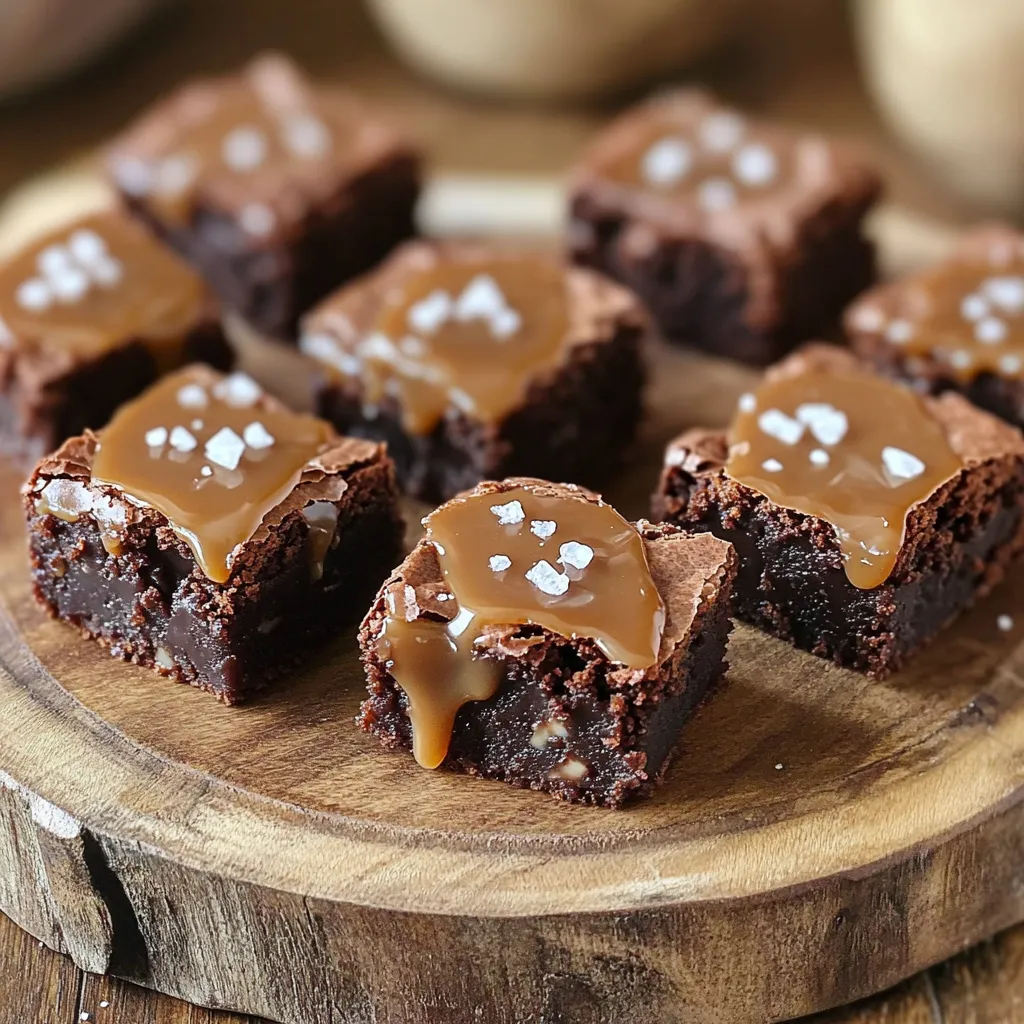
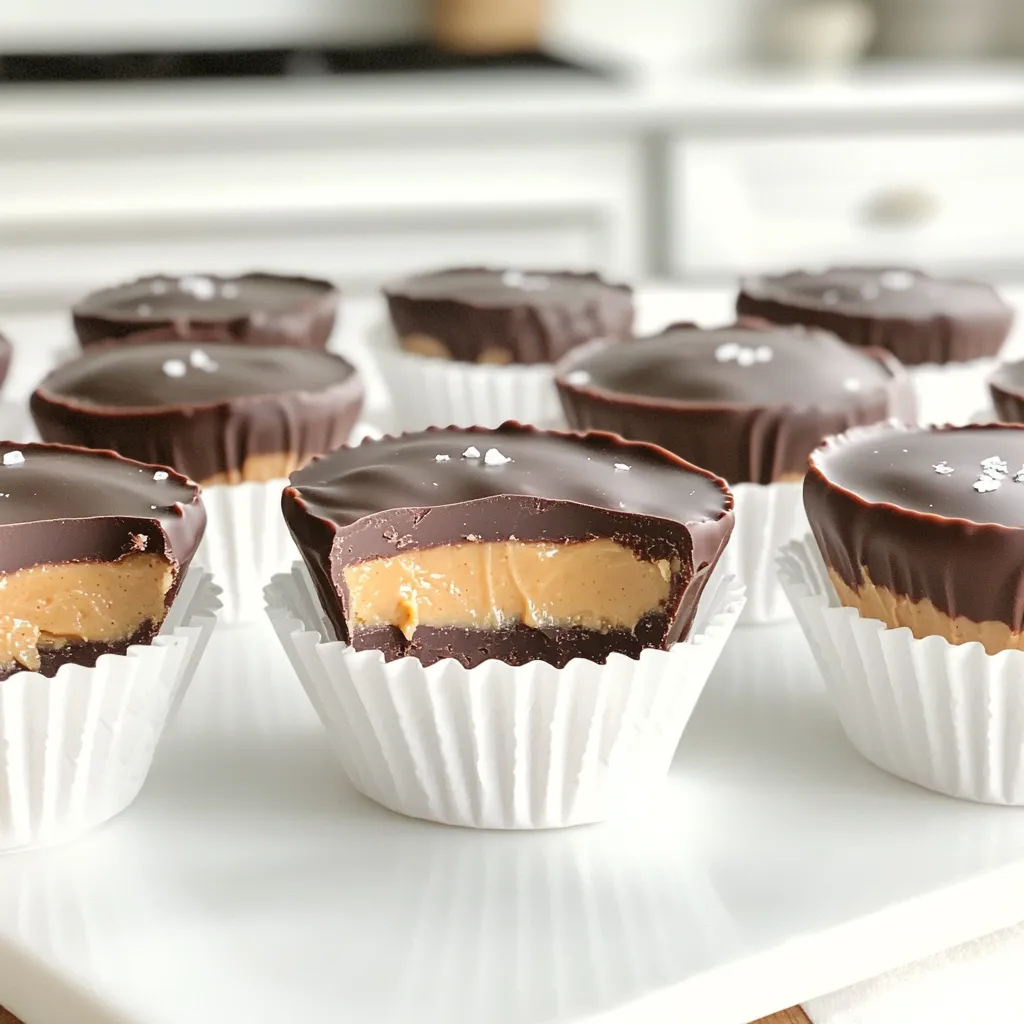
If you love the rich flavors of chocolate and the sweet touch of caramel, then you’re in for a treat!
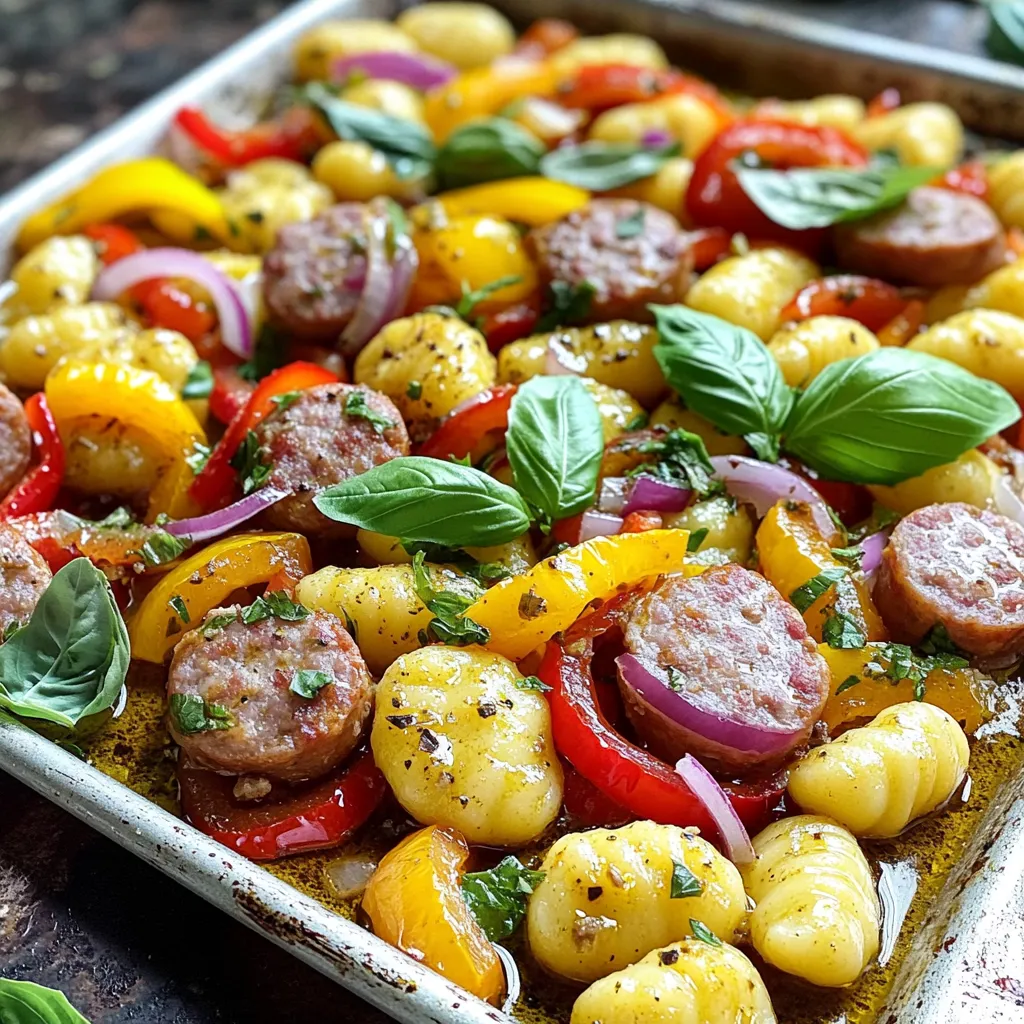
Welcome to your new favorite weeknight dish: Sheet Pan Sausage Pepper Gnocchi! This simple recipe combines savory sausage, colorful peppers,
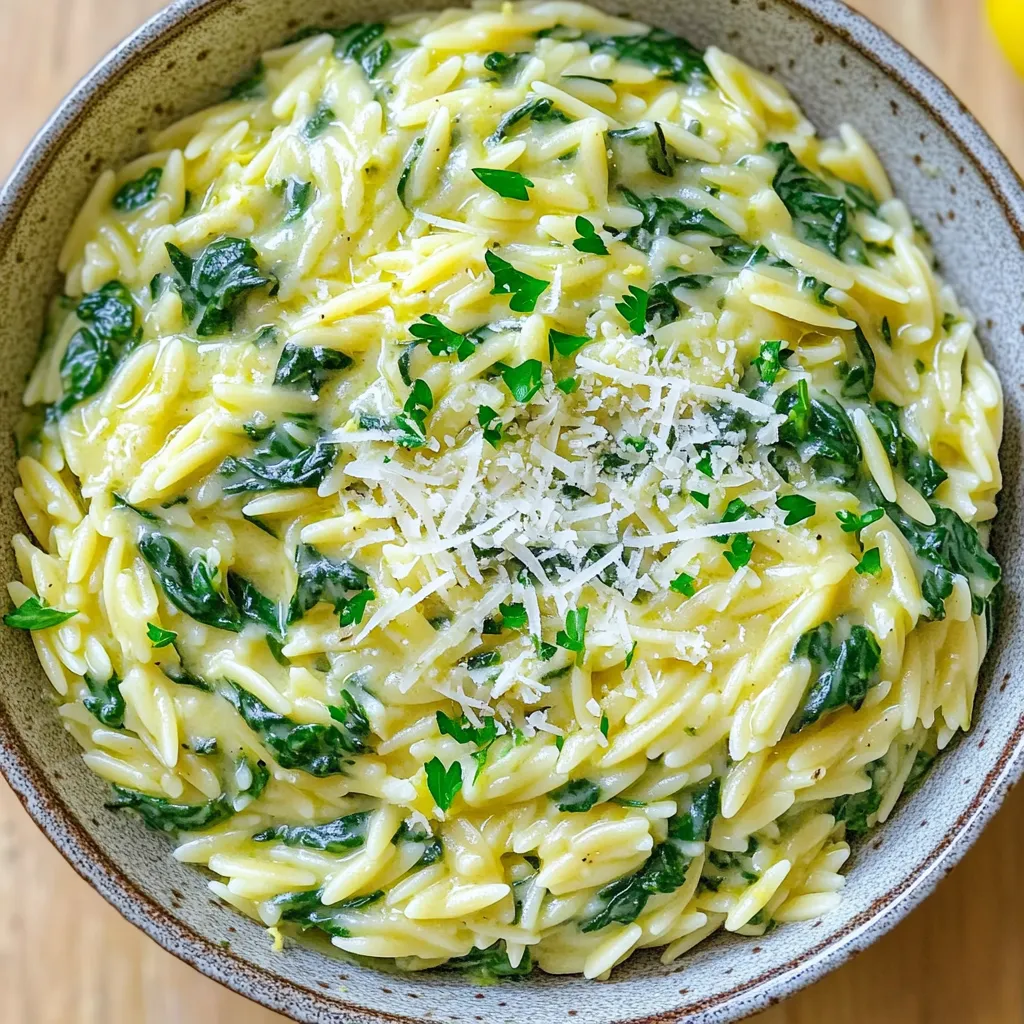
If you want a rich and creamy dish that packs a flavor punch, look no further! My creamy garlic spinach
