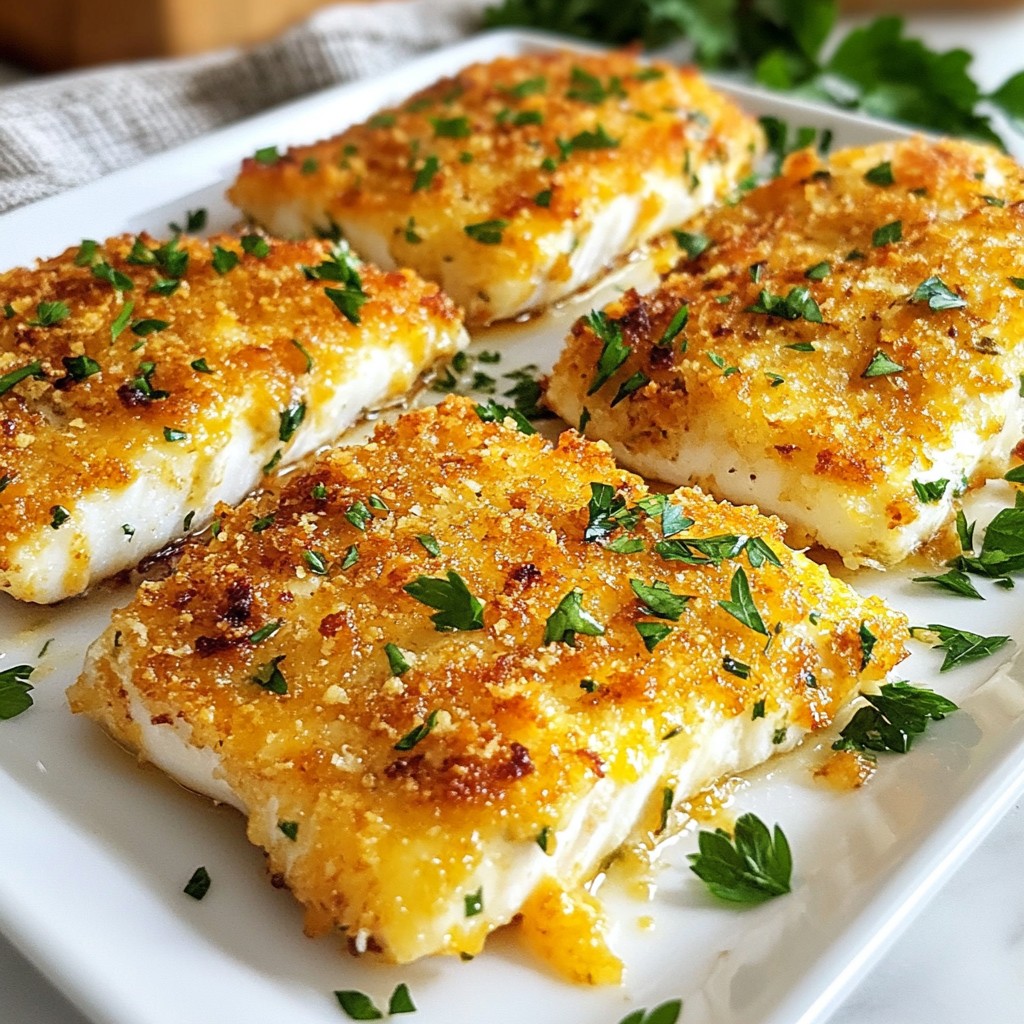
Are you ready to impress your family with a dish that's both tasty and easy? Baked Parmesan Crusted Tilapia is your new go-to recipe! This simple meal features tender fish covered in a crispy, cheesy coating that will have everyone asking for seconds. In this blog, I’ll guide you step by step through making this delicious dinner. Let’s dive into the world of flavors and make a meal that’s sure to satisfy!
Why I Love This Recipe
- Quick and Easy: This recipe comes together in just 25 minutes, making it perfect for busy weeknights.
- Flavorful Crust: The combination of Parmesan and breadcrumbs creates a deliciously crispy and cheesy topping.
- Healthy Option: Tilapia is a lean fish that’s rich in protein and low in calories, making it a healthy dinner choice.
- Customizable: You can easily adjust the seasonings or add your favorite herbs to suit your taste preferences.
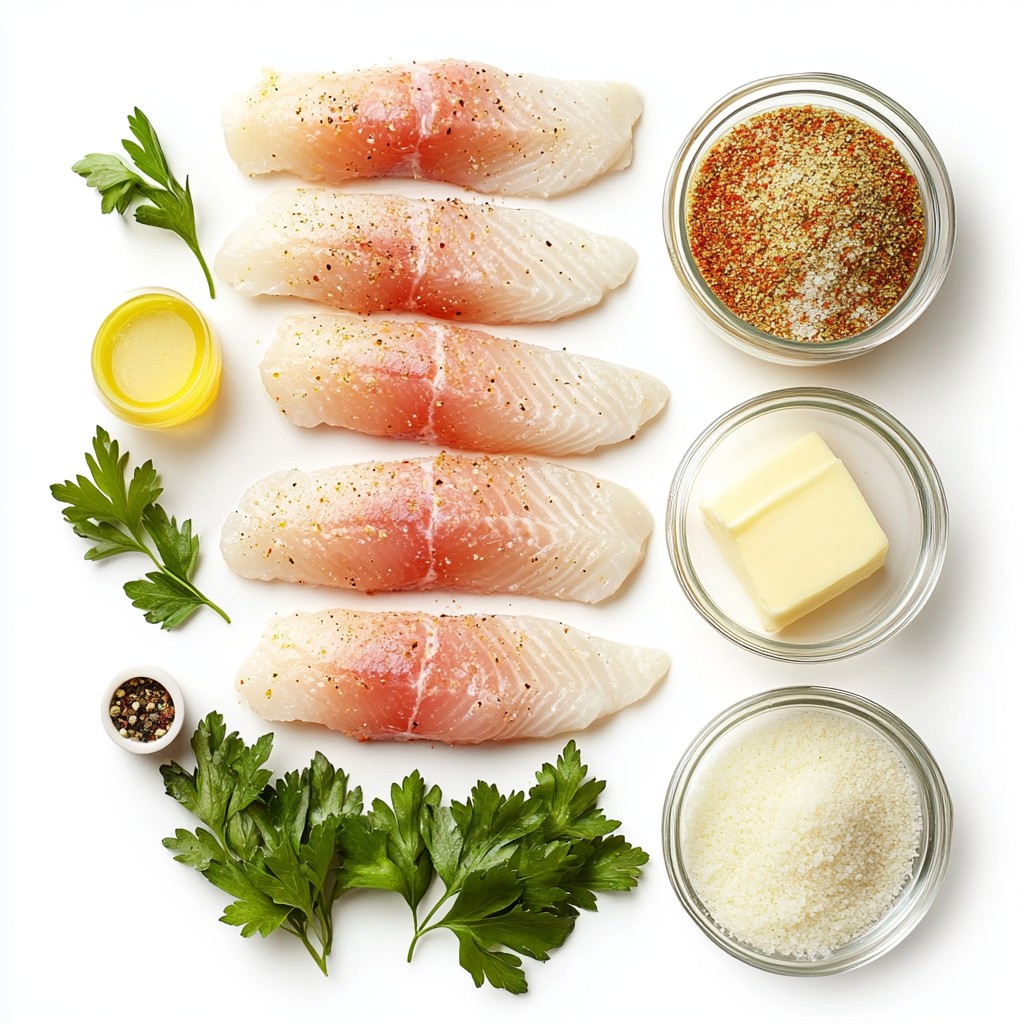
Ingredients
List of Ingredients
- 4 tilapia fillets
- 1/2 cup grated Parmesan cheese
- 1/2 cup breadcrumbs (preferably Panko)
- 1 teaspoon garlic powder
- 1 teaspoon onion powder
- 1 teaspoon dried Italian herbs (oregano, basil, thyme)
- 1/2 teaspoon paprika
- 1/4 teaspoon salt
- 1/4 teaspoon black pepper
- 2 tablespoons melted butter
- 1 tablespoon lemon juice
- Fresh parsley for garnish
When making Baked Parmesan Crusted Tilapia, you need simple yet tasty ingredients. The key is fresh tilapia fillets. They are mild and flaky, perfect for this dish.
Next, grated Parmesan cheese adds a rich flavor. It pairs well with the crunchy breadcrumbs, which I recommend being Panko. Panko breadcrumbs give a light and crispy texture.
For flavor, mix in garlic powder and onion powder. These spices enhance the dish without overpowering the fish. Dried Italian herbs bring a touch of Mediterranean flair. A pinch of paprika adds color and warmth.
Salt and black pepper are essential to boost all the flavors. Melted butter adds richness, while lemon juice gives a bright finish. Finally, fresh parsley makes a lovely garnish. It adds color and a fresh taste.
Each ingredient plays a role in making this dish delightful. It’s simple to gather them, making this recipe easy and fun to prepare!
Step-by-Step Instructions
Prepping the Oven and Baking Sheet
First, set your oven to 400°F (200°C). This temperature is perfect for baking the tilapia. While the oven heats, take a baking sheet and lightly grease it with non-stick spray. This step helps the fish not stick and keeps your cleanup easy.
Mixing the Coating
In a medium bowl, combine the grated Parmesan cheese, breadcrumbs, garlic powder, onion powder, dried Italian herbs, paprika, salt, and black pepper. Stir these dry ingredients well until they mix together. This coating will give the fish a tasty crust.
Coating the Tilapia Fillets
In a separate small bowl, mix the melted butter and lemon juice. Dip each tilapia fillet into the butter mixture. Make sure to coat both sides well. Next, dredge the fillet into the Parmesan breadcrumb mix. Press down gently to help the crumbs stick. Place the coated fillets on the greased baking sheet. Drizzle any leftover butter mixture over the top of the fillets for extra flavor.
Baking the Tilapia
Now, it’s time to bake. Place the baking sheet in the oven and let the tilapia cook for 12 to 15 minutes. The fish is done when it flakes easily with a fork and the crust turns a lovely golden brown. Keep an eye on it to avoid overcooking.
Final Touches Before Serving
Once done, take the baking sheet out of the oven. Allow the tilapia to cool for a few minutes. This cooling helps the fish set. Before serving, sprinkle some freshly chopped parsley on top for a pop of color and fresh flavor. Enjoy your meal!
Tips & Tricks
Selecting the Best Tilapia
When choosing tilapia, look for fresh fillets. Fresh fish has a clean smell and firm texture. If you can, buy wild-caught tilapia over farmed. It often tastes better and is healthier.
Achieving a Perfect Crust
To get a golden crust, use Panko breadcrumbs. They are lighter and crispier than regular breadcrumbs. Make sure to coat each fillet well. Press the mixture onto the fish for good sticking. Drizzling butter on top adds extra flavor and helps it crisp up.
Pairing Suggestions for Sides and Drinks
Baked Parmesan crusted tilapia pairs well with many sides. Try serving it with steamed vegetables or a fresh salad. A side of rice or quinoa works nicely too. For drinks, a light white wine or sparkling water with lemon is perfect. These options enhance the meal's flavors without overpowering them.
Pro Tips
- Choose Fresh Fish: Always opt for fresh tilapia fillets for the best flavor and texture. Look for fillets that are firm and have a mild scent.
- Use Panko Breadcrumbs: Panko breadcrumbs will give your crust a lighter, crispier texture compared to regular breadcrumbs.
- Don't Overcook: Keep an eye on the fish while baking. It should be flaky but not dry; aim for an internal temperature of 145°F (63°C).
- Experiment with Toppings: Feel free to add different herbs or spices to the breadcrumb mix for a unique flavor profile every time you make it.
Variations
Spicy Baked Parmesan Crusted Tilapia
To make your tilapia spicy, add some heat. Mix in cayenne pepper or red pepper flakes. Start with 1/2 teaspoon. Taste, then adjust to your liking. This adds a nice kick to the fish. The spicy crust pairs well with the creamy cheese.
Herb-Infused Homemade Breading
You can make your breading special by adding fresh herbs. Try using parsley, dill, or cilantro. Chop them finely and mix into the breading. Use about 1/4 cup of herbs. This adds freshness and flavor to each bite. You may also swap dried herbs for fresh ones. Just double the amount of fresh herbs you use.
Adding Citrus and Other Flavors
For a zesty twist, add citrus zest to the breading. Lemon or lime zest works great. Use about 1 teaspoon of zest. This brightens up the dish, making it more vibrant. You can also add a splash of orange juice to the butter mixture. This adds a sweet note. Feel free to mix in garlic or onion for extra depth.
Storage Info
How to Store Leftovers
To keep your Baked Parmesan Crusted Tilapia fresh, store it in an airtight container. Make sure it cools down first. Place the fillets in the fridge. They will stay good for up to three days. For best results, try to eat them within two days for freshness.
Reheating Tips for Optimal Taste
When you want to enjoy your leftovers, reheating is key. Preheat your oven to 350°F (175°C). Place the tilapia on a baking sheet. Cover it with foil to keep moisture in. Heat for about 10-15 minutes. This method helps keep the fish flaky and the crust crispy.
Freezing for Long-Term Storage
You can freeze Baked Parmesan Crusted Tilapia for later meals. Wrap each fillet tightly in plastic wrap. Then, place them in a freezer-safe bag. They will last up to three months. When you’re ready to eat, thaw in the fridge overnight. Reheat as mentioned above for the best taste.
FAQs
Can I use a different type of fish?
Yes, you can use other fish like cod or haddock. Both have a mild taste and firm texture. Just adjust the cooking time based on thickness. The coating works well on many fish.
What is the best way to tell when tilapia is done?
Check the fish for flakiness. Use a fork to gently pull apart the flesh. If it separates easily, it’s ready. The color should change from translucent to opaque.
Can I make this recipe gluten-free?
Absolutely! Use gluten-free breadcrumbs instead of regular ones. This switch keeps the dish tasty while making it safe for gluten-free diets. Just check the label to ensure they are truly gluten-free.
How do I make the coating extra crispy?
To get a crispier coating, use Panko breadcrumbs instead of regular ones. You can also spray the top with a bit of oil before baking. This adds crunch and a nice golden color.
This blog covered a simple and tasty recipe for baked Parmesan crusted tilapia. You learned the main ingredients, step-by-step instructions, and tips for the best results. We shared variations and storage tips, too.
I hope you feel ready to enjoy this dish at home. Cooking can be fun, and this recipe is a great start. Remember, with a few tweaks, you can make it your own! Happy cooking!