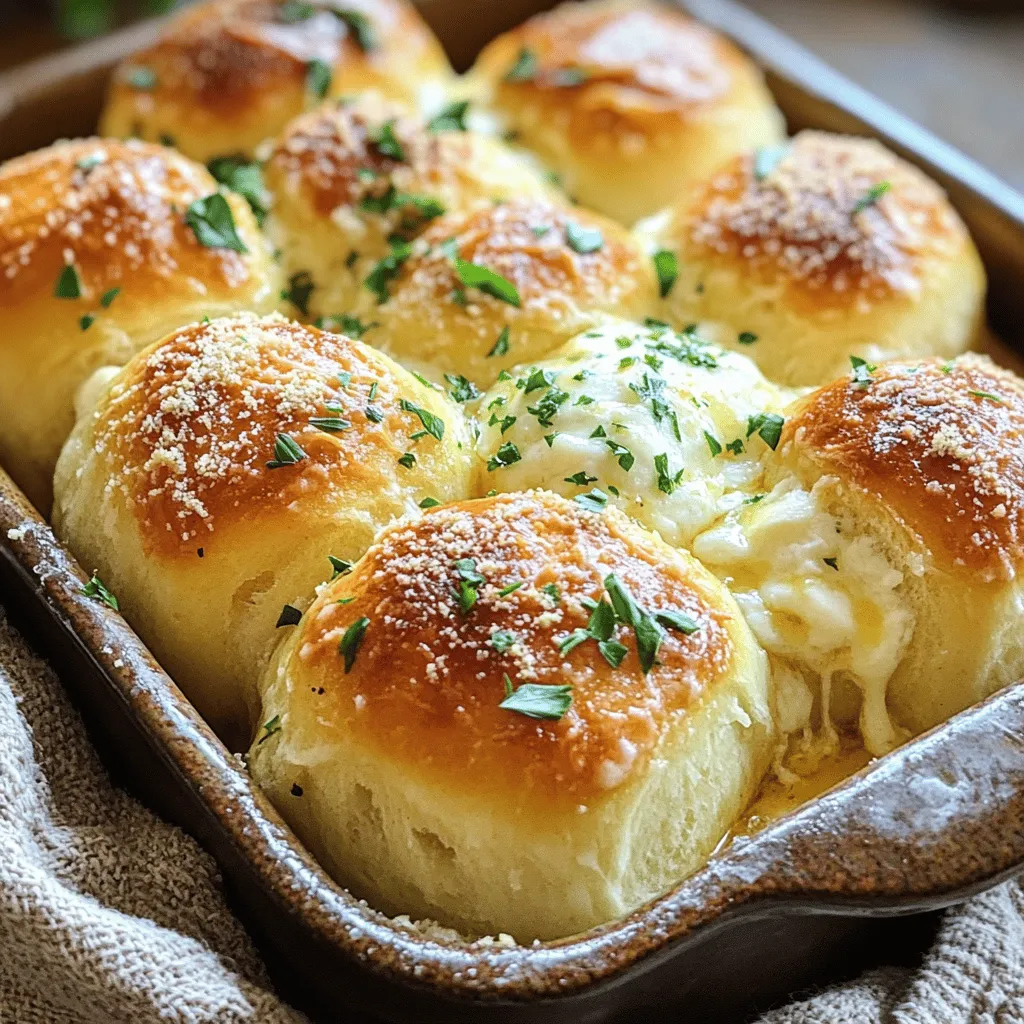
Cheesy Garlic Dinner Rolls Recipe

WANT TO SAVE THIS RECIPE?

Introduction

There’s something truly special about the aroma of freshly baked bread wafting through your kitchen, especially when it involves Cheesy Garlic Dinner Rolls. This delightful recipe combines the irresistible flavors of gooey cheese, fragrant garlic, and the soft, buttery texture of freshly baked rolls. Whether it’s a family dinner, a festive gathering, or a cozy holiday feast, these rolls serve as the perfect side dish that complements almost any meal.

Imagine pulling a tray of golden-brown rolls from the oven, their cheesy centers bubbling and begging to be torn apart. The warm scent of garlic and herbs fills the air, enticing everyone to the dinner table. Not only do these rolls elevate the dining experience, but they also bring a sense of home and comfort, making them a true crowd-pleaser.

What makes this recipe even more appealing is its simplicity. With just a few basic ingredients, you can create a batch of Cheesy Garlic Dinner Rolls that rivals those from your favorite bakery. Baking at home is not just about the final product; it’s about the joy of creating something delicious from scratch. Let’s dive into the recipe, where we’ll explore the essential ingredients and walk through the steps to achieve these mouthwatering rolls.

Understanding the Ingredients

To master the art of making Cheesy Garlic Dinner Rolls, it’s important to understand the role each ingredient plays in contributing to their flavor and texture. Here’s a closer look at the key components:

All-Purpose Flour

All-purpose flour serves as the foundation for the dough, providing structure and stability. It’s versatile enough to yield a soft, airy roll while also allowing for the necessary gluten development. The amount of flour used can vary slightly depending on humidity and other factors, so it’s important to measure accurately for the best results.

Shredded Mozzarella Cheese

The star ingredient in our rolls, shredded mozzarella cheese, infuses them with a delightful cheesy goodness. Its melting properties ensure that each roll has that gooey, stretchy consistency that makes them so irresistible. Opt for low-moisture mozzarella to achieve the best results.

Warm Milk

Warm milk is crucial for activating the yeast, giving the dough a tender texture. It enriches the dough, adding moisture and flavor. Make sure the milk is warm but not hot, as excessive heat can kill the yeast, preventing the dough from rising properly.

Unsalted Butter

Unsalted butter provides richness and contributes to the roll’s soft texture. Using unsalted butter allows you to control the saltiness of the dough better. Melted butter will also be used to brush the rolls before baking, giving them a beautiful golden finish and enhancing their flavor.

Sugar

Sugar plays a dual role in this recipe. Firstly, it aids in the activation of the yeast, helping the dough to rise. Secondly, it adds a subtle hint of sweetness that balances the savory flavors of the garlic and cheese.

Salt

Salt is essential for enhancing flavor and strengthening the dough structure. It helps control yeast activity and ensures a well-balanced taste in the finished rolls. Be sure to use the right amount, as too much salt can inhibit the yeast’s ability to work.

Instant Yeast

Instant yeast acts as the leavening agent, making our rolls rise and become fluffy. It is convenient because it does not require proofing in warm water like active dry yeast, allowing for a quicker and more straightforward baking process.

Garlic

Fresh garlic infuses the rolls with a robust and aromatic flavor. You can adjust the amount according to your preference, but a generous amount will ensure that each bite is packed with garlic goodness. For those who enjoy a milder taste, roasting the garlic first can provide a softer flavor profile.

Fresh Parsley

Fresh parsley adds a touch of color and a hint of freshness to the rolls. It complements the garlic and cheese beautifully, making the flavors pop. You can also experiment with other herbs, such as basil or oregano, for a different twist.

Parmesan Cheese

While optional, a sprinkle of Parmesan cheese on top of the rolls before baking adds an extra layer of flavor and a delightful crust. It enhances the savory profile and gives the rolls a gourmet touch.

Additional Melted Butter

Finally, brushing the rolls with melted butter before baking not only enhances richness but also promotes a beautiful golden color and shiny finish. This step is crucial for achieving that perfect bakery-style appearance.

Step-by-Step Instructions

Now that we have a clear understanding of the ingredients, let’s walk through the step-by-step process to create these delectable Cheesy Garlic Dinner Rolls. This detailed guide will ensure that even novice bakers can follow along with confidence and achieve fantastic results.

Preparing the Yeast Mixture

The first step in making our Cheesy Garlic Dinner Rolls is preparing the yeast mixture. This crucial step ensures that the yeast is activated properly, which is essential for the dough to rise.

1. Warm the Milk: Begin by gently warming your milk in a small saucepan or microwave until it reaches about 110°F (43°C). This temperature is warm enough to activate the yeast without killing it. If you don’t have a thermometer, you can test it with your finger; it should feel warm but not hot.

2. Add Sugar and Yeast: In a large mixing bowl, combine the warm milk and sugar. Stir until the sugar is dissolved, then sprinkle the instant yeast over the mixture. Allow it to sit for about 5-10 minutes. You should see bubbles forming on the surface, indicating that the yeast is activated and ready to work its magic.

Mixing the Dough

With the yeast mixture prepared, it’s time to combine the ingredients and create a smooth dough.

1. Incorporate Wet Ingredients: Add the melted unsalted butter and salt to the yeast mixture. Stir to combine.

2. Add Flour Gradually: Begin adding the all-purpose flour, one cup at a time, mixing with a wooden spoon or spatula until a shaggy dough forms. This gradual addition helps ensure that the flour is evenly incorporated.

3. Add Cheese, Garlic, and Parsley: Once the dough starts to come together, fold in the shredded mozzarella cheese, minced garlic, and chopped fresh parsley. This step is essential as it evenly distributes the flavorful ingredients throughout the dough.

4. Knead the Dough: Transfer the dough onto a lightly floured surface. Knead the dough for about 8-10 minutes until it becomes smooth and elastic. If the dough is sticky, sprinkle a little more flour as needed, but be cautious not to add too much, as this can make the rolls dense.

5. Let It Rise: Form the kneaded dough into a ball and place it in a lightly greased bowl. Cover the bowl with a clean kitchen towel or plastic wrap, and let it rise in a warm, draft-free area for about 1 to 1.5 hours, or until it has doubled in size. This rising period is crucial for developing the rolls’ fluffy texture.

By following these initial steps, you’re well on your way to creating delicious Cheesy Garlic Dinner Rolls that will impress your family and friends. The aroma of the dough rising and the anticipation of the final product will fill your kitchen with warmth and excitement, making the baking experience truly enjoyable. Stay tuned for the next part of the recipe, where we’ll guide you through the shaping, baking, and finishing touches of these irresistible rolls.

There's something truly special about the aroma of freshly baked bread wafting through your kitchen, especially when it involves Cheesy Garlic Dinner Rolls. This delightful recipe combines the irresistible flavors of gooey cheese, fragrant garlic, and the soft, buttery texture of freshly baked rolls. Whether it’s a family dinner, a festive gathering, or a cozy holiday feast, these rolls serve as the perfect side dish that complements almost any meal.

Kneading the Dough

Kneading is a crucial step in making Cheesy Garlic Dinner Rolls, as it develops the gluten structure necessary for achieving a light and airy texture. To knead the dough effectively, start by placing it on a lightly floured surface. Use the heel of your hands to push the dough away from you, then fold it back over itself. Rotate the dough a quarter turn, and repeat the process for about 8-10 minutes. You will know the dough is ready when it becomes smooth and elastic, springing back when poked. This elasticity is what gives the rolls their delightful chewiness and airy quality.

If the dough feels too sticky, lightly dust it with flour, but be cautious not to add too much, as it can lead to dense rolls. The ideal dough consistency should be slightly tacky but not overly sticky, allowing you to handle it easily without it clinging to your fingers.

First Rise

Once kneaded, it’s time for the first rise, also known as fermentation. This step is vital for flavor development and ensuring the rolls have a light texture. Place the kneaded dough in a greased bowl and cover it with a clean kitchen towel or plastic wrap. The dough needs a warm environment to rise effectively—ideal temperatures are between 75°F and 85°F.

If your kitchen is cool, you can create a warm spot by turning on the oven for just a couple of minutes, then turning it off and placing the dough inside. Allow the dough to rise until it has doubled in size, which typically takes about 1-1.5 hours. You can check for readiness by gently pressing your finger into the dough; if the indentation remains, the dough is ready for the next step.

Shaping the Rolls

Once the dough has risen, it’s time to shape the rolls. Start by gently punching down the dough to release excess gas. On a lightly floured surface, turn out the dough and divide it into equal portions. For dinner rolls, aim for about 12-16 pieces, depending on your desired size.

To shape each piece, flatten it slightly, add a generous spoonful of the cheesy garlic filling, then fold the edges over to enclose the filling. Roll the dough into a ball by cupping your hand around it and moving it in a circular motion against the surface. Ensure the seams are on the bottom to create a smooth top. Place the shaped rolls in a greased baking dish, ensuring they are spaced closely together for soft, pull-apart rolls.

Second Rise

The second rise is essential for achieving that fluffy texture. After shaping, cover the rolls again with a kitchen towel and let them rise for another 30-45 minutes in a warm environment. During this time, the rolls will puff up significantly. You can use the same method as before to create a warm environment if needed.

Patience is key here; the rolls should double in size again. This final rise allows the yeast to create air pockets, which will expand during baking, resulting in soft, airy rolls.

Baking the Rolls

Baking the rolls is where the magic happens. Preheat your oven to 375°F (190°C) and bake the rolls for 20-25 minutes. You’ll know they’re done when they are golden brown on top and sound hollow when tapped on the bottom. Additionally, the aroma of garlic and cheese will fill your kitchen, a sure sign that something delicious is happening.

If you prefer a richly golden finish, you can rotate the pan halfway through baking to ensure even color. Keep an eye on the rolls during the last few minutes of baking to prevent over-browning.

Finishing Touches

Once out of the oven, brush the warm rolls with melted butter for that irresistible glossy finish. This step not only adds flavor but also helps to keep the crust soft. If you want an extra kick of flavor, consider mixing minced garlic or herbs into the butter before brushing it onto the rolls.

Baking Tips for Perfect Rolls

Here are some essential tips to ensure your Cheesy Garlic Dinner Rolls turn out perfectly:

  • Achieving the Right Dough Consistency: As mentioned earlier, the dough should be slightly tacky but not overly sticky. It should feel smooth and elastic after kneading, allowing it to hold its shape without falling apart.
  • Optimal Rising Conditions: Finding a warm spot in your kitchen is crucial. Areas near a warm appliance or a sunny windowsill work well. If you live in a particularly cool climate, using the oven method described earlier can help create the perfect rising environment.
  • Monitoring Baking Time: Keep an eye on the color and texture of the rolls as they bake. They should be golden brown and sound hollow when tapped on the bottom. If you notice they are browning too quickly, you can cover them loosely with aluminum foil to prevent burning while allowing them to continue baking.

Serving Suggestions

Cheesy Garlic Dinner Rolls are incredibly versatile and can elevate any meal. Here are some creative ways to present and serve these delectable rolls:

  • Serving Warm: The best way to enjoy these rolls is straight from the oven while they are still warm and buttery. Serve them on a decorative platter or in a warm bread basket.
  • Pairing Ideas: These rolls pair beautifully with a variety of dishes. Consider serving them alongside creamy soups, such as tomato basil or potato leek, for a comforting combination. They also complement salads and main courses, such as grilled chicken or pasta dishes.
  • Presentation Tips: Create an inviting display by using a decorative basket lined with a cloth napkin. This adds a rustic touch to your table setting. You can also sprinkle some fresh herbs or garlic powder on top of the rolls just before serving for a pop of color and flavor.

Nutritional Information

Understanding the nutritional aspects of your Cheesy Garlic Dinner Rolls is important, especially for those with dietary considerations. Each roll contains approximately 150 calories, with 6 grams of fat, 3 grams of protein, and 20 grams of carbohydrates. The cheese and butter contribute to the fat content, while the flour provides the bulk of the carbohydrates.

For those monitoring their gluten or dairy intake, consider using gluten-free flour blends and dairy-free cheese alternatives to accommodate dietary restrictions while still enjoying the delicious flavors.

Conclusion

Preparing and enjoying Cheesy Garlic Dinner Rolls is not just about the end product; it’s about the entire experience of baking at home. The delightful aroma wafting through your kitchen, the satisfaction of kneading the dough, and the joy of sharing these soft, cheesy rolls with family and friends create memorable moments around the dining table.

These rolls are a crowd-pleasing addition to any meal, making them perfect for family dinners, holiday gatherings, or simply indulging yourself. Embrace the joy of baking and relish the satisfaction that comes from creating homemade treats. Whether served as an appetizer or a side dish, these rolls are sure to delight and elevate every meal into a special occasion. Enjoy the process and the delicious results!

There's something truly special about the aroma of freshly baked bread wafting through your kitchen, especially when it involves Cheesy Garlic Dinner Rolls. This delightful recipe combines the irresistible flavors of gooey cheese, fragrant garlic, and the soft, buttery texture of freshly baked rolls. Whether it’s a family dinner, a festive gathering, or a cozy holiday feast, these rolls serve as the perfect side dish that complements almost any meal.

Cheesy Garlic Dinner Rolls

Indulge in the delectable goodness of homemade Cheesy Garlic Dinner Rolls with this easy recipe! Bursting with melted mozzarella, savory garlic, and a buttery finish, these rolls are perfect for any meal or special gathering. With just a few simple ingredients, you can create fluffy, golden-brown rolls that will impress your family and friends. Click through to discover the step-by-step guide and elevate your dinner experience today!

Ingredients
  

2 cups all-purpose flour

1 cup shredded mozzarella cheese

1/2 cup warm milk (about 110°F or 43°C)

2 tablespoons unsalted butter, melted

1 tablespoon sugar

1 teaspoon salt

1 packet (2 1/4 teaspoons) instant yeast

2 cloves garlic, minced

2 tablespoons fresh parsley, chopped

Additional melted butter for brushing

Parmesan cheese for topping (optional)

Instructions
 

In a large bowl, combine the warm milk, melted butter, sugar, instant yeast, and salt. Stir and let it sit for about 5 minutes until bubbly on top.

    Gradually add the all-purpose flour to the yeast mixture, mixing until a dough forms. Add the shredded mozzarella cheese, minced garlic, and fresh parsley, and mix until well incorporated.

      Turn the dough out onto a floured surface and knead it for about 5-7 minutes until smooth and elastic.

        Place the dough in a greased bowl and cover with a damp cloth. Let it rise in a warm area for about 1 hour, or until doubled in size.

          Once risen, punch down the dough and divide it into 12 equal pieces. Shape each piece into a round ball and place them in a greased 9x13 inch baking dish, leaving some space between each roll.

            Cover the rolls with a cloth and let them rise again for about 30 minutes until puffy.

              Preheat your oven to 375°F (190°C).

                Brush the tops of the rolls with additional melted butter, and sprinkle with Parmesan cheese if desired.

                  Bake in the preheated oven for 20-25 minutes or until golden brown on top and cooked through.

                    Once baked, remove from the oven and brush with more melted butter. Let them cool slightly before serving.

                      Prep Time: 20 mins | Total Time: 1 hr 55 mins | Servings: 12 rolls

                        - Presentation Tips: Serve warm in the baking dish or transfer to a decorative basket lined with a cloth napkin. Garnish with a sprinkle of fresh parsley for a pop of color.

                          WANT TO SAVE THIS RECIPE?

                          Leave a Comment

                          Recipe Rating