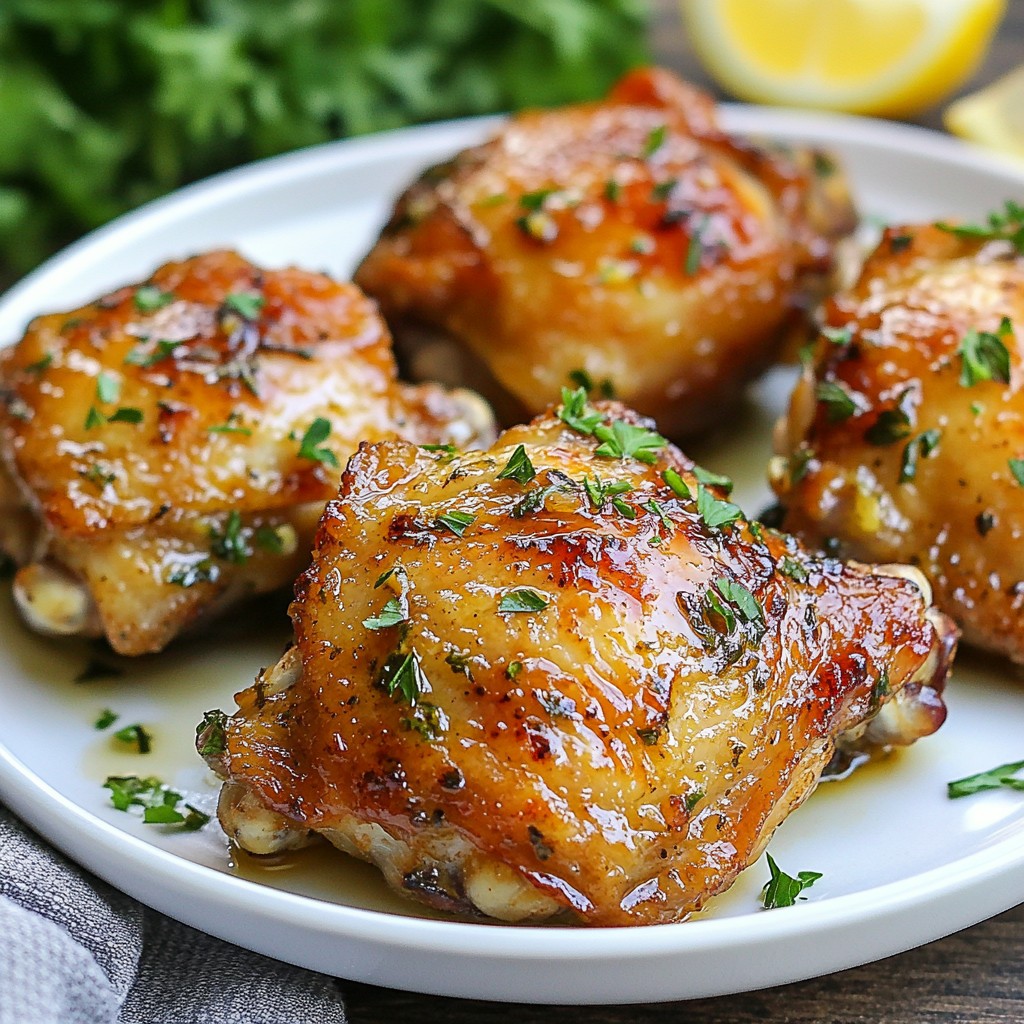
Are you ready to whip up a delicious meal quickly? This Flavorful Instant Pot Garlic Herb Chicken Thighs recipe is your ticket to a tender, savory dish without the fuss. With simple ingredients like garlic, olive oil, and fresh herbs, you’ll impress your family in no time. Join me as I guide you through each step, ensuring your chicken thighs are juicy and full of flavor. Let's get started!
Why I Love This Recipe
- Delicious Flavor Combination: The blend of garlic, herbs, and spices creates a mouthwatering aroma that fills your kitchen and elevates the chicken thighs to a new level.
- Quick and Easy: With the Instant Pot, this recipe takes just 35 minutes from start to finish, making it perfect for busy weeknights.
- Tender and Juicy Chicken: The pressure cooking method ensures that the chicken thighs remain moist and tender, providing a satisfying bite every time.
- Versatile Meal: This dish pairs well with a variety of sides, from rice to vegetables, allowing you to customize the meal to your liking.
Ingredients
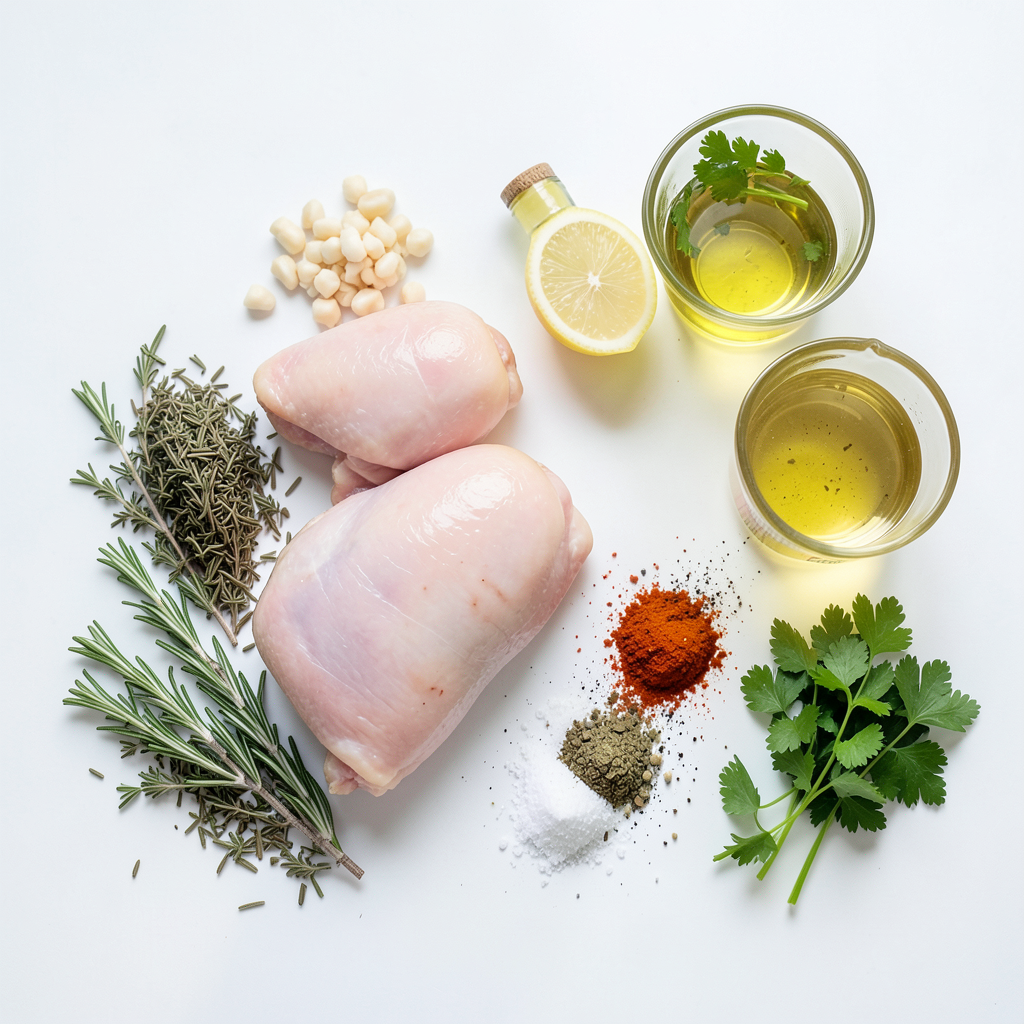
Here is what you need for flavorful Instant Pot garlic herb chicken thighs:
- 6 bone-in chicken thighs, skin-on
- 4 cloves garlic, minced
- 2 tablespoons olive oil
- 1 teaspoon dried thyme
- 1 teaspoon dried rosemary
- 1 teaspoon paprika
- Salt and pepper to taste
- 1 cup chicken broth
- 2 tablespoons fresh parsley, chopped (for garnish)
- 1 tablespoon lemon juice (optional)
These ingredients come together to create a dish full of flavor. The chicken thighs are juicy and tender, thanks to the pressure cooking method. The garlic and herbs add a lovely taste. Plus, the lemon juice gives a bright finish.
Step-by-Step Instructions
Preparing the Chicken
- Searing the chicken thighs: Start by turning your Instant Pot to 'Sauté' mode. Pour in the olive oil and let it heat up. Season the chicken thighs with salt, pepper, paprika, thyme, and rosemary. Place them skin side down in the pot. Sear for 5-7 minutes until the skin is golden brown. Flip the thighs and sear the other side for 3-4 minutes. Remove the chicken and set it aside.
- Seasoning details: Use a good amount of salt and pepper. The herbs add great flavor, so don't skip them. Paprika gives a nice color and taste.
Cooking the Garlic
- Tips for sautéing garlic without burning: After removing the chicken, add minced garlic to the pot. Sauté for 1-2 minutes. Keep an eye on it! Garlic can burn quickly. You want it fragrant, not brown.
Deglazing the Instant Pot
- Importance of scraping the pot: Pour in the chicken broth after sautéing the garlic. Use a wooden spoon to scrape any browned bits from the bottom. This adds flavor to your sauce and prevents burning.
Pressure Cooking
- Correct settings for the Instant Pot: Place the seared chicken thighs back in the pot, skin side up. Close the lid and set the valve to 'Sealing'. Choose 'Manual' or 'Pressure Cook' and set it for 10 minutes.
- Timing for the chicken thighs: Ten minutes is perfect for bone-in thighs. They cook through and stay juicy.
Natural Pressure Release
- Timelines for pressure release: When the timer goes off, let the pressure release naturally for 5 minutes. This step helps keep the chicken moist. Then, switch the valve to 'Vent' to release any remaining pressure.
Final Touches
- Optional lemon juice drizzle: Once done, carefully take out the chicken thighs. A drizzle of lemon juice adds freshness and brightens the flavors.
- Thickening the sauce: If you want a thicker sauce, turn your Instant Pot back to 'Sauté'. Let the sauce simmer for a few minutes until it reduces to your liking. This step enhances the dish’s richness.
Tips & Tricks
Achieving Perfectly Tender Chicken
Resting the chicken after cooking is key. It allows the juices to settle. If you skip this step, your chicken may dry out. After cooking, let the chicken sit for 5 minutes. This simple step makes a big difference in texture and taste.
Enhancing Flavor Profiles
You can add more spices to boost flavor. Consider using smoked paprika for a deeper taste. A pinch of cayenne pepper adds a nice kick. You might try mixing in some Italian seasoning for a different twist. Experiment with what you like best!
Serving Suggestions
Pair this dish with sides for a complete meal. A fresh salad works well to balance the flavors. Mashed potatoes or rice can soak up the tasty sauce. Roasted veggies provide a nice color and crunch. You can mix and match your favorites!
Pro Tips
- Perfectly Crispy Skin: For extra crispy chicken skin, ensure the skin is dry before searing. Pat it with paper towels to remove moisture.
- Flavor Boost: Marinate the chicken thighs in the herb and garlic mixture for a few hours or overnight for intensified flavors.
- Use Fresh Herbs: Fresh herbs can elevate the dish. If you have fresh thyme or rosemary, use them instead of dried for a more vibrant taste.
- Thickening the Sauce: If you want a thicker sauce, mix a cornstarch slurry (1 tablespoon cornstarch mixed with 2 tablespoons cold water) into the sauce while simmering.
Variations
Cooking with Different Herbs
You can switch up the herbs in this recipe. If you don't have thyme or rosemary, try using Italian seasoning or oregano. They add a wonderful flavor. Fresh herbs can also work great! Just use more since they are less intense than dried herbs. Experiment with what you like best.
Using Different Cuts of Chicken
Chicken thighs are juicy and flavorful, but you can use chicken breasts too. If you choose breasts, reduce the cooking time to about 8 minutes. Breasts cook faster and can dry out if overcooked. Always check the internal temperature; it should reach 165°F.
Adding Vegetables to the Mix
Adding veggies boosts nutrition and flavor. Carrots, potatoes, and green beans work well with chicken. Chop them into similar sizes for even cooking. You can add them to the pot before pressure cooking. This way, they soak up the tasty juices. Enjoy a complete meal all in one pot!
Storage Info
Storing Leftovers
Store any leftover chicken in an airtight container. This keeps the chicken moist and flavorful. Place the container in the fridge. It will stay good for about 3 to 4 days. Make sure to cool the chicken to room temperature before sealing it.
Freezing Instructions
To freeze the chicken, let it cool first. Place the chicken in freezer bags or containers. Remove as much air as possible to prevent freezer burn. You can freeze it for up to 3 months. When ready to eat, thaw it overnight in the fridge.
Reheating Tips
To reheat chicken, use the oven or microwave. For the oven, preheat to 350°F and heat for about 15-20 minutes. This keeps the skin crispy. For the microwave, heat in short 30-second bursts. Check the chicken often to prevent drying it out.
FAQs
Can I use boneless chicken thighs?
Yes, you can use boneless chicken thighs. They cook faster than bone-in thighs. Reduce the cooking time to 8 minutes under pressure. This change ensures they stay juicy and tender. Always check for doneness with a meat thermometer. Aim for an internal temperature of 165°F.
What can I substitute for chicken broth?
You can use vegetable broth as a substitute. Water works too, but it may lack flavor. For a richer taste, try using wine or a mix of water and soy sauce. These options add depth and enhance the overall flavor of the dish.
How spicy is this recipe?
This recipe is not very spicy. The paprika adds warmth without heat. If you want more spice, consider adding red pepper flakes. Adjust the amount based on your taste. Start with a pinch and add more if needed.
This blog post covered a simple and tasty chicken thigh recipe. You learned which ingredients to use and how to prepare and cook them in an Instant Pot. I shared tips to make the chicken tender and flavorful. You also found variations and storage methods to keep leftovers fresh.
Cooking can be fun and satisfying. With practice, you will make delicious meals that impress family and friends. Enjoy your cooking journey and feel confident in your skills!