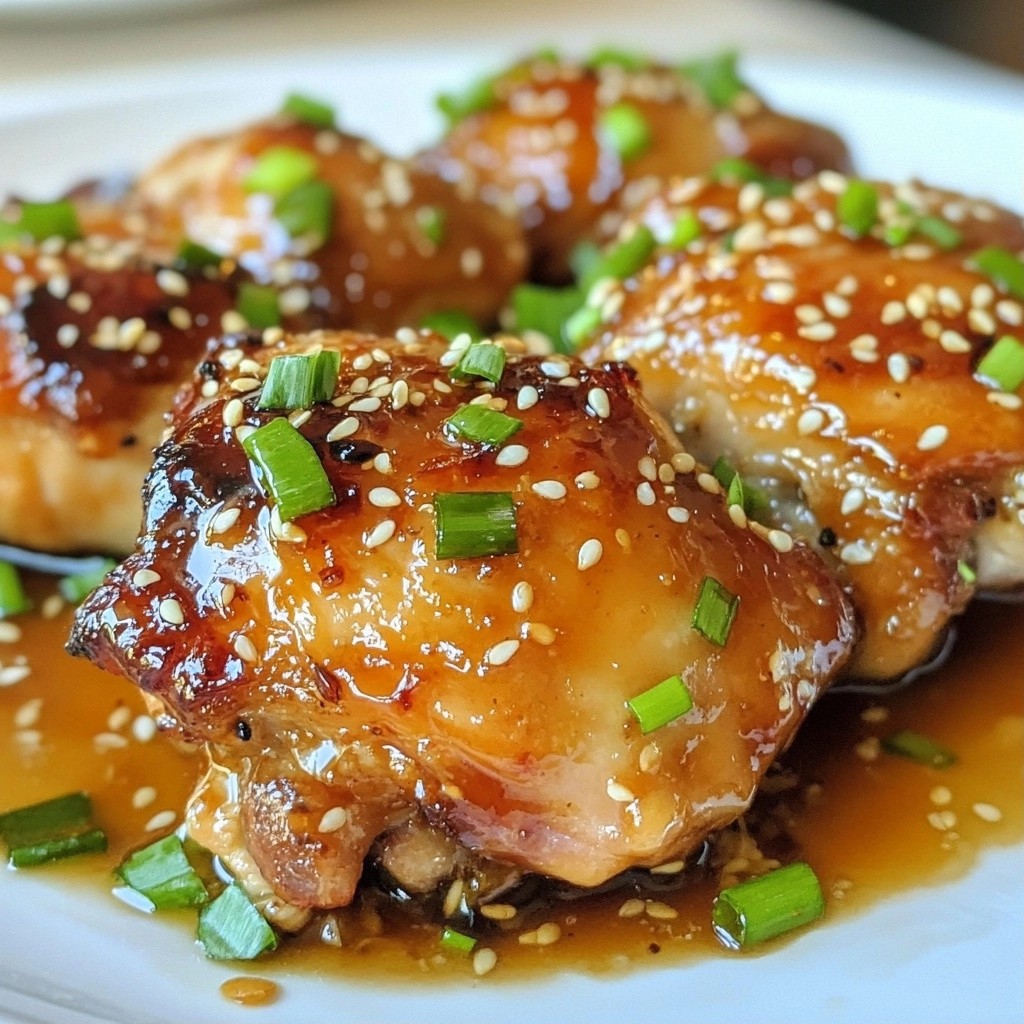
Are you ready for a dish that bursts with flavor and is a breeze to make? My Flavorful Instant Pot Sesame Garlic Chicken is just what you need! With simple ingredients like chicken thighs, soy sauce, and garlic, this meal satisfies cravings without fuss. Plus, it cooks quickly, saving time on busy nights. Join me as we explore this easy recipe that’s perfect for anyone, even novice cooks!
Why I Love This Recipe
- Quick and Easy: This recipe comes together in just 30 minutes, making it perfect for busy weeknights.
- Flavor Packed: The combination of soy sauce, garlic, and ginger creates a rich and delicious flavor profile.
- Healthy Option: Using chicken thighs provides a juicy and tender result, while the honey adds a touch of sweetness without being overly indulgent.
- Versatile: This dish pairs beautifully with rice, noodles, or even steamed vegetables, making it a flexible meal choice.
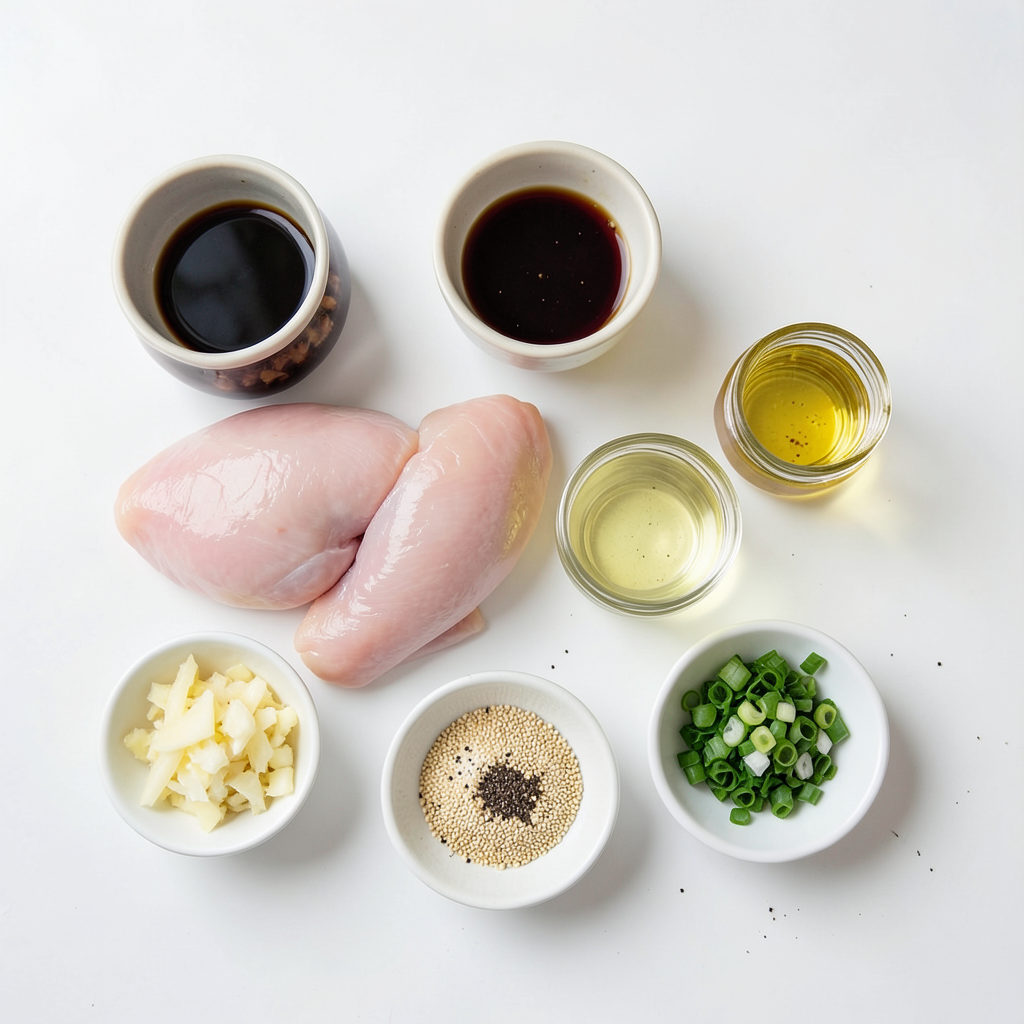
Ingredients
Main Ingredients
- 2 lbs chicken thighs, boneless and skinless
- 1/3 cup soy sauce (or tamari for gluten-free)
- 4 cloves garlic, minced
- 1-inch piece ginger, grated
In this recipe, chicken thighs are key. They stay juicy and tender. Soy sauce is your base flavor. If gluten is a concern, tamari works great. Garlic adds depth and aroma. Ginger brings a fresh kick.
Cooking Essentials
- 2 tablespoons sesame oil
- 2 tablespoons honey
- 1 tablespoon rice vinegar
- 1 tablespoon cornstarch
- 2 tablespoons water
Sesame oil gives a nutty flavor. Honey balances the saltiness of soy sauce. Rice vinegar adds brightness. Cornstarch thickens the sauce nicely. Mixing cornstarch with water helps it blend better into the sauce.
Optional Garnishes
- 1 tablespoon sesame seeds
- 3 green onions, chopped (for garnish)
- Salt and pepper to taste
Garnishes make your dish pop. Sesame seeds add crunch and flavor. Green onions give a fresh touch. Always taste and adjust salt and pepper to your liking.
Step-by-Step Instructions
Marinating the Chicken
1. Combining the marinade ingredients: In a mixing bowl, add 1/3 cup soy sauce, 2 tablespoons honey, 4 minced garlic cloves, and 1-inch grated ginger. Mix well. Then, pour in 2 tablespoons sesame oil and 1 tablespoon rice vinegar. Stir until combined.
2. Preparing the chicken thighs: Take 2 lbs of boneless, skinless chicken thighs. Place them in the Instant Pot. Pour the marinade over the chicken. Make sure each piece is coated well.
Safety and Cooking Settings
1. Setting the Instant Pot: Close the lid tightly. Switch the valve to "Sealing." Set the Instant Pot to cook on high pressure for 12 minutes.
2. Understanding pressure cooking: After cooking, let the pressure release naturally for 10 minutes. Then, switch to quick release to let out any remaining steam.
Finishing Touches
1. Thickening the sauce: Carefully take out the chicken thighs and set them on a plate. In a small bowl, mix 1 tablespoon cornstarch with 2 tablespoons water to create a slurry.
2. Coating the chicken in sauce: Set the Instant Pot to "Sauté" mode. Bring the sauce to a simmer. Stir in the cornstarch slurry and cook for 2-3 minutes until the sauce thickens. Return the chicken to the pot and coat it in the thickened sauce.
3. Sprinkle sesame seeds on top for crunch and serve hot. Garnish with chopped green onions for a fresh touch.
Tips & Tricks
Achieving Maximum Flavor
For the best taste, marinate the chicken for at least 30 minutes. If you have time, let it sit for a few hours. This really helps the flavors blend. Adjust the seasoning to your taste. If you like it saltier, add more soy sauce. For sweetness, add a touch more honey.
Instant Pot Best Practices
Make sure to seal the Instant Pot properly. This step keeps all the steam inside. If not sealed, your chicken may not cook right. Use quick release for a fast finish, but natural release gives a softer texture. I recommend using natural release for 10 minutes, then quick release to finish.
Cooking Variations
You can swap chicken thighs for chicken breasts or even tofu. Each protein offers a different texture and flavor. Adding vegetables like broccoli or bell peppers boosts nutrition. Toss them in the pot with the chicken for a one-pot meal.
Pro Tips
- Marinate for Maximum Flavor: For an even more flavorful dish, marinate the chicken thighs in the sauce for at least 30 minutes or overnight in the refrigerator.
- Use Fresh Ingredients: Fresh garlic and ginger will enhance the flavor profile significantly compared to dried versions.
- Adjust Sweetness: Feel free to adjust the amount of honey in the marinade to suit your taste preferences; you can add more for a sweeter sauce or less for a more savory flavor.
- Thicken Sauce to Preference: If you prefer a thicker sauce, simply add more cornstarch mixed with water to achieve your desired consistency.
Variations
Gluten-Free Options
You can easily make this dish gluten-free. Use tamari instead of soy sauce. Tamari has a similar taste and works well. You can also try coconut aminos. It offers a milder flavor. For honey, you can stick with it, as it is gluten-free. Be sure to check any other sauces you use for gluten.
Spicy Sesame Garlic Chicken
Want to add some heat? You can add chili flakes for a spicy kick. Start with a small amount and adjust to your taste. Another option is to use spicy sauces like Sriracha or chili garlic sauce. These can add great flavor and heat to your chicken. Mix them into the marinade or drizzle on top before serving.
Mediterranean Twist
For a fresh twist, introduce Mediterranean herbs like oregano or basil. These can add a new layer of flavor. Instead of rice vinegar, try using lemon juice. The lemon will brighten up the dish and give it a zesty taste. This variation is perfect for those who love Mediterranean flavors.
Storage Info
Refrigeration Guidelines
To store leftover chicken, let it cool to room temperature first. Place the chicken in a shallow, airtight container. This helps it cool quickly and stay fresh. You can keep it in the fridge for up to four days. Always label the container with the date. This way, you can track how long it's been stored. For best safety, reheat only the portion you plan to eat.
Freezing Instructions
To freeze leftovers, put the chicken in a freezer-safe bag. Squeeze out as much air as possible before sealing. This prevents freezer burn. You can freeze it for up to three months. When you're ready to eat, thaw it in the fridge overnight. To reheat, place the chicken in the microwave or Instant Pot.
Reheating Methods
For reheating, I suggest using the microwave for a quick option. Place the chicken on a microwave-safe plate. Cover it with a damp paper towel to keep it moist. Heat it in short bursts until warm. You can also use the Instant Pot. Add a splash of water to the pot and set it to Sauté mode. This helps avoid dryness. Cook for a few minutes until heated through. Enjoy your tasty chicken!
FAQs
How can I make this dish spicy?
You can add heat to sesame garlic chicken by using red pepper flakes. Start with a pinch and adjust to your taste. Another option is to mix in Sriracha or chili paste. Adding these ingredients enhances the flavor and gives you a nice kick.
Can I use chicken breasts instead of thighs?
Yes, you can use chicken breasts in this recipe. They will cook faster than thighs. Adjust the cooking time to about 8 minutes under high pressure. This change will still give you tasty results, but the chicken may be less juicy.
What can I serve with sesame garlic chicken?
Sesame garlic chicken pairs well with rice or noodles. Steamed broccoli or stir-fried vegetables also make great sides. A fresh salad can add crunch and balance. You can also serve it with warm flatbreads for a fun twist.
How do I know when the chicken is cooked properly?
Check the chicken's internal temperature with a meat thermometer. It should reach at least 165°F (75°C). If you don't have a thermometer, cut into the chicken. The meat should be white, not pink. This ensures it's safe to eat and fully cooked.
This blog post covered everything you need for making sesame garlic chicken. We explored key ingredients like chicken thighs, soy sauce, and garlic. You learned important cooking steps, marinating tips, and best practices with the Instant Pot. We also shared variations, storage info, and common questions about the dish.
In short, this recipe is flexible and fun. Enjoying your meal can be simple and tasty. Don’t be afraid to experiment with flavors and ingredients!