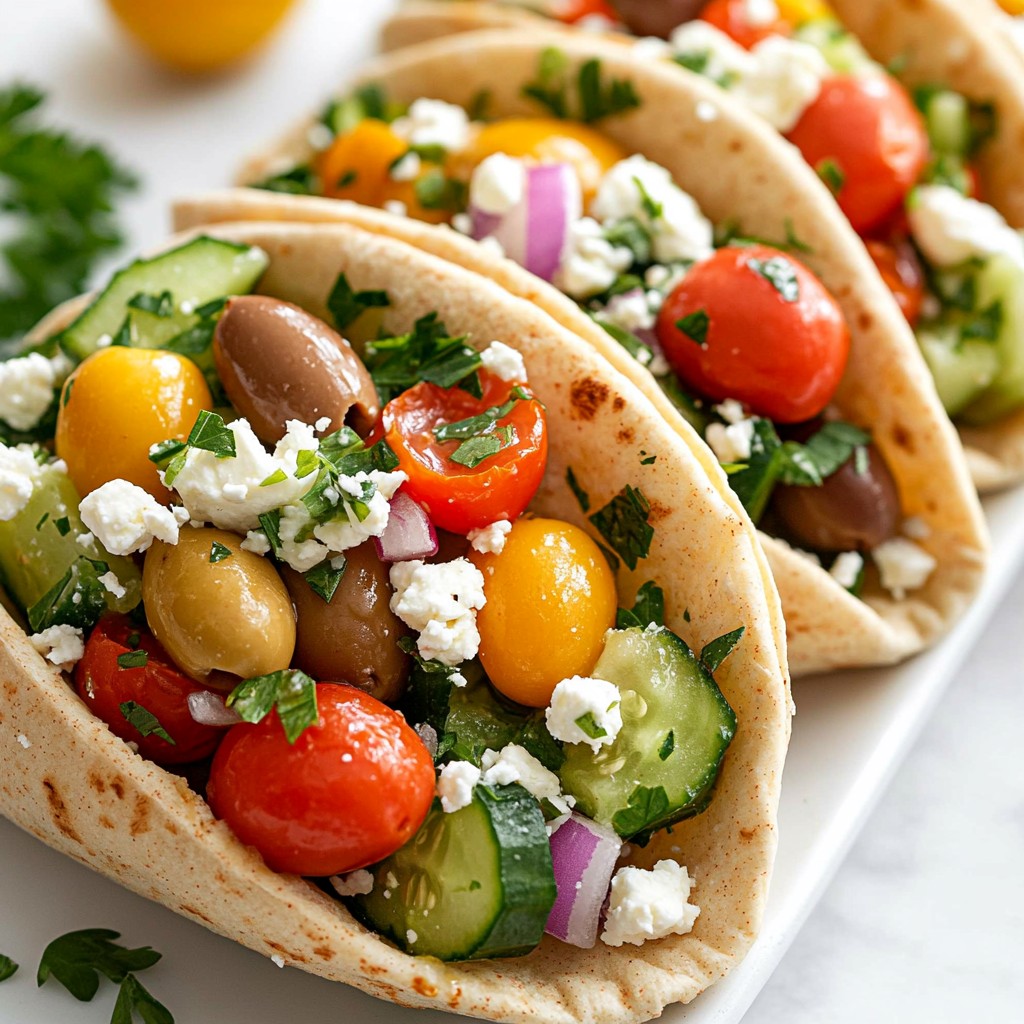
Looking for a fresh and tasty meal? Greek Salad Stuffed Pitas are your perfect answer! Packed with vibrant veggies and creamy feta, these pitas are fun to make and eat. I’ll guide you through easy steps, helpful tips, and tasty variations. Whether you want a quick lunch or a light dinner, this dish is ready in no time. Let’s dive into this flavorful and fresh delight!
Why I Love This Recipe
- Healthy and Nutritious: This Greek salad stuffed pita is loaded with fresh vegetables, whole grains, and protein from feta cheese, making it a wholesome meal option.
- Quick and Easy: With just 15 minutes of prep time, this recipe is perfect for a quick lunch or dinner, allowing you to enjoy a delicious meal without the hassle.
- Customizable: You can easily adapt this recipe by adding your favorite ingredients like grilled chicken, avocado, or different herbs to suit your taste.
- Great for Meal Prep: These stuffed pitas can be made ahead of time and stored in the fridge, making them a handy option for busy days.
Ingredients
List of Ingredients
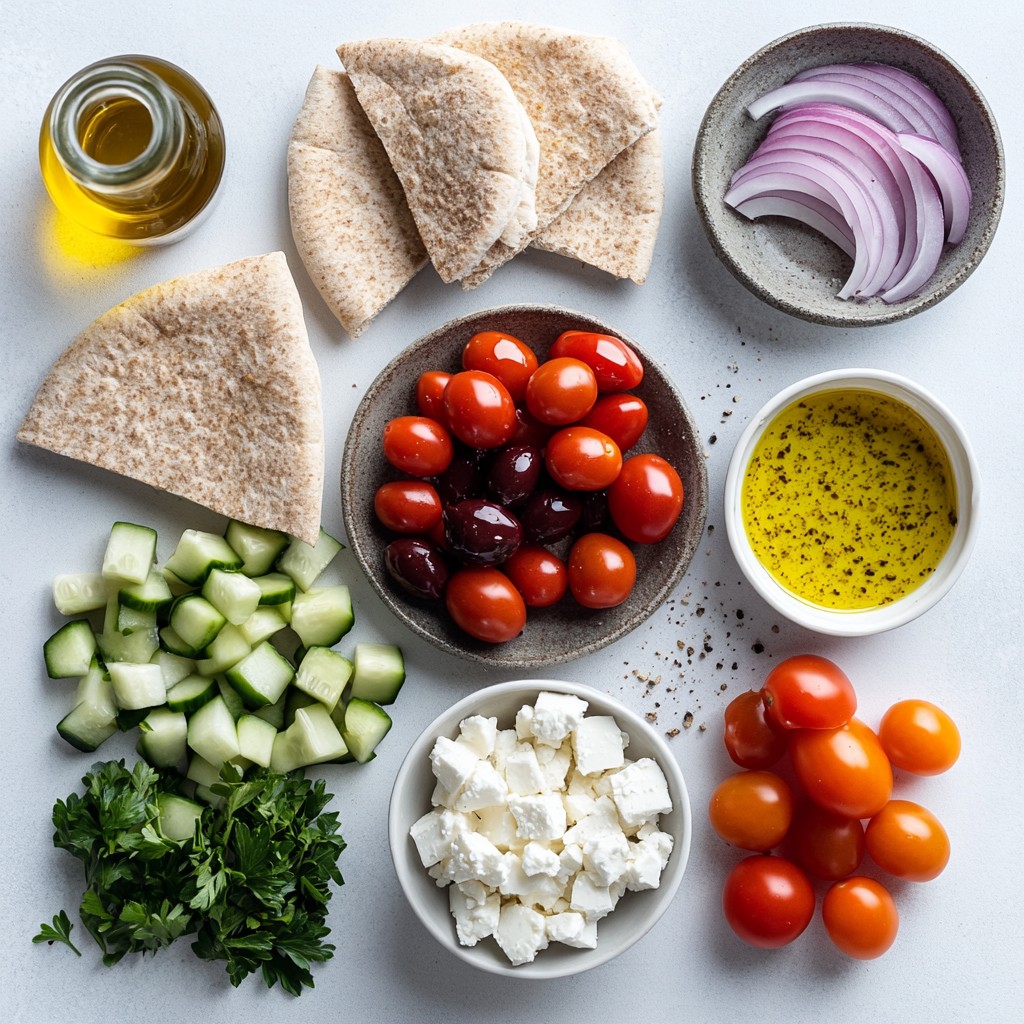
To make Greek Salad Stuffed Pitas, you will need:
- 4 whole wheat pita pockets
- 1 cup cherry tomatoes, halved
- 1 cucumber, diced
- 1/2 red onion, finely chopped
- 1 cup Kalamata olives, pitted and halved
- 1 cup crumbled feta cheese
- 1/4 cup fresh parsley, chopped
- 3 tablespoons olive oil
- 2 tablespoons red wine vinegar (or lemon juice)
- 1 teaspoon dried oregano
- Salt and pepper to taste
Substitutions & Additions
You can swap whole wheat pitas for regular ones if you prefer. For a twist, use chopped bell peppers instead of cucumber. If you want more crunch, add lettuce or radishes. Try using goat cheese instead of feta for a different flavor. You can also add grilled chicken or chickpeas for extra protein. Fresh herbs like dill or mint can enhance the taste too.
Nutritional Information
This meal is balanced and healthy. Each serving has about:
- Calories: 320
- Protein: 12g
- Carbohydrates: 38g
- Dietary Fiber: 7g
- Total Fat: 16g
- Saturated Fat: 5g
- Sugars: 3g
- Sodium: 700mg
This dish is rich in vitamins and minerals. The olives and feta provide healthy fats. The fresh veggies add fiber and antioxidants. Enjoy this meal knowing it’s not just tasty, but also good for you!
Step-by-Step Instructions
Preparation of Vegetables
Start by washing the cherry tomatoes. Cut each tomato in half. Next, dice the cucumber into small pieces. Finely chop the red onion. Take the Kalamata olives, pit them, and then cut them in half. Finally, chop fresh parsley. Place all these vegetables in a large mixing bowl. This mix will be colorful and fresh, perfect for your pitas.
Making the Dressing
In a small bowl, combine olive oil, red wine vinegar, dried oregano, salt, and pepper. Whisk these ingredients together until they blend well. This dressing will add lots of flavor to your salad. You can also use lemon juice instead of vinegar for a lighter taste. Choose what you like best!
Stuffing the Pitas
Carefully open each pita pocket. Make sure not to tear them. Spoon the vegetable mixture into each pita. Fill them generously for the best taste. After that, sprinkle crumbled feta cheese on top of the salad inside the pitas. Serve them right away for a fresh meal. You can also cover them and chill for up to 30 minutes to let the flavors mix. Enjoy your tasty Greek salad stuffed pitas!
Tips & Tricks
Tips for Perfectly Stuffed Pitas
To make the best Greek salad stuffed pitas, start with fresh ingredients. Use ripe cherry tomatoes and crisp cucumbers. Cut the veggies into bite-sized pieces for easy stuffing. When you open the pita, do it gently to avoid tearing. Stuff each pita pocket generously but leave a little space at the top. This helps keep the filling inside without spilling out.
Flavor Enhancements
To take your stuffed pitas to the next level, try adding herbs or spices. Fresh dill or mint can add a nice twist. You can also mix in a touch of garlic for extra flavor. If you prefer a spicy kick, add some chopped jalapeños or red pepper flakes. Experiment with your favorite ingredients to make it your own.
Serving Suggestions
Serve your Greek salad stuffed pitas on a large platter. A wooden board adds a rustic feel. Garnish with extra parsley and lemon wedges for color. You can pair them with a side of tzatziki for dipping. These stuffed pitas work great for lunch, picnics, or casual dinners with friends. Enjoy them fresh for the best taste!
Pro Tips
- Use Fresh Ingredients: Always opt for the freshest vegetables and herbs to enhance the flavor of your Greek salad stuffed pitas.
- Customize Your Fillings: Feel free to add additional ingredients like bell peppers, artichokes, or even grilled chicken for a protein boost.
- Chill Before Serving: Allow the stuffed pitas to chill in the refrigerator for about 30 minutes to let the flavors meld beautifully.
- Choose Whole Wheat Pitas: Whole wheat pita pockets not only add a nutty flavor but also provide more fiber than white pitas.
Variations
Vegetarian Options
Greek Salad Stuffed Pitas are already a great vegetarian meal. You can add more veggies to boost flavor. Try adding bell peppers or avocados for creaminess. You can even include artichoke hearts for an extra twist. These options add color and variety to your dish.
Additional Protein Ideas
If you want more protein, chicken or shrimp makes a great choice. Grilled chicken breast adds a nice touch. You can also use chickpeas for a plant-based protein. Simply toss them in with the salad mix. This keeps your meal hearty and filling.
Dressing Alternatives
While the classic dressing is tasty, feel free to switch it up. A tahini dressing can give a nutty flavor. If you like spicy, add some sriracha or a dash of hot sauce. For a creamy option, try a yogurt-based dressing. This adds richness without being too heavy. Each choice adds a unique twist to your Greek Salad Stuffed Pitas.
Storage Info
Best Practices for Storing Leftovers
To keep your Greek salad stuffed pitas fresh, wrap them in plastic wrap. This helps to seal in moisture. You can also store the salad mixture separately in an airtight container. This keeps the pita soft and prevents sogginess.
How to Reheat or Serve Cold
If you want to serve your leftover pitas cold, just take them out of the fridge. They taste great chilled! If you prefer warm pitas, gently reheat them in a microwave for about 15-20 seconds. Be careful not to overheat, or they might get tough.
Shelf Life
These stuffed pitas are best eaten within two days. After that, the vegetables may lose their crunch. If you store them properly, they can last up to three days in the fridge. Always check for freshness before eating.
FAQs
Can I make Greek Salad Stuffed Pitas ahead of time?
Yes, you can prepare Greek Salad Stuffed Pitas ahead of time. Make the salad mix and store it in the fridge. Keep the pita pockets separate until you are ready to serve. This keeps the pitas from getting soggy. You can stuff them just before eating for the best taste. If you want to serve them later, cover them with plastic wrap to keep them fresh.
What can I substitute for feta cheese?
If you need to replace feta cheese, try using goat cheese or ricotta. Both add a nice creaminess to your stuffed pitas. You can also use a dairy-free cheese if you prefer. Just make sure it crumbles well. Another option is to skip cheese altogether and add more veggies. This keeps the dish fresh and light.
Are stuffed pitas suitable for meal prep?
Stuffed pitas are great for meal prep! You can prepare the salad mix in advance. Store it in a sealed container in the fridge. When you want to eat, just stuff the pitas. This makes a quick lunch or dinner. You can also use them for picnics or lunch boxes. Just remember to keep the dressing separate until it's time to eat. This keeps everything fresh and tasty.
This article covered how to make Greek salad stuffed pitas. We explored the key ingredients, useful tips, and variations to suit your taste. I shared ways to prepare and store your pitas for the best flavor and freshness. You can easily customize this dish with different ingredients and make it your own. Remember, cooking should be fun, so don’t be afraid to experiment! Enjoy your delicious, healthy meals with these easy steps.