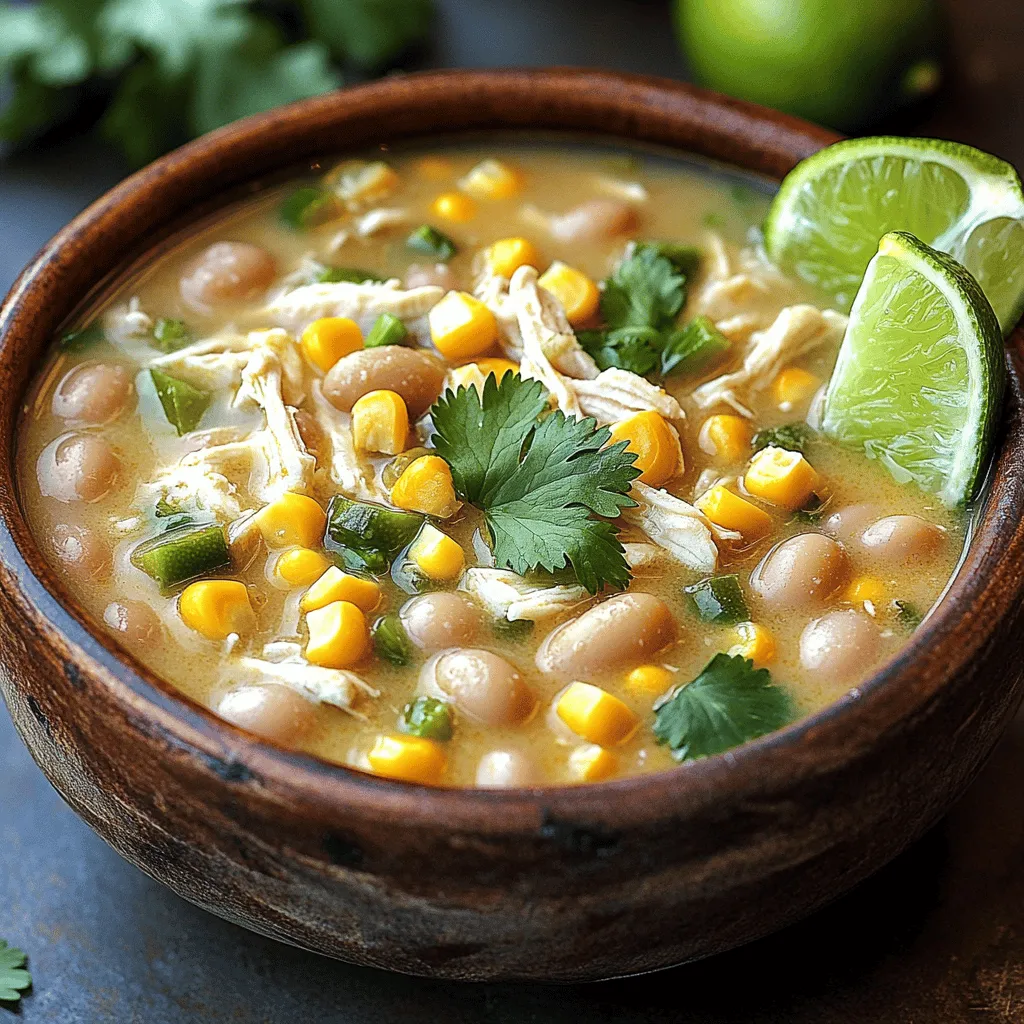
Are you ready to make a warm and tasty meal with minimal effort? This Instant Pot White Chicken Chili recipe is easy to follow and packed with flavor. You’ll love using simple ingredients like boneless chicken breasts, Great Northern beans, and zesty spices. Whether you’re a cooking novice or a seasoned chef, this dish is sure to impress. Let’s dive in and whip up a comforting bowl of chili that your whole family will enjoy!
Why I Love This Recipe
- Quick and Easy: This Instant Pot recipe allows you to prepare a hearty meal in just 40 minutes, making it perfect for busy weeknights.
- Comforting Flavors: The combination of spices, creamy texture, and tender chicken creates a warm and satisfying dish that everyone loves.
- Customizable: You can easily adjust the ingredients to suit your taste, whether that’s adding more veggies or using a different type of bean.
- Healthy Ingredients: This chili is packed with protein, fiber, and wholesome ingredients, making it a nutritious choice for any meal.
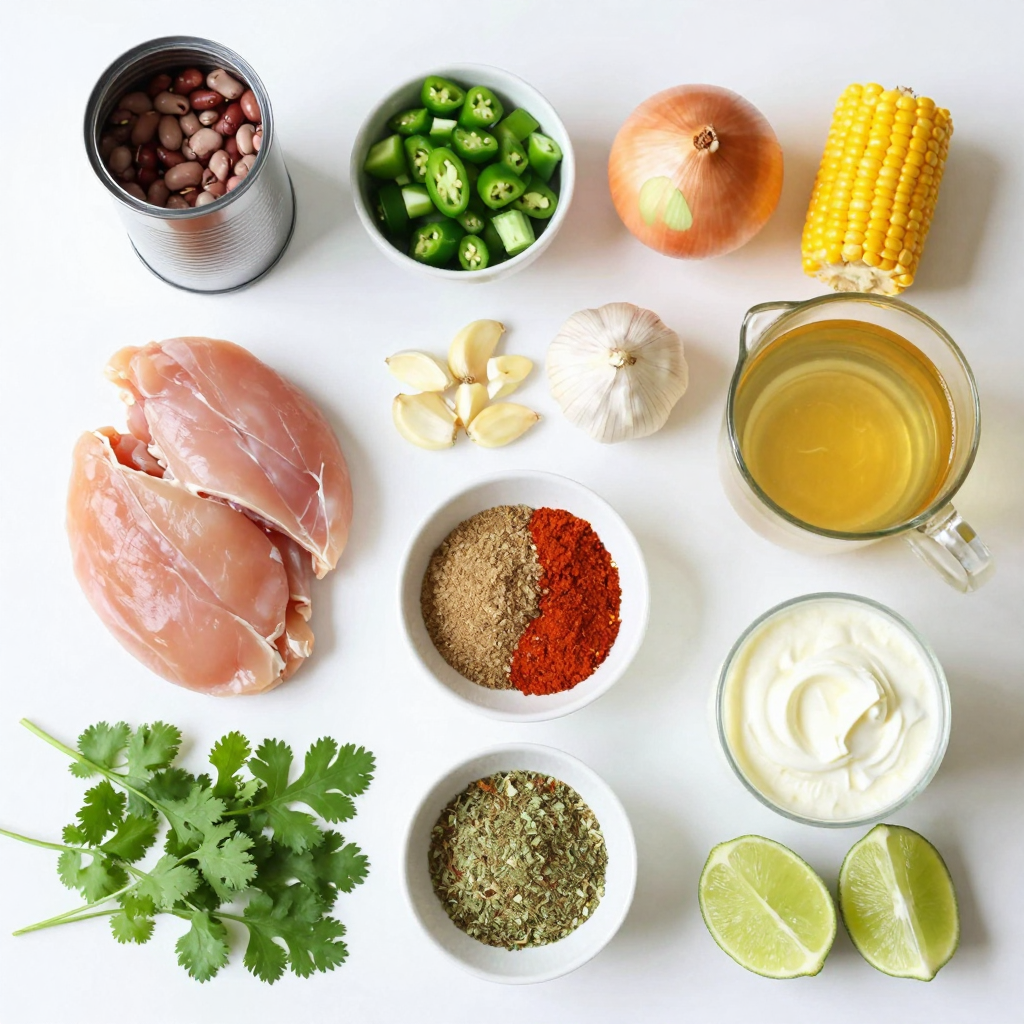
Ingredients
Key Ingredients
– 1 pound boneless, skinless chicken breasts
– 1 can (15 oz) Great Northern beans, drained and rinsed
– 1 can (4 oz) diced green chilies
These key ingredients form the backbone of your chili. The chicken gives it a hearty base, while the Great Northern beans add a nice creaminess. Diced green chilies bring a mild heat and a burst of flavor.
Spices and Seasonings
– 1 teaspoon ground cumin
– 1 teaspoon chili powder
– ½ teaspoon smoked paprika
– ½ teaspoon oregano
The spices are vital for flavor. Ground cumin gives a warm taste. Chili powder adds depth, while smoked paprika introduces a subtle smokiness. Oregano ties everything together with its herbal notes.
Optional Ingredients
– 1 cup heavy cream (or coconut milk for a dairy-free option)
– Fresh cilantro, for garnish
– Lime wedges, for serving
You can choose heavy cream for richness or coconut milk for a lighter feel. Fresh cilantro adds a pop of color and freshness. Lime wedges brighten the dish and enhance the flavors.This ensures you have everything you need to make this delightful meal.
Step-by-Step Instructions
Preparing the Aromatics
To start, turn on your Instant Pot and set it to the “Sauté” mode. Add a splash of oil and toss in the diced onion. Sauté it for about 3 to 4 minutes until it turns soft. This step builds a great base for your chili. Next, add the minced garlic and stir for one minute until it starts to smell great.
Now it’s time to season the chicken. Place the boneless, skinless chicken breasts right into the pot. Sprinkle salt, pepper, ground cumin, chili powder, smoked paprika, and oregano over the chicken. Make sure to stir well to coat the chicken with the spices. This will add rich flavor to your dish.
Combining Ingredients
Next, you’ll want to add the beans and corn. Pour in the drained Great Northern beans, the diced green chilies, and the corn. Then, add the low-sodium chicken broth. Stir everything together well. It is important that the chicken is fully submerged in the liquid. This ensures even cooking and keeps the chicken juicy.
Cooking Process
Once everything is combined, close the Instant Pot lid. Make sure the valve is set to “Sealing.” Select the “Manual” or “Pressure Cook” setting and cook on high pressure for 15 minutes. This will lock in all the flavors while cooking the chicken to perfection.
After the cooking time is over, you can release the pressure in two ways. First, let it release naturally for about 10 minutes. This helps the flavors settle. Then, for any remaining pressure, do a quick release. Be cautious with the steam.
Once it’s safe to open the lid, use two forks to shred the chicken right in the pot. Stir in the heavy cream or coconut milk until everything is well mixed. Taste your chili and adjust the seasoning with salt and pepper if needed.Enjoy your delicious and easy Instant Pot White Chicken Chili!
Pro Tips
- Use Rotisserie Chicken: For a quicker preparation, substitute the raw chicken with shredded rotisserie chicken. This will save you time and add extra flavor.
- Adjust the Spice Level: If you prefer a spicier chili, add diced jalapeños or a dash of cayenne pepper to the mix for an extra kick.
- Make it Ahead: This chili tastes even better the next day! Make a larger batch and refrigerate, allowing the flavors to meld together overnight.
- Garnish Wisely: Fresh toppings like avocado, cheese, or sour cream can elevate your chili. Consider offering a toppings bar for guests to customize their bowls.
Tips & Tricks
Perfecting the Flavor
To make your white chicken chili pop, season it well. I often tweak the spices as I cook. If you like heat, add cayenne or more chili powder. For a fresh taste, add lime juice at the end.
When shredding chicken, use two forks. Start by pulling apart the chicken in the pot. This keeps it juicy and mixes the flavors. Shredding right in the pot saves time and effort.
Cooking Consistency
To get the right thickness, you can adjust the liquid. If it seems too thin, let it simmer uncovered for a few minutes. This helps it thicken up.
For a creamier chili, swap in more heavy cream or use coconut milk. You can also add cream cheese for a rich texture.
Time-Saving Hacks
Prep your ingredients ahead of time. Chop the onion and garlic and store them in the fridge. This makes cooking faster.
Using frozen vegetables is another great hack. Just toss them in straight from the bag. They cook quickly and save you time on chopping.
Variations
Ingredient Swaps
You can change the beans in this recipe. Black beans or pinto beans work great. They add a different taste and texture. You can also add optional veggies like bell peppers or zucchini. These give your chili a fresh crunch. Feel free to mix and match beans and veggies based on what you enjoy.
Serving Suggestions
Toppings can make your chili even better. Try adding avocado, cheese, or jalapeños. They add great flavors and textures. For sides, cornbread or tortilla chips are perfect. They soak up the chili and provide a nice crunch. Experiment with toppings and sides to find your favorite combo.
Dietary Adjustments
If you need a gluten-free meal, this chili is easy to adjust. Just make sure your broth and any toppings are gluten-free. For a dairy-free option, swap heavy cream for coconut milk. This keeps the chili creamy and rich without dairy. These simple swaps let you enjoy the dish no matter your dietary needs.
Storage Info
Storing Leftovers
Store your leftover white chicken chili in the fridge. Use airtight containers to keep it fresh. This helps maintain flavor and texture. Your chili will stay good for up to 3-4 days. If you use glass containers, they are great for this. They do not stain and are easy to clean.
Freezing Instructions
You can freeze white chicken chili for later. Let the chili cool completely before freezing. Use freezer-safe bags or containers. Label them with the date. This way, you will know how long it has been frozen. When you want to eat it, thaw it overnight in the fridge.
To reheat, place it in a pot on low heat. Stir often to avoid burning. You can add a splash of broth if it seems thick. Microwaving is also an option. Just heat it in short bursts and stir in between.
Shelf Life
How long does the chili last? In the fridge, it lasts about 3-4 days. If you freeze it, it can last up to 3 months.
Watch for signs of spoilage. If you see any mold, do not eat it. A sour smell is also a bad sign. If the texture seems off, throw it away. Always trust your nose and eyes when checking food.
FAQs
Common Questions
How long does it take to cook in the Instant Pot?
Cooking in the Instant Pot takes about 40 minutes. This includes 15 minutes of high-pressure cooking and time for the pot to heat up and release pressure. You will love how fast it makes meals!
Can I use frozen chicken for this recipe?
Yes, you can use frozen chicken. Just add a few extra minutes to the cook time. It’s a great time-saver when you forget to thaw your meat!
Substitutions and Adjustments
What can I substitute for chicken?
For a meat-free option, try using tofu or cooked quinoa. Shredded jackfruit also works well. These choices add protein while keeping the dish hearty.
Can I make this recipe without beans?
Absolutely! If beans are not your thing, leave them out. You can add more corn or even diced potatoes for extra texture.
Cooking Technique Queries
What if my chili is too thick?
If your chili is too thick, add more chicken broth. Stir well and let it simmer for a few minutes. This will help you reach the perfect consistency.
How to make this in a slow cooker instead?
To make this in a slow cooker, follow these steps:
– Sauté the onion and garlic in a pan first.
– Add all ingredients to the slow cooker.
– Cook on low for 6-8 hours or high for 3-4 hours.
This gives the flavors time to blend beautifully.
In this blog post, we explored how to make white chicken chili in the Instant Pot. We discussed key ingredients like chicken breasts, Great Northern beans, and spices. I shared simple steps for preparing your dish and tips for flavor and consistency. You can adjust this recipe with different ingredients and make it your own. Remember to store leftovers properly for future meals. Dive into this recipe, and enjoy a comforting bowl of chili that fits your taste. It’s easy, fun, and perfect for sharing.