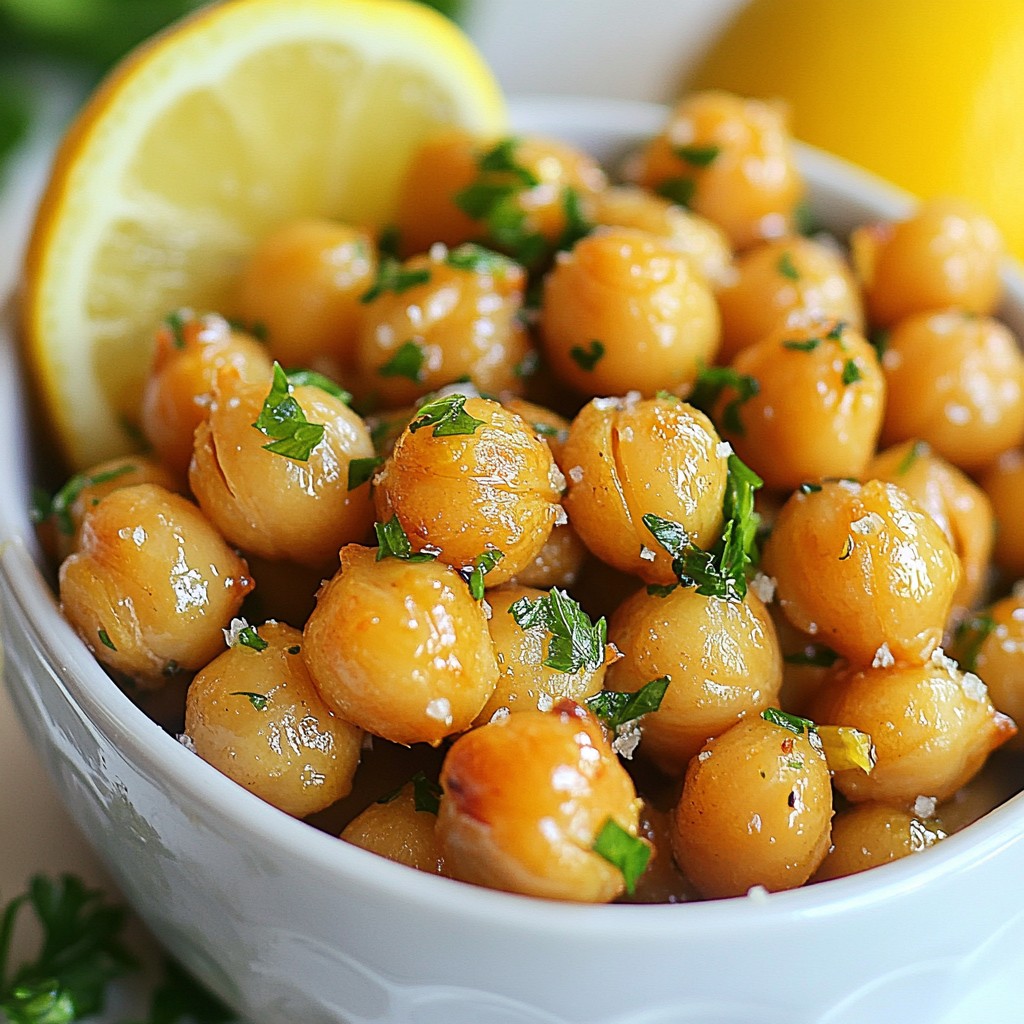
Looking for a snack that's both crunchy and full of flavor? You’re in the right place! Lemon Garlic Roasted Chickpeas are delicious, easy to make, and packed with nutrients. They make a perfect snack or addition to any meal. In this post, I’ll walk you through simple steps, share tips for the best results, and offer fun variations to keep things exciting. Let’s dive into the world of mouth-watering chickpeas!
Why I Love This Recipe
- Quick and Easy: This recipe requires minimal prep time and is ready in under 40 minutes, making it perfect for a busy day.
- Healthier Snack Option: Roasted chickpeas are a nutritious alternative to chips, packed with protein and fiber, keeping you satisfied.
- Flavorful Twist: The combination of lemon, garlic, and spices gives these chickpeas a zesty flavor that’s hard to resist.
- Versatile Use: These crispy chickpeas can be enjoyed on their own or as a crunchy topping for salads and bowls.
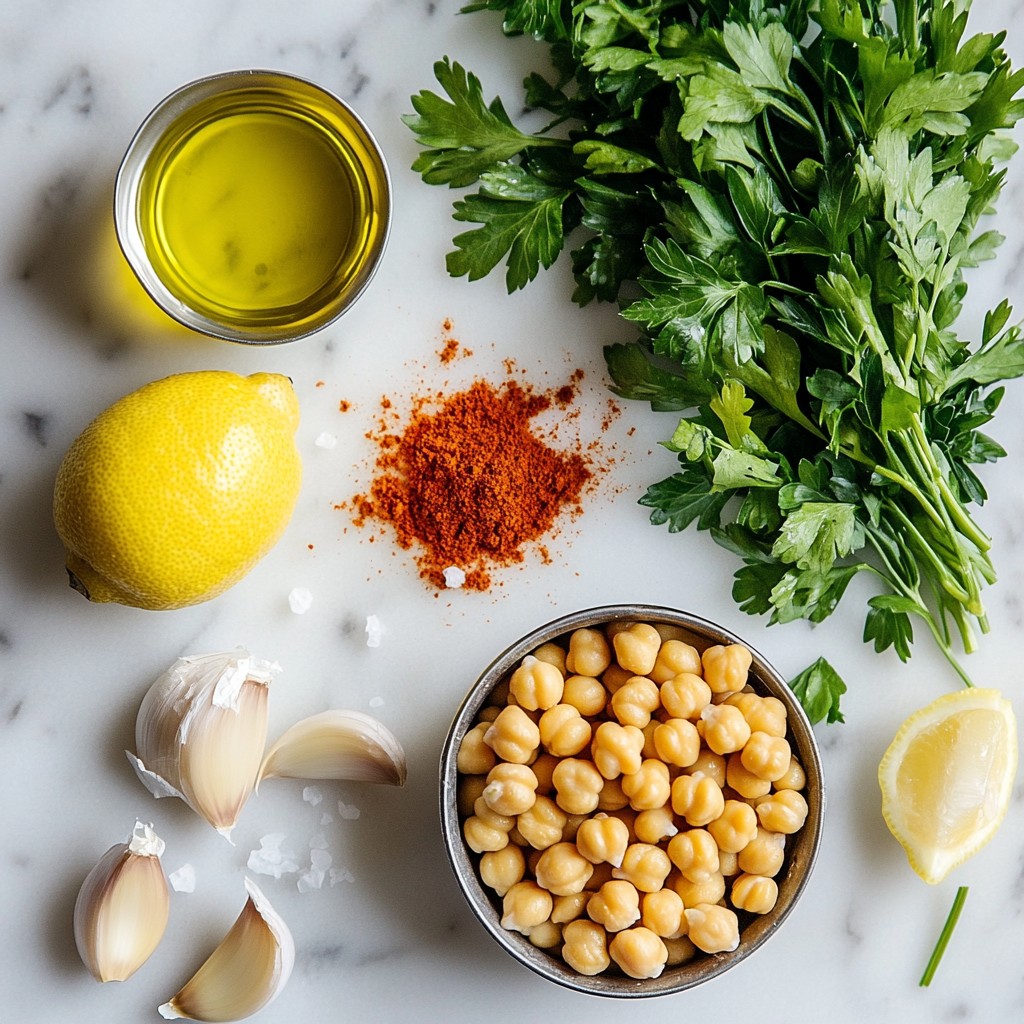
Ingredients
List of Ingredients
- 1 can (15 oz) chickpeas, drained and rinsed
- 2 tablespoons olive oil
- 2 tablespoons fresh lemon juice
- Zest of 1 lemon
- 3 cloves garlic, minced
- 1 teaspoon smoked paprika
- 1/2 teaspoon cumin
- Salt and pepper to taste
- Fresh parsley, chopped (for garnish)
Substitutions for Allergies or Preferences
If you have a garlic allergy, you can skip the minced garlic. Instead, add a bit of onion powder for flavor. For those avoiding oil, you can use vegetable broth to help coat the chickpeas. If you prefer a different spice, try using chili powder instead of smoked paprika.
Making it Vegan-Friendly
This recipe is already vegan! Chickpeas are a great plant-based protein. They fit well into many diets. You can enjoy these lemon garlic roasted chickpeas without worry. They are a fun snack for everyone!
Step-by-Step Instructions
Prepping the Chickpeas
Start by draining and rinsing a can of chickpeas. This step is crucial. It removes extra salt and makes them taste better. I prefer using canned chickpeas for ease. But you can use dried ones if you soak them overnight. Once rinsed, gently pat them dry with a paper towel. This helps them get crunchy later.
Mixing and Coating the Chickpeas
In a mixing bowl, combine the chickpeas with 2 tablespoons of olive oil. Add 2 tablespoons of fresh lemon juice and the zest of one lemon. The zest adds a bright flavor. Then, mix in 3 cloves of minced garlic, 1 teaspoon of smoked paprika, and 1/2 teaspoon of cumin. Season with salt and pepper to taste. Toss everything until the chickpeas are nicely coated. This mix brings out the best flavors.
Roasting Process and Timing
Preheat your oven to 400°F (200°C). Spread the coated chickpeas on a baking sheet lined with parchment paper. Make sure they are in a single layer. This helps them cook evenly. Roast them for 25 to 30 minutes. Halfway through, shake the pan to ensure even roasting. Watch for a golden color and crisp texture. Once done, take them out and let them cool slightly. You can adjust the seasoning if needed. Garnish with chopped fresh parsley before serving. Enjoy your crunchy snack!
Tips & Tricks
Ensuring Crispy Texture
To get that perfect crunch, start with dry chickpeas. After rinsing, pat them with a clean towel. Remove as much moisture as you can. This step is key for crispiness. Use a single layer on your baking sheet. If they are piled up, they will steam instead of roast. Shake the pan halfway through to help them cook evenly.
Flavor Enhancements
For a zestier kick, add extra lemon juice or zest. You can also mix in different spices. Try adding cayenne for heat or garlic powder for more flavor. Fresh herbs like thyme or rosemary can make them pop. Feel free to experiment! These small changes can elevate the taste.
Common Mistakes to Avoid
Don’t skip the oil. It helps the spices stick and adds flavor. Be careful not to overcook the chickpeas. If they get too brown, they can taste burnt. Always taste before serving. Adjust seasoning if needed. Finally, avoid crowding the pan. It’s better to roast in batches if needed. This keeps them crispy and delicious.
Pro Tips
- Dry the Chickpeas: Make sure to thoroughly dry the chickpeas after rinsing to achieve maximum crispiness during roasting.
- Experiment with Spices: Feel free to customize the spice blend by adding your favorite herbs and spices, such as cayenne pepper for heat or oregano for an Italian twist.
- Store Properly: Store any leftovers in an airtight container at room temperature for up to 2 days. They may lose some crispiness but can be re-crisped in the oven.
- Perfect for Toppings: Use these roasted chickpeas as a crunchy topping for salads, soups, or grain bowls for added texture and nutrition.
Variations
Spicy Lemon Garlic Chickpeas
For a kick, add cayenne pepper or chili powder. Start with a pinch, then taste. You can also mix in a few drops of hot sauce. This will give your chickpeas a warm and bold flavor. Spicy lemon garlic chickpeas make a flavorful snack or topping. They pair well with creamy dips and cooling sauces.
Herb-Infused Versions
Add your favorite herbs to the mix for a fresh twist. Try dried oregano, thyme, or rosemary. Mixing in fresh herbs can also brighten the dish. Toss in a tablespoon of fresh basil or cilantro before roasting. The herbs add depth and aroma to your chickpeas. They are perfect for salads or grain bowls.
Other Flavor Combinations
You can get creative with other flavors, too. Swap lemon juice for lime juice for a zesty twist. Consider adding a teaspoon of curry powder for a warm flavor. You might also try nutritional yeast for a cheesy taste. Don't forget to play with spices like garlic powder or onion powder. Each combo brings a unique flair to your roasted chickpeas. Enjoy the journey of flavor exploration!
Storage Info
Best Practices for Storage
To keep your lemon garlic roasted chickpeas fresh, store them in an airtight container. Let them cool completely before sealing. This helps keep their crunch. You can use glass or plastic containers. If you want to keep them longer, use a resealable bag. Just remove as much air as you can before sealing.
How to Reheat Leftovers
Reheating roasted chickpeas is simple. Preheat your oven to 350°F (175°C). Spread the chickpeas on a baking sheet. Bake for about 10 minutes, or until they get hot and crispy again. You can also use an air fryer. Just set it to 350°F (175°C) and heat for around 5 minutes. This method keeps them crunchy and tasty.
Shelf Life of Roasted Chickpeas
Roasted chickpeas can last about 3 to 5 days at room temperature. They stay crispy for the first couple of days. After that, they might lose some crunch but still taste good. If you want to store them longer, keep them in the fridge. They can last up to a week in the fridge but may lose some texture. Enjoy them fresh for the best experience!
FAQs
Can I use dried chickpeas instead of canned?
Yes, you can use dried chickpeas. However, they require more time. First, soak them overnight in water. This helps them soften. After soaking, cook them until tender. This usually takes 1 to 2 hours. Rinse them well before seasoning. They will taste fresh and have a firm texture.
How can I make lemon garlic roasted chickpeas in an air fryer?
Making lemon garlic roasted chickpeas in an air fryer is easy. First, follow the same steps to coat the chickpeas with olive oil and spices. Then, place the chickpeas in the air fryer basket. Set the air fryer to 400°F (200°C). Cook for about 15 to 20 minutes. Shake the basket halfway through. This will help them cook evenly. They should be crispy and golden when done.
What are the health benefits of chickpeas?
Chickpeas are very healthy. They are high in protein, which helps build muscles. They also have a lot of fiber, which aids digestion. This can help you feel full longer. Chickpeas are rich in vitamins and minerals that support overall health. They are low in fat and can help maintain a healthy weight. Eating chickpeas can improve heart health too, making them a great snack choice.
You now have a guide for making tasty roasted chickpeas. We covered the best ingredients, helpful tips, and easy steps. You also learned about fun variations and smart storage tips. Roasted chickpeas are fun to eat and great for you. Experiment with flavors and share them with friends. Enjoy your cooking, and remember, practice makes perfect!