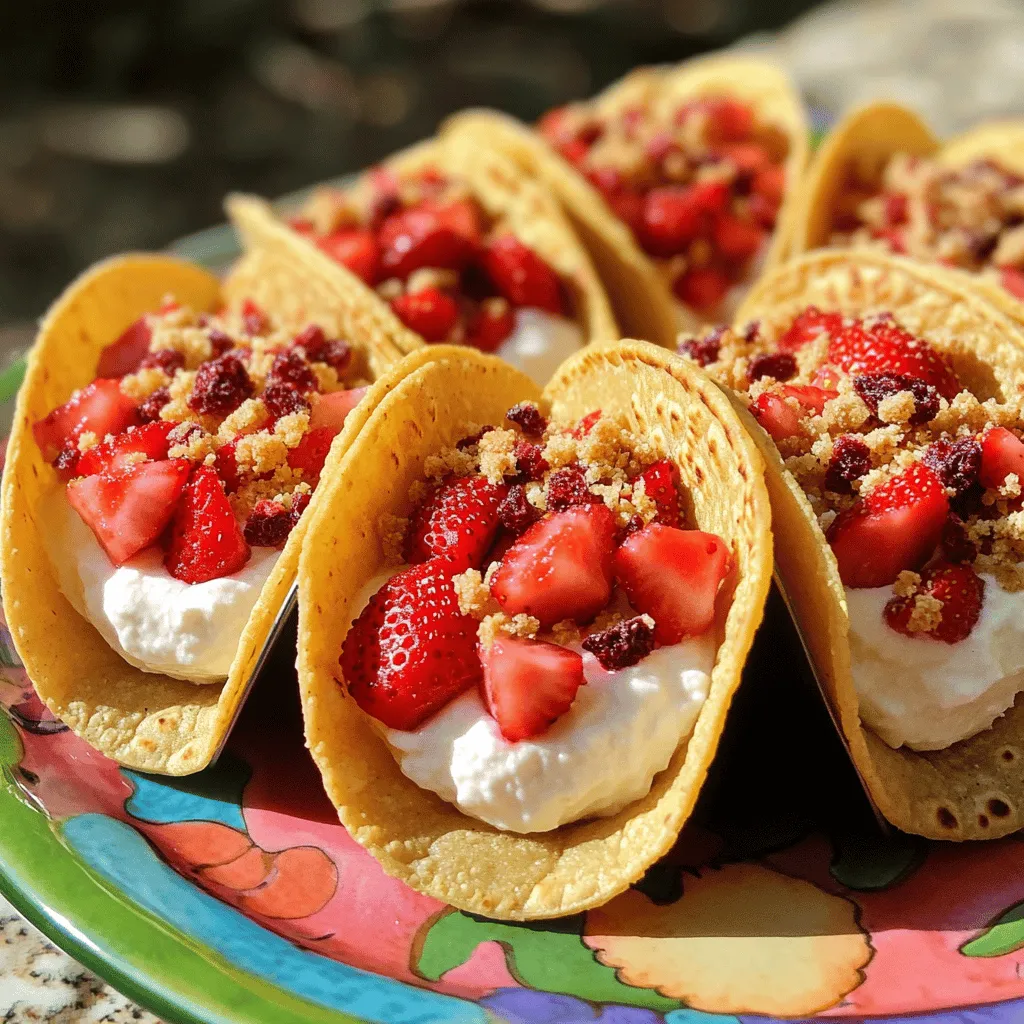
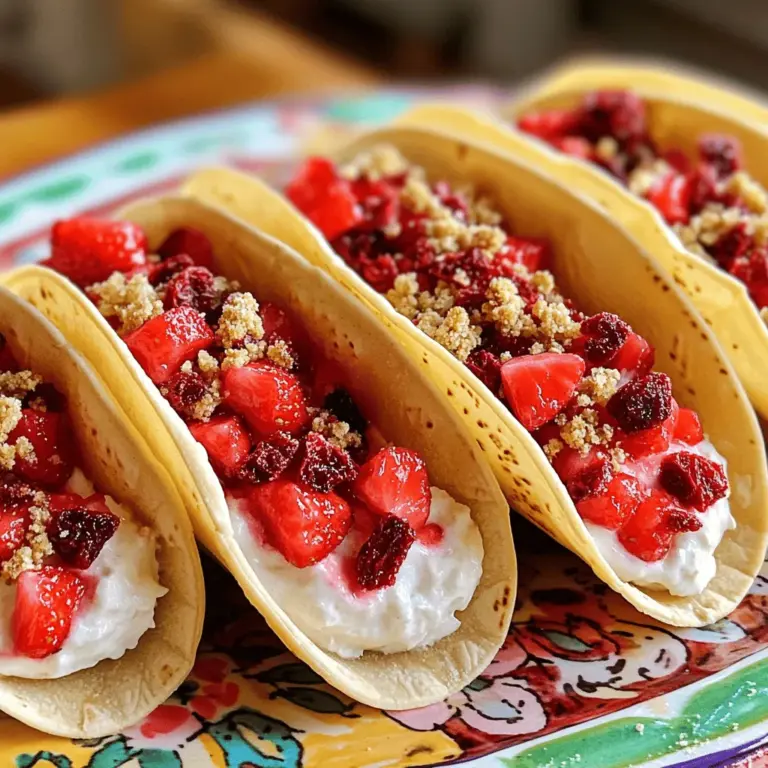
Get ready to impress your friends with my Strawberry Crunch Cheesecake Tacos! This sweet treat combines creamy cheesecake filling with crunchy taco shells, making it perfect for any occasion. Whether you’re hosting a summer party or simply craving a dessert, these tacos are both fun to make and eat. I’ll guide you through each step, so let’s dive into this delicious recipe that everyone will love!
Ingredients
Main Ingredients
- 1 cup graham cracker crumbs
- 1/2 cup crushed freeze-dried strawberries
- 1/4 cup unsalted butter, melted
- 8 oz cream cheese, softened
- 1/2 cup powdered sugar
- 1 tsp vanilla extract
- 1 cup heavy whipping cream
- 2 cups fresh strawberries, hulled and diced
- Taco shells (mini or regular size)
The core of our Strawberry Crunch Cheesecake Tacos lies in fresh, simple ingredients. The graham cracker crumbs give the shells a sweet crunch. The crushed freeze-dried strawberries add a fruity zing. Unsalted butter helps bind it all together.
Cream cheese is the star of the filling. It brings rich creaminess to the dish. You’ll sweeten it with powdered sugar. A touch of vanilla extract adds warmth and depth. Heavy whipping cream makes the filling light and fluffy.
Fresh strawberries provide a burst of flavor. They add texture and color to each taco. You can choose mini or regular taco shells, depending on your preference.
Optional Garnishes
- Extra crushed freeze-dried strawberries
- Mint leaves
- Strawberry sauce
Elevate your tacos with optional garnishes. Extra crushed freeze-dried strawberries give a nice crunch. Mint leaves add a pop of color and freshness. A drizzle of strawberry sauce enhances the sweet flavor.
Step-by-Step Instructions
Preparing the Crunch Shells
First, grab a mixing bowl. In it, mix the graham cracker crumbs with the crushed freeze-dried strawberries. This adds a fruity twist to the shells. Next, pour in the melted butter and mix everything well. You want a sandy texture that holds together.
Shaping the Shells
Now, preheat your oven to 350°F (175°C). Take your taco molds and press the mixture into them. Make sure to fill every corner. Use the bottom of a cup to create grooves. Bake these for about 10 to 12 minutes. Look for a nice golden brown color. Once done, let them cool completely on a wire rack.
Making the Cheesecake Filling
In a large bowl, start by beating the softened cream cheese until it’s smooth. This will take a minute. Next, add the powdered sugar and vanilla extract. Mix until everything is combined. In another bowl, whip the heavy cream until soft peaks form. Now, gently fold the whipped cream into the cheesecake mixture. This makes it light and fluffy.
Assembling the Tacos
Once your taco shells are cool, it’s time to fill them. Scoop a generous amount of cheesecake filling into each shell. Don’t be shy! Then, top each taco with diced fresh strawberries. This adds a pop of color and flavor.
Preparing the Crunch Topping
For the final touch, sprinkle extra crushed freeze-dried strawberries on top of each filled taco. This adds a delightful crunch that you will love.
Chilling and Serving
Put the assembled tacos in the fridge for at least 30 minutes. This helps the flavors blend and sets the filling. Serve them chilled for the best taste. Enjoy your delicious strawberry crunch cheesecake tacos!
Tips & Tricks
Perfecting the Taco Shells
To make the taco shells fun and unique, use different molds. You can make mini or regular-sized shells. This adds variety to your serving. Bake the shells until they turn lightly golden. This gives them the best texture. A crunchy shell holds the filling well.
Cheesecake Filling Tips
Start with softened cream cheese. Let it sit at room temperature for about 30 minutes. This makes mixing much easier. Taste the filling as you mix. Adjust the sweetness to your liking. You can add more or less powdered sugar based on your taste.
Serving Suggestions
These tacos are best served chilled. Place them in the fridge for 30 minutes before serving. They are great for parties or summer gatherings. Their bright colors catch the eye, and they taste amazing. For a fun touch, drizzle some strawberry sauce on top. Add mint leaves for a pop of color. Enjoy every bite of this delightful dessert!

Variations
Flavor Alternatives
You can change up the fruit in your tacos. Instead of strawberries, try blueberries or raspberries. These fruits add their own sweet and tangy twist. You can also switch the cheesecake flavor. Try lemon for a zesty kick or chocolate for a rich treat. Each option makes your tacos unique and fun.
Dietary Adjustments
If you need a gluten-free option, use gluten-free crackers instead of regular ones. This way, everyone can enjoy the tacos. For a vegan option, use dairy-free cream cheese and coconut cream. These swaps keep the taste delicious while fitting different diets.
Size Options
You can have mini tacos for a cute, bite-sized treat. They are perfect for kids or as party snacks. If you want a bigger serving, use regular-sized taco shells. Both sizes work well and let you share this fun dessert with friends and family.
Storage Info
Refrigeration Guidelines
Store your assembled tacos in an airtight container. This keeps them fresh. Make sure they are fully chilled before sealing. This way, they stay cool and tasty for your next treat.
Freezing Instructions
You can freeze the taco shells separately for later use. This helps keep them crunchy. When ready to serve, thaw the shells at room temperature. After thawing, assemble the tacos fresh. This keeps the flavors bright and delightful.
Shelf Life
These tacos will maintain optimal freshness in the fridge for about 2-3 days. After that, the shells may start to lose their crunch. Enjoy them while they are at their best for the best taste!
FAQs
Can I make the filling ahead of time?
Yes, prepare the cheesecake filling a day in advance. It will save time and allow flavors to blend well. Store it in the fridge in an airtight container. This way, you can focus on assembling the tacos later.
How do I prevent the shells from getting soggy?
Assemble tacos just before serving to maintain crunchiness. This keeps the shells firm and the filling fresh. If you must prepare early, keep the filling and shells separate until serving time.
Can I use store-bought taco shells?
Yes, store-bought shells can save time; just fill them. This option is great if you want to skip baking. Look for mini or regular sizes based on your preference. They can still taste amazing!
What can I substitute for freeze-dried strawberries?
Dehydrated fruits or other crunchy toppings may work. Try using crushed nuts or chocolate for a different twist. This can add a unique flavor and texture to your tacos.
Is the recipe suitable for children?
Yes, it’s a fun and delicious treat for all ages. Kids love the bright colors and sweet taste. They can even help assemble the tacos for a fun kitchen activity!
This post outlined how to make tasty cheesecake tacos. You learned about the main ingredients and optional garnishes. The step-by-step guide made it easy to create and assemble. I shared tips for perfecting your shell and filling. You can also explore fun variations and storage options.
These cheesecake tacos are great for gatherings and fun to eat. Enjoy making them your own!


