![To make the brownie base, gather these items: - 1 cup unsalted butter, melted - 2 cups granulated sugar - 4 large eggs - 1 teaspoon vanilla extract - 1 cup all-purpose flour - 1 cup unsweetened cocoa powder - ½ teaspoon salt These ingredients combine to create a rich and fudgy base. The melted butter and sugar make it sweet and moist. The cocoa powder gives it that deep chocolate flavor we all love. Next, let's focus on the chocolate mousse. You will need: - 1 cup heavy cream - 8 ounces bittersweet chocolate, chopped - 3 large eggs, room temperature - ½ cup granulated sugar - 1 teaspoon vanilla extract This mousse is light and creamy. The bittersweet chocolate adds a nice balance to the sweetness. Be sure to use room temperature eggs for a smooth texture. For the finishing touch, gather these garnishes: - Whipped cream - Chocolate shavings or cocoa powder These add a lovely look and taste. The whipped cream makes it extra fluffy. Chocolate shavings or cocoa powder give it a fancy touch. For the complete recipe, check the [Full Recipe]. To start, preheat your oven to 350°F (175°C). Grease a 9x13 inch baking pan or line it with parchment paper. This makes it easy to lift the brownies out later. In a bowl, mix 1 cup of melted butter with 2 cups of granulated sugar. Whisk until creamy. Next, add 4 large eggs one at a time. After each egg, whisk well to combine. Then, stir in 1 teaspoon of vanilla extract. In a separate bowl, sift together 1 cup of all-purpose flour, 1 cup of unsweetened cocoa powder, and ½ teaspoon of salt. Gradually fold this dry mix into the wet ingredients until just combined. Pour the brownie batter into your prepared pan. Smooth the top with a spatula. Bake for 25-30 minutes. To check if they are done, insert a toothpick into the center. It should come out with a few moist crumbs. Let the brownies cool completely in the pan before moving on to the mousse. For the mousse, place 8 ounces of chopped bittersweet chocolate in a heatproof bowl. Put this bowl over simmering water, stirring until the chocolate melts and is smooth. Set it aside to cool a bit. Next, in a new bowl, beat 1 cup of heavy cream on high speed until stiff peaks form. In another bowl, whisk together 3 large eggs and ½ cup of sugar until light and fluffy. Now, stir in the cooled melted chocolate and 1 teaspoon of vanilla extract. Mix until everything is well combined. Gently fold the whipped cream into the chocolate mixture. Do this carefully to keep the mousse light and airy. Now that both layers are ready, it's time to assemble. Pour the chocolate mousse over the cooled brownie layer. Use a spatula to smooth the top. Cover the pan and refrigerate for at least 4 hours, or until the mousse sets. When the mousse is firm, lift the brownies out of the pan using the parchment paper. Cut them into squares. For a special touch, serve each square with whipped cream and a sprinkle of chocolate shavings or cocoa powder. Find the Full Recipe for more details. Enjoy your delicious treat! To make the best brownies, start with fresh ingredients. Use unsalted butter for a rich taste. Make sure you measure your flour and cocoa powder correctly. Too much can lead to dry brownies. Mix the melted butter and sugar until creamy. This adds air and helps the brownies rise. Bake them for 25-30 minutes. Check with a toothpick; it should have a few moist crumbs. Let them cool fully before adding the mousse. For a light mousse, use cold heavy cream. Beat it until stiff peaks form. This will give your mousse a fluffy texture. When you mix in the melted chocolate, do it gently. Folding keeps the air in the cream. This step is key for a smooth finish. Let the mousse set in the fridge for at least 4 hours. This helps it firm up and makes it easier to slice. Presentation makes a big difference! Cut the brownies into squares for serving. Top each square with a dollop of whipped cream. Add chocolate shavings or a dusting of cocoa powder. You can also use fresh berries for color. Arrange the squares on a nice platter. This will impress your guests. Try these ideas to make your dessert stand out. For the full recipe, check out the complete instructions above. {{image_2}} You can change up the chocolate in your brownies and mousse. Use milk chocolate for a sweeter taste. Dark chocolate gives a rich flavor. If you want a twist, try white chocolate. Just remember, each type of chocolate has a different sweetness level. Adjust the sugar in your recipe if needed. Want to amp up the mousse flavor? Add some flavor extracts to the mix. A splash of coffee extract can enhance the chocolate taste. For a minty twist, use peppermint extract. You can also fold in some orange zest for a fresh taste. These small changes can make your mousse layer even more exciting. If you need a gluten-free option, swap the all-purpose flour with a gluten-free blend. Many blends work well for baking. Just make sure to check the packaging for the right amount to use. You could also use almond flour for a nutty flavor. This way, everyone can enjoy these tasty layered chocolate mousse brownies! Check out the Full Recipe for more details. To keep your layered chocolate mousse brownies fresh, store them in an airtight container. Place a piece of parchment paper between the layers to prevent sticking. This method helps keep each brownie intact and delicious. You can freeze these brownies for up to three months. First, cut them into squares. Wrap each square tightly in plastic wrap. Then, place them in a freezer-safe bag or container. Thaw them in the fridge overnight when you want to enjoy them. To maintain the best taste and texture, eat the brownies within one week if stored in the fridge. Keep them away from direct sunlight or heat. If you notice any signs of moisture, that means they are no longer fresh. For the best enjoyment, serve them cold or at room temperature. You can check the full recipe for more details on preparation. Yes, you can use milk chocolate or white chocolate for the mousse. Each type will give a unique taste. Milk chocolate will make it sweeter, while white chocolate adds a creamy texture. Choose a chocolate you love! Just remember to adjust the sugar if you use sweeter chocolate. You can use applesauce, banana, or silken tofu as substitutes for eggs. Each option will help bind the ingredients. Use ¼ cup of applesauce or mashed banana for each egg. For silken tofu, blend it until smooth and use ¼ cup per egg. These options work well in brownies and mousse. You can store the brownies in the fridge for up to one week. Keep them in an airtight container to maintain freshness. If you want to enjoy them longer, you can freeze them for up to three months. Just thaw them in the fridge before serving. Enjoy the deliciousness later! In this post, we explored how to make delicious layered chocolate mousse brownies. We covered the key ingredients, including those for the brownie base and mousse layer. You learned step-by-step instructions and helpful tips for baking and presentation. We also shared fun variations and storage tips so you can enjoy these treats longer. With these insights, you can impress friends and family. Enjoy creating your own tasty, layered brownies!](https://pagosarecipes.com/wp-content/uploads/2025/05/66c065d7-066f-4eea-a42a-9b3313fb0e3f-768x768.webp)
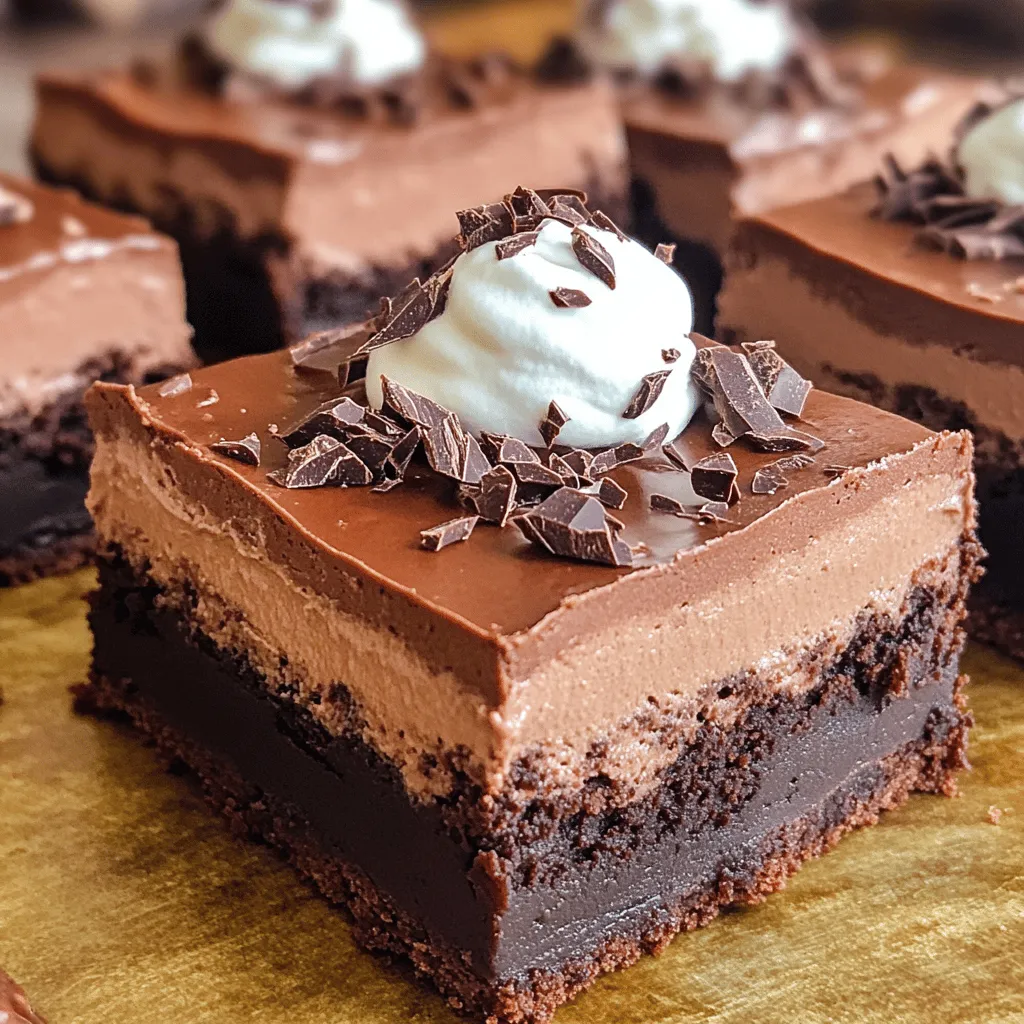
Get ready to indulge in a sweet delight with my Layered Chocolate Mousse Brownies! This treat combines rich, fudgy brownies with creamy chocolate mousse, creating a dessert that is sure to impress. You’ll learn step-by-step how to make this layered masterpiece, along with tips, variations, and storage advice. Dive in and discover how easy it is to whip up these delicious brownies for any occasion!
Ingredients
Ingredients for the Brownie Base
To make the brownie base, gather these items:
- 1 cup unsalted butter, melted
- 2 cups granulated sugar
- 4 large eggs
- 1 teaspoon vanilla extract
- 1 cup all-purpose flour
- 1 cup unsweetened cocoa powder
- ½ teaspoon salt
These ingredients combine to create a rich and fudgy base. The melted butter and sugar make it sweet and moist. The cocoa powder gives it that deep chocolate flavor we all love.
Ingredients for the Chocolate Mousse Layer
Next, let’s focus on the chocolate mousse. You will need:
- 1 cup heavy cream
- 8 ounces bittersweet chocolate, chopped
- 3 large eggs, room temperature
- ½ cup granulated sugar
- 1 teaspoon vanilla extract
This mousse is light and creamy. The bittersweet chocolate adds a nice balance to the sweetness. Be sure to use room temperature eggs for a smooth texture.
Garnish Ingredients
For the finishing touch, gather these garnishes:
- Whipped cream
- Chocolate shavings or cocoa powder
These add a lovely look and taste. The whipped cream makes it extra fluffy. Chocolate shavings or cocoa powder give it a fancy touch.
Step-by-Step Instructions
Preparing the Brownie Base
To start, preheat your oven to 350°F (175°C). Grease a 9×13 inch baking pan or line it with parchment paper. This makes it easy to lift the brownies out later. In a bowl, mix 1 cup of melted butter with 2 cups of granulated sugar. Whisk until creamy.
Next, add 4 large eggs one at a time. After each egg, whisk well to combine. Then, stir in 1 teaspoon of vanilla extract. In a separate bowl, sift together 1 cup of all-purpose flour, 1 cup of unsweetened cocoa powder, and ½ teaspoon of salt. Gradually fold this dry mix into the wet ingredients until just combined.
Pour the brownie batter into your prepared pan. Smooth the top with a spatula. Bake for 25-30 minutes. To check if they are done, insert a toothpick into the center. It should come out with a few moist crumbs. Let the brownies cool completely in the pan before moving on to the mousse.
Making the Chocolate Mousse Layer
For the mousse, place 8 ounces of chopped bittersweet chocolate in a heatproof bowl. Put this bowl over simmering water, stirring until the chocolate melts and is smooth. Set it aside to cool a bit.
Next, in a new bowl, beat 1 cup of heavy cream on high speed until stiff peaks form. In another bowl, whisk together 3 large eggs and ½ cup of sugar until light and fluffy. Now, stir in the cooled melted chocolate and 1 teaspoon of vanilla extract. Mix until everything is well combined.
Gently fold the whipped cream into the chocolate mixture. Do this carefully to keep the mousse light and airy.
Assembling the Layered Chocolate Mousse Brownies
Now that both layers are ready, it’s time to assemble. Pour the chocolate mousse over the cooled brownie layer. Use a spatula to smooth the top. Cover the pan and refrigerate for at least 4 hours, or until the mousse sets.
When the mousse is firm, lift the brownies out of the pan using the parchment paper. Cut them into squares. For a special touch, serve each square with whipped cream and a sprinkle of chocolate shavings or cocoa powder.Enjoy your delicious treat!
Tips & Tricks
Baking Tips for Perfect Brownies
To make the best brownies, start with fresh ingredients. Use unsalted butter for a rich taste. Make sure you measure your flour and cocoa powder correctly. Too much can lead to dry brownies. Mix the melted butter and sugar until creamy. This adds air and helps the brownies rise. Bake them for 25-30 minutes. Check with a toothpick; it should have a few moist crumbs. Let them cool fully before adding the mousse.
Achieving the Best Chocolate Mousse Texture
For a light mousse, use cold heavy cream. Beat it until stiff peaks form. This will give your mousse a fluffy texture. When you mix in the melted chocolate, do it gently. Folding keeps the air in the cream. This step is key for a smooth finish. Let the mousse set in the fridge for at least 4 hours. This helps it firm up and makes it easier to slice.
Presentation Ideas for Serving
Presentation makes a big difference! Cut the brownies into squares for serving. Top each square with a dollop of whipped cream. Add chocolate shavings or a dusting of cocoa powder. You can also use fresh berries for color. Arrange the squares on a nice platter. This will impress your guests. Try these ideas to make your dessert stand out.
Variations
Alternative Chocolate Options
You can change up the chocolate in your brownies and mousse. Use milk chocolate for a sweeter taste. Dark chocolate gives a rich flavor. If you want a twist, try white chocolate. Just remember, each type of chocolate has a different sweetness level. Adjust the sugar in your recipe if needed.
Adding Flavor to the Mousse Layer
Want to amp up the mousse flavor? Add some flavor extracts to the mix. A splash of coffee extract can enhance the chocolate taste. For a minty twist, use peppermint extract. You can also fold in some orange zest for a fresh taste. These small changes can make your mousse layer even more exciting.
Gluten-Free Substitutes
If you need a gluten-free option, swap the all-purpose flour with a gluten-free blend. Many blends work well for baking. Just make sure to check the packaging for the right amount to use. You could also use almond flour for a nutty flavor. This way, everyone can enjoy these tasty layered chocolate mousse brownies!
Storage Info
How to Store Layered Chocolate Mousse Brownies
To keep your layered chocolate mousse brownies fresh, store them in an airtight container. Place a piece of parchment paper between the layers to prevent sticking. This method helps keep each brownie intact and delicious.
Freezing Instructions
You can freeze these brownies for up to three months. First, cut them into squares. Wrap each square tightly in plastic wrap. Then, place them in a freezer-safe bag or container. Thaw them in the fridge overnight when you want to enjoy them.
Best Practices for Keeping Freshness
To maintain the best taste and texture, eat the brownies within one week if stored in the fridge. Keep them away from direct sunlight or heat. If you notice any signs of moisture, that means they are no longer fresh. For the best enjoyment, serve them cold or at room temperature.
FAQs
Can I use a different type of chocolate for the mousse?
Yes, you can use milk chocolate or white chocolate for the mousse. Each type will give a unique taste. Milk chocolate will make it sweeter, while white chocolate adds a creamy texture. Choose a chocolate you love! Just remember to adjust the sugar if you use sweeter chocolate.
What can I substitute for eggs in this recipe?
You can use applesauce, banana, or silken tofu as substitutes for eggs. Each option will help bind the ingredients. Use ¼ cup of applesauce or mashed banana for each egg. For silken tofu, blend it until smooth and use ¼ cup per egg. These options work well in brownies and mousse.
How long can I store the brownies in the fridge?
You can store the brownies in the fridge for up to one week. Keep them in an airtight container to maintain freshness. If you want to enjoy them longer, you can freeze them for up to three months. Just thaw them in the fridge before serving. Enjoy the deliciousness later!
In this post, we explored how to make delicious layered chocolate mousse brownies. We covered the key ingredients, including those for the brownie base and mousse layer. You learned step-by-step instructions and helpful tips for baking and presentation. We also shared fun variations and storage tips so you can enjoy these treats longer. With these insights, you can impress friends and family. Enjoy creating your own tasty, layered brownies!
![To make the brownie base, gather these items: - 1 cup unsalted butter, melted - 2 cups granulated sugar - 4 large eggs - 1 teaspoon vanilla extract - 1 cup all-purpose flour - 1 cup unsweetened cocoa powder - ½ teaspoon salt These ingredients combine to create a rich and fudgy base. The melted butter and sugar make it sweet and moist. The cocoa powder gives it that deep chocolate flavor we all love. Next, let's focus on the chocolate mousse. You will need: - 1 cup heavy cream - 8 ounces bittersweet chocolate, chopped - 3 large eggs, room temperature - ½ cup granulated sugar - 1 teaspoon vanilla extract This mousse is light and creamy. The bittersweet chocolate adds a nice balance to the sweetness. Be sure to use room temperature eggs for a smooth texture. For the finishing touch, gather these garnishes: - Whipped cream - Chocolate shavings or cocoa powder These add a lovely look and taste. The whipped cream makes it extra fluffy. Chocolate shavings or cocoa powder give it a fancy touch. For the complete recipe, check the [Full Recipe]. To start, preheat your oven to 350°F (175°C). Grease a 9x13 inch baking pan or line it with parchment paper. This makes it easy to lift the brownies out later. In a bowl, mix 1 cup of melted butter with 2 cups of granulated sugar. Whisk until creamy. Next, add 4 large eggs one at a time. After each egg, whisk well to combine. Then, stir in 1 teaspoon of vanilla extract. In a separate bowl, sift together 1 cup of all-purpose flour, 1 cup of unsweetened cocoa powder, and ½ teaspoon of salt. Gradually fold this dry mix into the wet ingredients until just combined. Pour the brownie batter into your prepared pan. Smooth the top with a spatula. Bake for 25-30 minutes. To check if they are done, insert a toothpick into the center. It should come out with a few moist crumbs. Let the brownies cool completely in the pan before moving on to the mousse. For the mousse, place 8 ounces of chopped bittersweet chocolate in a heatproof bowl. Put this bowl over simmering water, stirring until the chocolate melts and is smooth. Set it aside to cool a bit. Next, in a new bowl, beat 1 cup of heavy cream on high speed until stiff peaks form. In another bowl, whisk together 3 large eggs and ½ cup of sugar until light and fluffy. Now, stir in the cooled melted chocolate and 1 teaspoon of vanilla extract. Mix until everything is well combined. Gently fold the whipped cream into the chocolate mixture. Do this carefully to keep the mousse light and airy. Now that both layers are ready, it's time to assemble. Pour the chocolate mousse over the cooled brownie layer. Use a spatula to smooth the top. Cover the pan and refrigerate for at least 4 hours, or until the mousse sets. When the mousse is firm, lift the brownies out of the pan using the parchment paper. Cut them into squares. For a special touch, serve each square with whipped cream and a sprinkle of chocolate shavings or cocoa powder. Find the Full Recipe for more details. Enjoy your delicious treat! To make the best brownies, start with fresh ingredients. Use unsalted butter for a rich taste. Make sure you measure your flour and cocoa powder correctly. Too much can lead to dry brownies. Mix the melted butter and sugar until creamy. This adds air and helps the brownies rise. Bake them for 25-30 minutes. Check with a toothpick; it should have a few moist crumbs. Let them cool fully before adding the mousse. For a light mousse, use cold heavy cream. Beat it until stiff peaks form. This will give your mousse a fluffy texture. When you mix in the melted chocolate, do it gently. Folding keeps the air in the cream. This step is key for a smooth finish. Let the mousse set in the fridge for at least 4 hours. This helps it firm up and makes it easier to slice. Presentation makes a big difference! Cut the brownies into squares for serving. Top each square with a dollop of whipped cream. Add chocolate shavings or a dusting of cocoa powder. You can also use fresh berries for color. Arrange the squares on a nice platter. This will impress your guests. Try these ideas to make your dessert stand out. For the full recipe, check out the complete instructions above. {{image_2}} You can change up the chocolate in your brownies and mousse. Use milk chocolate for a sweeter taste. Dark chocolate gives a rich flavor. If you want a twist, try white chocolate. Just remember, each type of chocolate has a different sweetness level. Adjust the sugar in your recipe if needed. Want to amp up the mousse flavor? Add some flavor extracts to the mix. A splash of coffee extract can enhance the chocolate taste. For a minty twist, use peppermint extract. You can also fold in some orange zest for a fresh taste. These small changes can make your mousse layer even more exciting. If you need a gluten-free option, swap the all-purpose flour with a gluten-free blend. Many blends work well for baking. Just make sure to check the packaging for the right amount to use. You could also use almond flour for a nutty flavor. This way, everyone can enjoy these tasty layered chocolate mousse brownies! Check out the Full Recipe for more details. To keep your layered chocolate mousse brownies fresh, store them in an airtight container. Place a piece of parchment paper between the layers to prevent sticking. This method helps keep each brownie intact and delicious. You can freeze these brownies for up to three months. First, cut them into squares. Wrap each square tightly in plastic wrap. Then, place them in a freezer-safe bag or container. Thaw them in the fridge overnight when you want to enjoy them. To maintain the best taste and texture, eat the brownies within one week if stored in the fridge. Keep them away from direct sunlight or heat. If you notice any signs of moisture, that means they are no longer fresh. For the best enjoyment, serve them cold or at room temperature. You can check the full recipe for more details on preparation. Yes, you can use milk chocolate or white chocolate for the mousse. Each type will give a unique taste. Milk chocolate will make it sweeter, while white chocolate adds a creamy texture. Choose a chocolate you love! Just remember to adjust the sugar if you use sweeter chocolate. You can use applesauce, banana, or silken tofu as substitutes for eggs. Each option will help bind the ingredients. Use ¼ cup of applesauce or mashed banana for each egg. For silken tofu, blend it until smooth and use ¼ cup per egg. These options work well in brownies and mousse. You can store the brownies in the fridge for up to one week. Keep them in an airtight container to maintain freshness. If you want to enjoy them longer, you can freeze them for up to three months. Just thaw them in the fridge before serving. Enjoy the deliciousness later! In this post, we explored how to make delicious layered chocolate mousse brownies. We covered the key ingredients, including those for the brownie base and mousse layer. You learned step-by-step instructions and helpful tips for baking and presentation. We also shared fun variations and storage tips so you can enjoy these treats longer. With these insights, you can impress friends and family. Enjoy creating your own tasty, layered brownies!](https://pagosarecipes.com/wp-content/uploads/2025/05/66c065d7-066f-4eea-a42a-9b3313fb0e3f-250x250.webp)
