If you love warm, sweet treats, then you’ll adore these Apple Cider Glazed Donut Holes! This easy recipe packs all the cozy flavors of fall in every bite. I’ll guide you through the simple steps to make these delicious bites, so you can enjoy them fresh from your kitchen. Grab your apron and let’s dive into this tasty experience that will make your taste buds dance!
Why I Love This Recipe
- Delicious Flavor: The combination of apple cider, cinnamon, and nutmeg creates a warm and cozy flavor profile that’s perfect for fall.
- Easy to Make: This recipe is straightforward and doesn’t require any special equipment, making it accessible for bakers of all levels.
- Perfect for Sharing: With 24 donut holes, these treats are ideal for gatherings, parties, or family brunches.
- Customizable: You can easily adjust the spices or add toppings to suit your personal taste, making each batch unique!
Ingredients
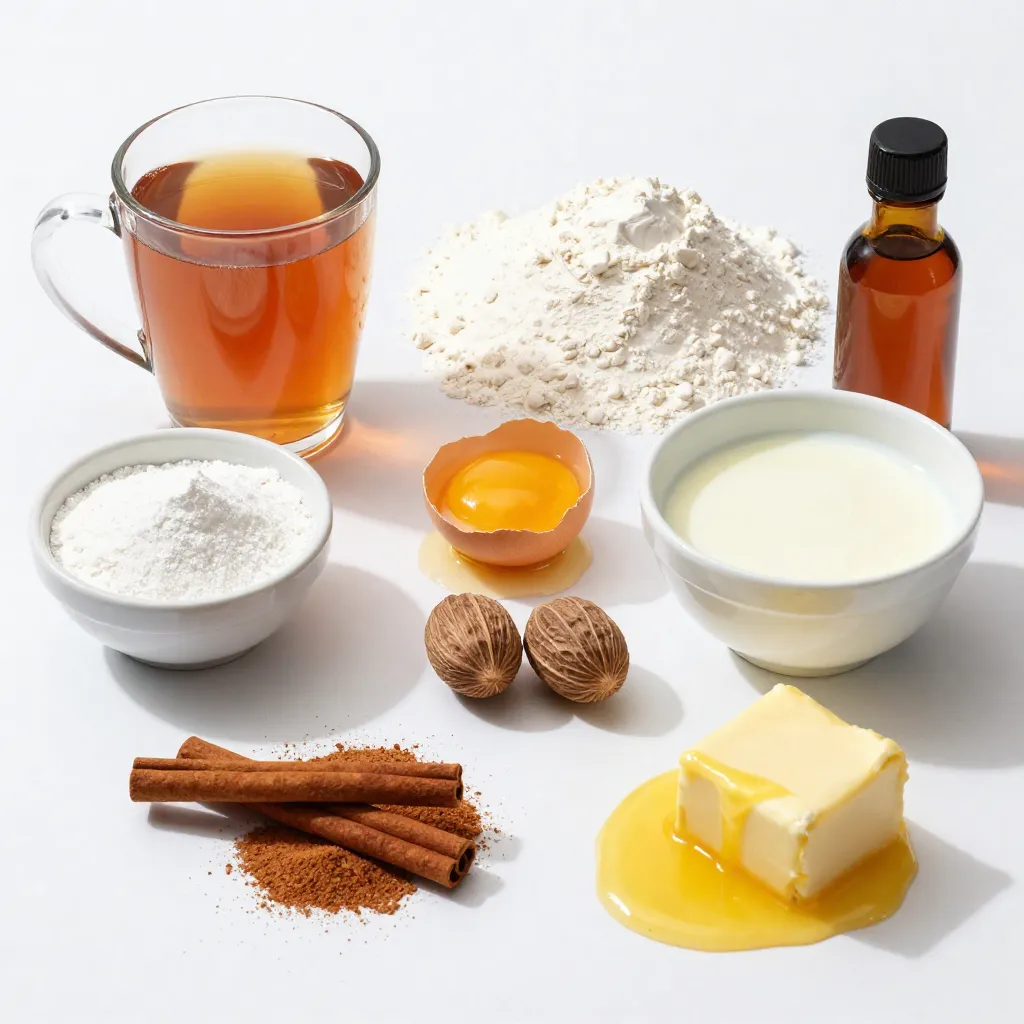
List of Ingredients
– 1 cup apple cider
– 2 cups all-purpose flour
– 1/2 cup granulated sugar
– 2 tsp baking powder
– 1/2 tsp baking soda
– 1/2 tsp salt
– 1/2 tsp ground cinnamon
– 1/4 tsp ground nutmeg
– 2 large eggs
– 1/2 cup buttermilk
– 1/4 cup unsalted butter, melted
– 1 tsp vanilla extract
For the glaze:
– 1 cup powdered sugar
– 2-3 tablespoons apple cider
– 1/2 tsp ground cinnamon
Optional Add-ins
You can make your donut holes even better. Try adding:
– Chopped apples for a fruity bite.
– Mini chocolate chips for a sweet twist.
– Chopped nuts for a crunchy texture.
Tips for Choosing Ingredients
When picking ingredients, I recommend using fresh apple cider. It gives great flavor. Use high-quality butter for richness. Choose a good brand of vanilla extract for depth. Always measure flour correctly. Too much can make your donut holes dense. For spices, fresh ground cinnamon and nutmeg always taste best.
Step-by-Step Instructions
Detailed Preparation Steps
1. Reduce the apple cider: Start by pouring 1 cup of apple cider into a small saucepan. Heat it on medium until it boils. Then, let it simmer for 10-15 minutes. You want it to reduce to about 1/4 cup. Take it off the heat and let it cool a bit.
2. Preheat the oven: While the cider cools, set your oven to 350°F (175°C). Grease a mini donut hole pan with non-stick spray or some melted butter. This helps the donut holes pop out easily.
3. Mix the dry ingredients: Grab a large mixing bowl. Whisk together 2 cups of all-purpose flour, 1/2 cup of granulated sugar, 2 tsp of baking powder, 1/2 tsp of baking soda, 1/2 tsp of salt, 1/2 tsp of ground cinnamon, and 1/4 tsp of ground nutmeg. Make sure they are well combined.
4. Combine wet ingredients: In another bowl, mix 2 large eggs, 1/2 cup of buttermilk, 1/4 cup of melted unsalted butter, 1 tsp of vanilla extract, and the reduced cider. Whisk them until smooth.
5. Combine wet and dry mixtures: Slowly add the wet mix to the dry mix. Stir gently until just combined. Do not overmix, as this can make the donut holes tough.
6. Fill the donut hole pan: Use a spoon or a piping bag to fill each cavity of the donut hole pan about 2/3 full with the batter. This ensures they have room to rise.
7. Bake: Place the pan in the oven and bake for 10-12 minutes. Check for doneness by inserting a toothpick. If it comes out clean, they are ready.
8. Prepare the glaze: In a medium bowl, mix 1 cup of powdered sugar, 1/2 tsp of ground cinnamon, and enough apple cider (2-3 tablespoons) to make a smooth glaze. You want it pourable but not too runny.
9. Glaze the donut holes: Once the donut holes cool enough to handle, dip them into the glaze. Let the excess drip off. Place them on a wire rack for a few minutes to set.
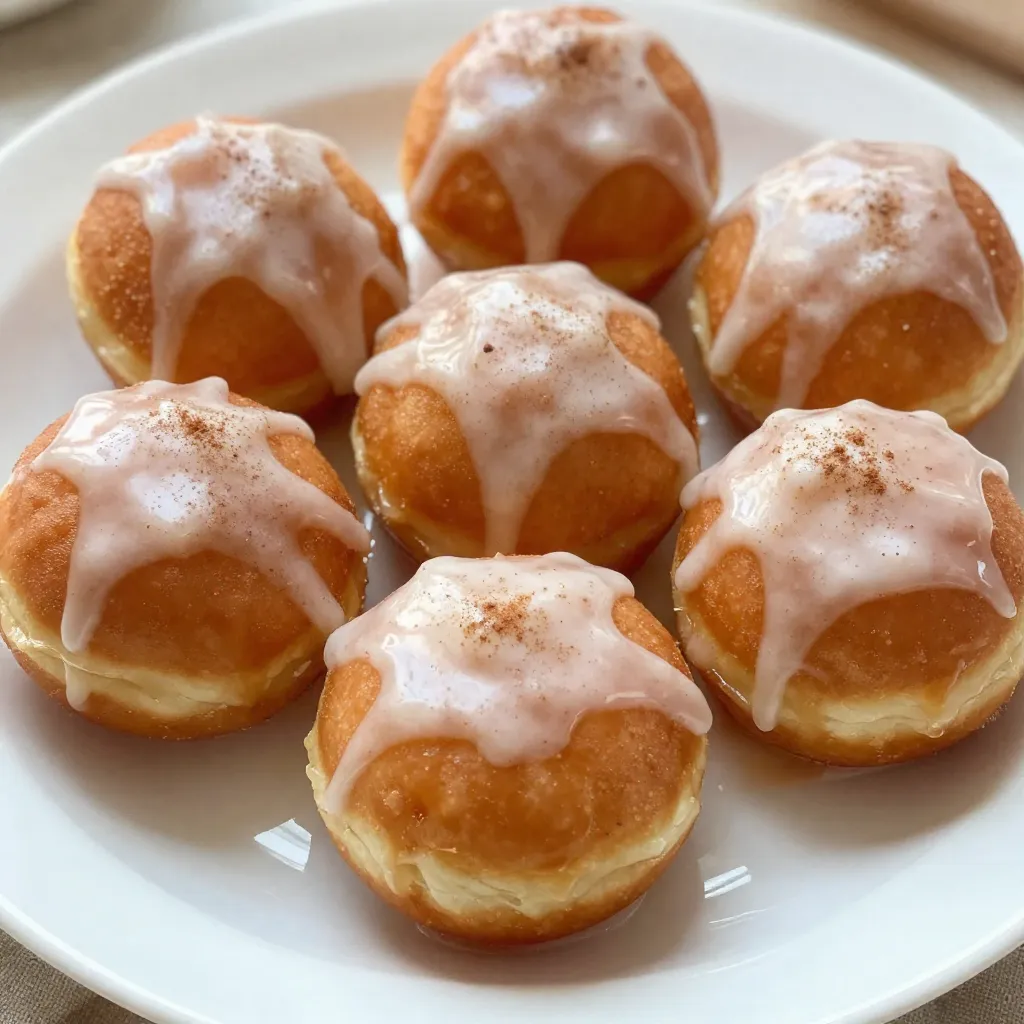
10. Serve and enjoy: These donut holes are best warm. Serve with extra apple cider for a tasty fall treat.
Baking Times and Temperatures
– Preheat your oven to 350°F (175°C).
– Bake the donut holes for 10-12 minutes. Keep an eye on them. They should be golden brown.
Visual Guide for Each Step
– Step 1: Show a saucepan with bubbling apple cider.
– Step 2: Display the greased donut hole pan ready for batter.
– Step 3: Highlight a bowl filled with dry ingredients whisked together.
– Step 4: Capture a smooth mixture of wet ingredients in a bowl.
– Step 5: Illustrate the mixing process of wet and dry ingredients.
– Step 6: Include an image of the pan filled with batter.
– Step 7: Show the donut holes baking in the oven.
– Step 8: Display the glaze being mixed in a bowl.
– Step 9: Capture the donut holes being dipped in the glaze.
– Step 10: Present the final product on a plate, ready to be eaten.
Tips & Tricks
Common Baking Mistakes to Avoid
Baking can be tricky. Here are some common mistakes to watch for.
– Overmixing: When you mix the wet and dry ingredients, stop when just combined. Overmixing makes the donuts tough.
– Wrong Oven Temp: Always preheat your oven. If it’s too hot or too cold, baking times change.
– Incorrect Measuring: Use the right measuring cups. Too much flour can make your donuts dry.
Enhancing Flavor with Spices
Spices make your donut holes special. Here are some ideas to boost flavor.
– Cinnamon and Nutmeg: These spices add warmth. Use them as the recipe states.
– Ginger: A pinch of ground ginger adds a nice zing. It pairs well with apple cider.
– Vanilla Extract: Always use pure vanilla extract for the best taste.
Techniques for Perfect Glaze
A good glaze makes your donut holes shine. Here’s how to get it just right.
– Right Consistency: Mix the powdered sugar and cider until smooth. It should flow but not be too runny.
– Dip Quickly: Once the donut holes cool, dip them right away. This helps the glaze stick better.
– Set on Wire Rack: Let the glazed donut holes sit on a wire rack. This keeps them from getting soggy.
These tips will help you bake and glaze like a pro! Enjoy your delicious apple cider glazed donut holes.
Pro Tips
- Reduce the Cider Fully: Make sure to reduce the apple cider until it’s thick and syrupy. This intensifies the flavor and sweetness in your donut holes.
- Don’t Overmix: When combining the wet and dry ingredients, mix until just combined. Overmixing can lead to dense donut holes.
- Use a Piping Bag: For easy filling of the donut hole pan, consider using a piping bag to avoid mess and ensure even distribution of batter.
- Glaze While Warm: For best results, glaze the donut holes while they are still warm. This helps the glaze to adhere better and creates a delightful finish.
Variations
Creative Flavor Additions
You can mix things up with fun flavors. Try adding pumpkin spice for a fall twist. You could also add some chopped nuts, like pecans or walnuts, for a nice crunch. If you like fruits, small pieces of apple or pear work well too. For a sweet touch, fold in mini chocolate chips. These little changes keep each batch exciting!
Gluten-Free or Dairy-Free Options
If you need gluten-free donut holes, use a gluten-free flour blend. Look for one that has xanthan gum for better texture. For dairy-free options, swap buttermilk with almond milk or oat milk. You can also use coconut oil instead of butter. These swaps help everyone enjoy the treat together, no matter their diet.
Different Glazing Techniques
Glazing can be a fun part! Instead of dipping, you can drizzle the glaze over the donut holes using a spoon. This gives a nice look and allows the glaze to soak in a bit. For a thicker glaze, add more powdered sugar. If you want to add color, mix in a few drops of food coloring. Each technique adds a unique touch to your donut holes!
Storage Info
How to Store Donut Holes
To keep your apple cider glazed donut holes fresh, store them in an airtight container. This helps keep them moist and tasty. You can leave them at room temperature for up to three days. If you want to save them for longer, consider freezing.
Freezing Instructions
To freeze donut holes, let them cool completely. Place them on a baking sheet in a single layer. Once they are frozen solid, transfer them to a freezer-safe bag. Remove as much air as possible. They can last up to three months in the freezer. This method keeps their flavor and texture intact.
Reheating Tips for Freshness
When you’re ready to enjoy your frozen donut holes, reheating is easy. Preheat your oven to 350°F (175°C). Place the donut holes on a baking sheet. Heat them for about 5 to 7 minutes. This warms them up while keeping them soft. You can also microwave them for 15-20 seconds if you’re in a hurry. Enjoy them warm for the best taste!
FAQs
What is the best way to serve Apple Cider Glazed Donut Holes?
Serve these donut holes warm. They taste best fresh from the oven. You can place them on a nice plate for a pretty look. Add a small bowl of extra apple cider for dipping. This adds a fun twist!
Can I use different types of cider?
Yes, you can use different ciders! You can try hard cider for a richer flavor. Just remember, it may change the taste a bit. Fresh apple cider works great too. It brings out that sweet, fruity taste we love.
How long do these donut holes last?
These donut holes are best eaten fresh. They last for about two days at room temperature. To keep them longer, store them in an airtight container. You can freeze them for up to a month. Just thaw and warm them for a tasty treat!
In this post, I shared the ingredients, steps, and tips for making apple cider glazed donut holes. I discussed how to pick the best ingredients and avoid common baking mistakes. The variations allow you to customize your donut holes to suit your taste. Remember, proper storage keeps them fresh longer. These tips ensure you can enjoy perfect donut holes any time. Experiment, have fun, and enjoy your tasty treat


