Warm Maple Spiced Apple Toddy Cozy Holiday Drink
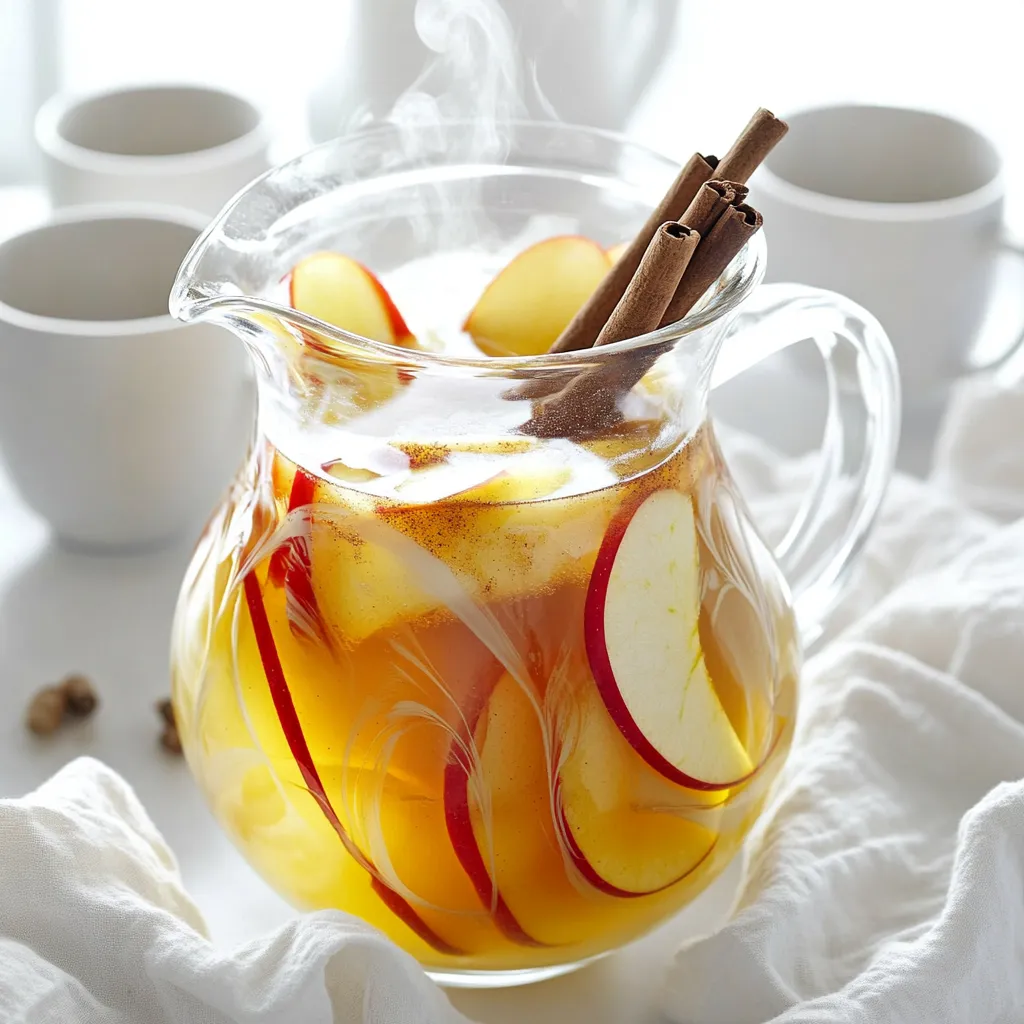
Looking for a cozy drink to warm you up this holiday season? The Warm Maple Spiced Apple Toddy is your

Looking for a cozy drink to warm you up this holiday season? The Warm Maple Spiced Apple Toddy is your

Get ready to treat yourself! These No-Bake White Chocolate Peppermint Bark Bars are simple, tasty, and perfect for any holiday.

Craving a quick, spicy meal? You’re in the right place! My Minute Spicy Chili Garlic Ramen recipe is not only
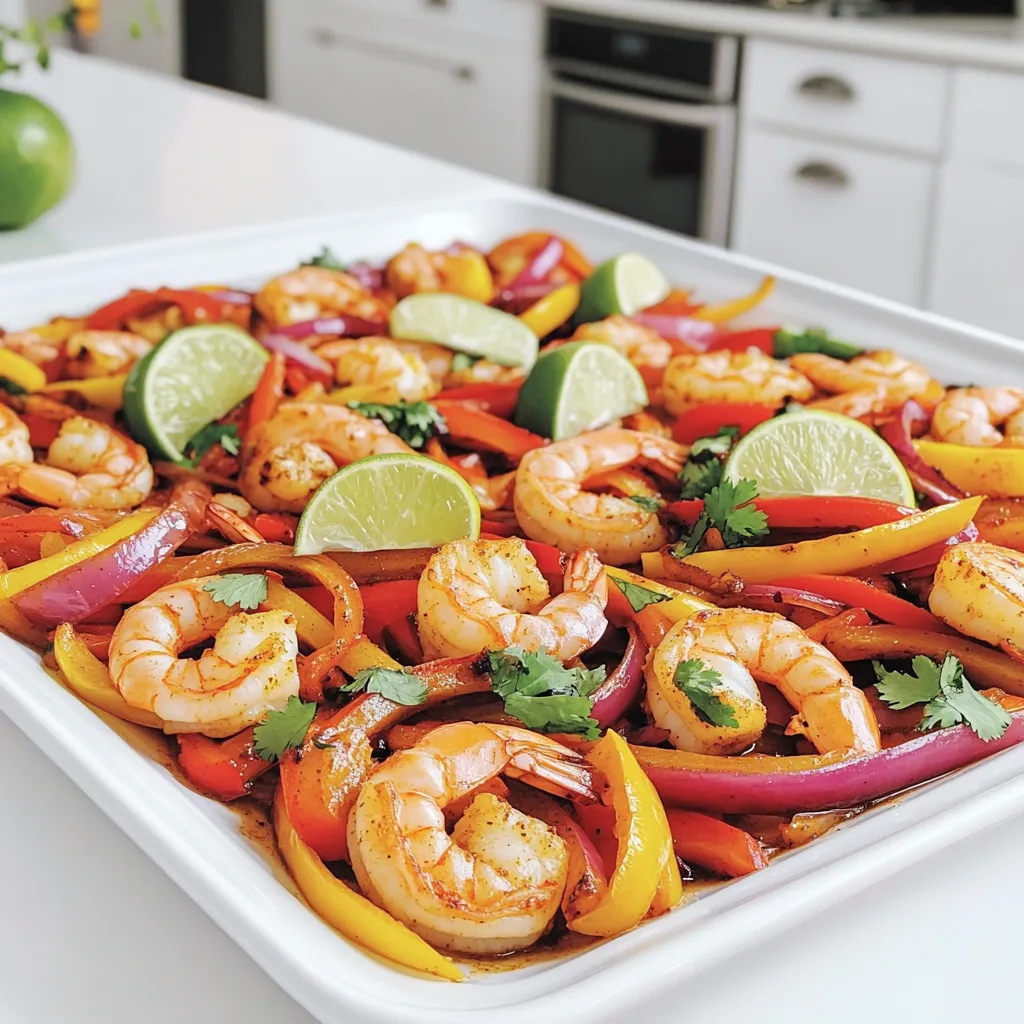
Get ready to excite your taste buds with my Sheet-Pan Garlic Butter Shrimp Fajitas! This dish blends tender shrimp with
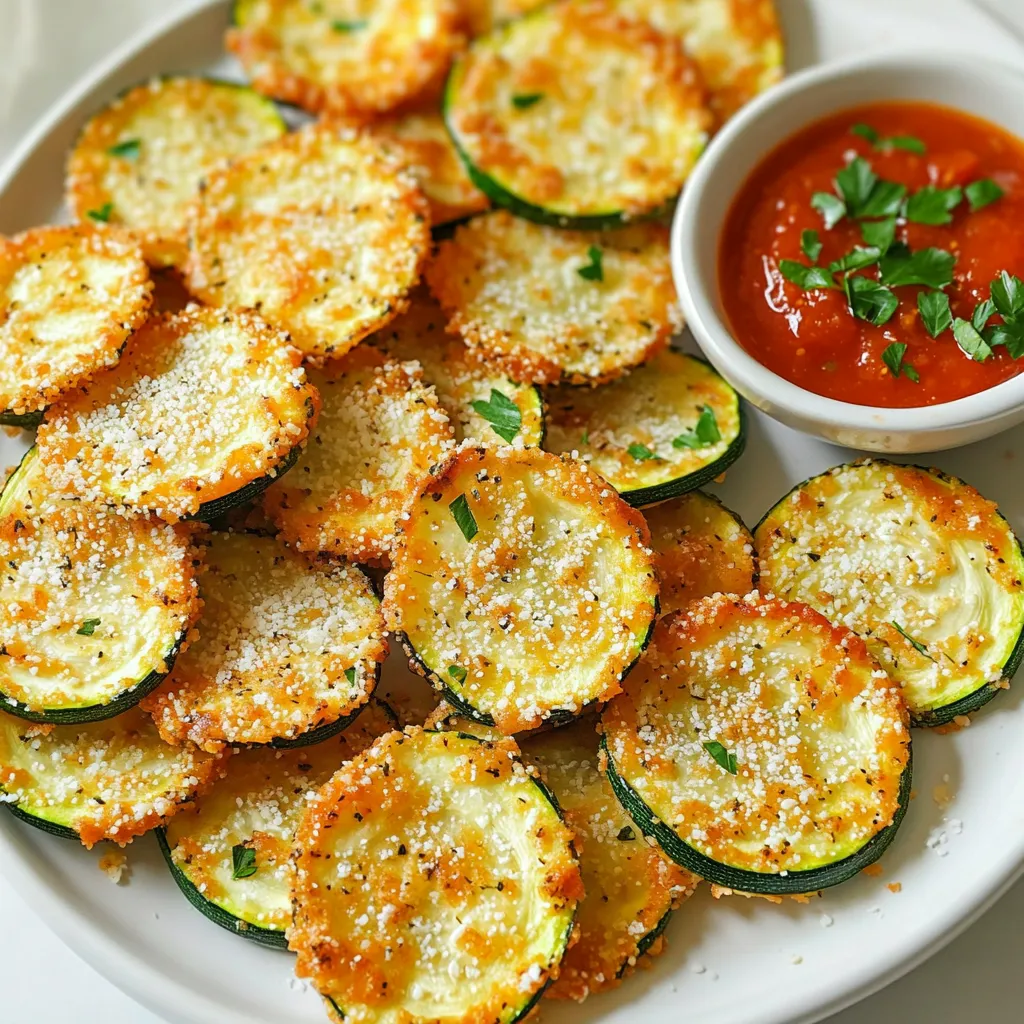
Looking for a healthy snack that’s packed with flavor? You’ve hit the jackpot with these Air Fryer Crispy Parmesan Zucchini
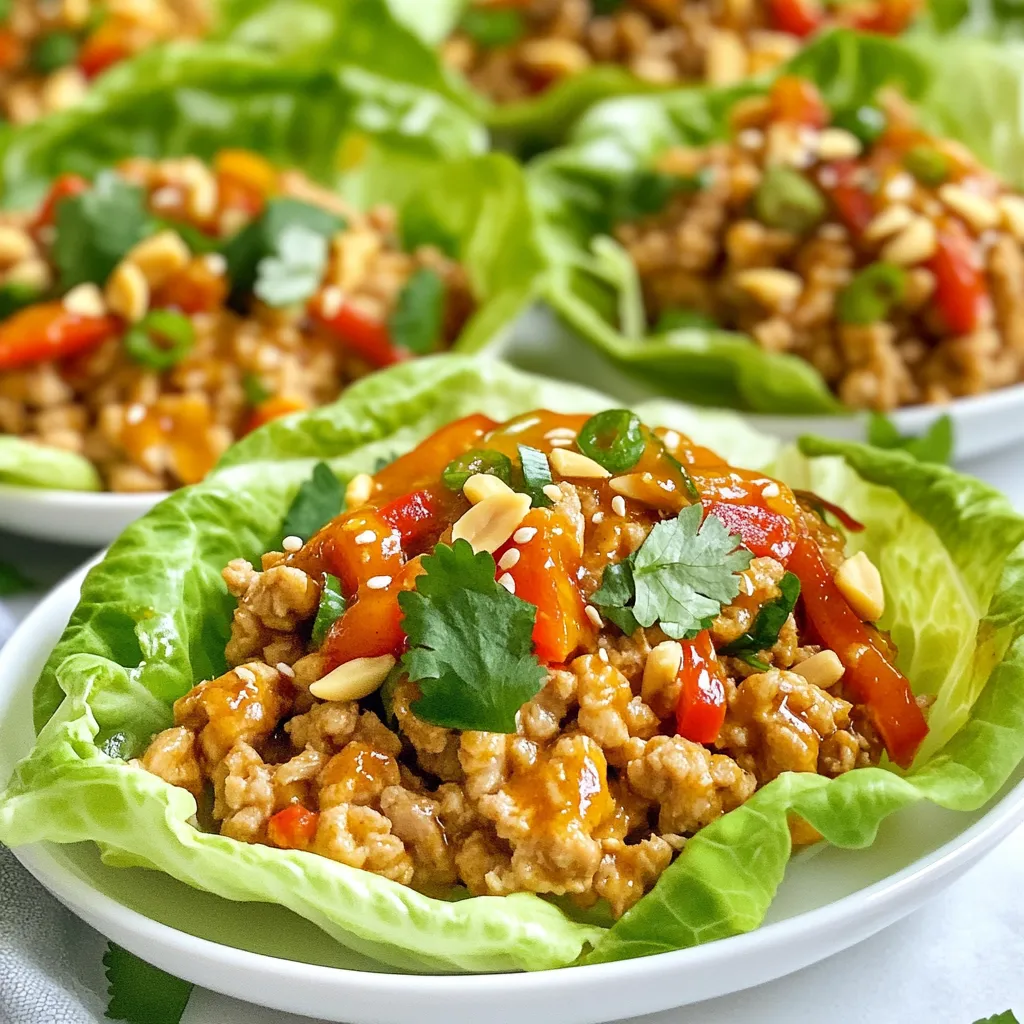
Get ready to impress your taste buds with Sweet Chili Chicken Lettuce Wraps! This delightful meal prep will help you
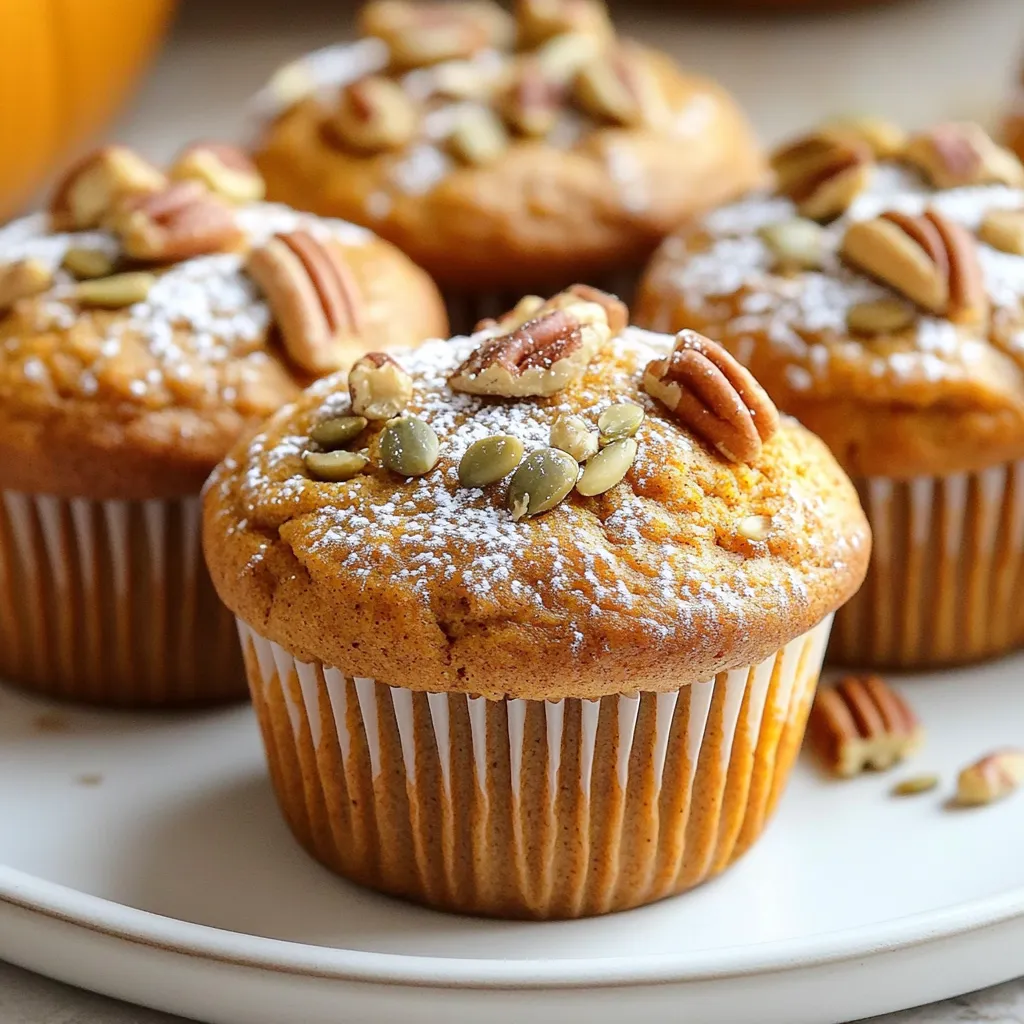
Do you crave the warm, cozy flavors of fall? Let me show you how to make bakery-style pumpkin spice muffins

Looking for a quick and tasty dinner? This Creamy Tomato Basil Orzo One Pot meal is just what you need!
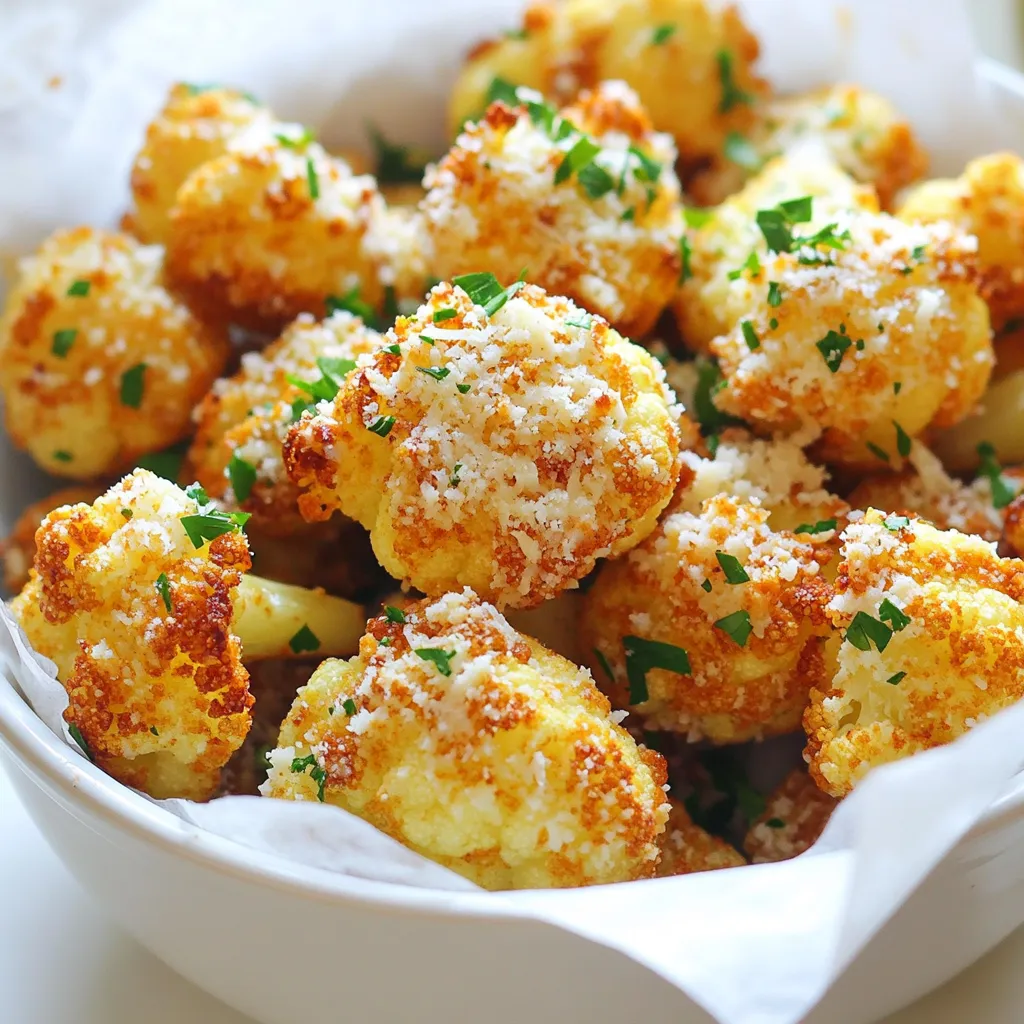
If you’re craving a tasty snack that’s healthy and easy, I’ve got just the thing for you: Garlic Parmesan Cauliflower

If you’re craving a warm, hearty meal, you’ve landed in the right spot! This Delicious Chicken Tortilla Soup Slow Cooker
