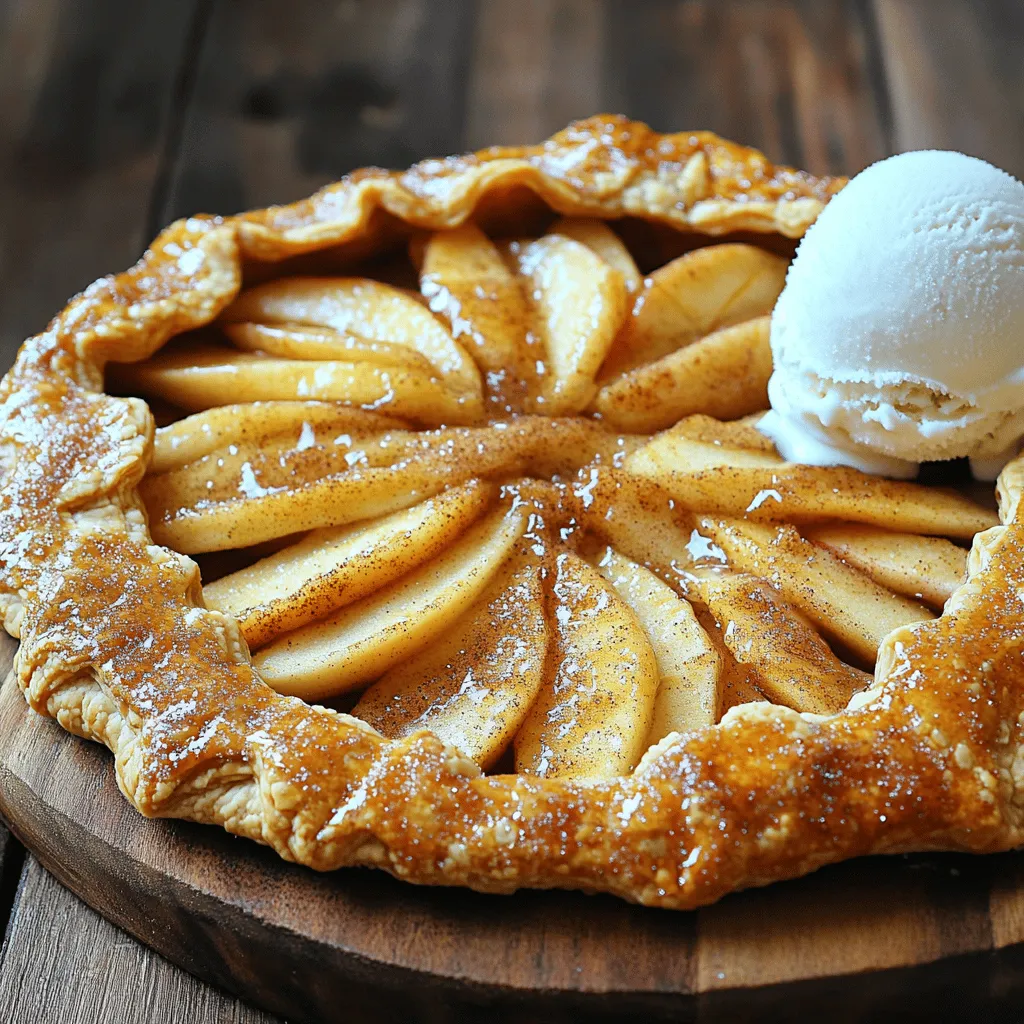
Let’s make dessert easy and delicious! In this post, I’ll show you how to create irresistible Cinnamon Sugar Apple Galettes. These rustic pastries are packed with sweet, tender apples and warm spices. Plus, they come together with simple ingredients and steps. Whether you’re a baking pro or a beginner, you’ll enjoy making these tasty treats. Let’s dive into the world of flavors that will delight your taste buds!
Why I Love This Recipe
- Deliciously Simple: This recipe combines fresh apples with just a few pantry staples, making it easy to whip up any time.
- Perfectly Rustic: The galette’s free-form shape adds a charming rustic look that is perfect for any occasion.
- Versatile Serving: Serve it warm with a scoop of vanilla ice cream, or enjoy it plain; either way, it’s a crowd-pleaser!
- Seasonal Favorite: This dessert highlights the best flavors of fall, making it a seasonal favorite that you can enjoy year after year.
Ingredients
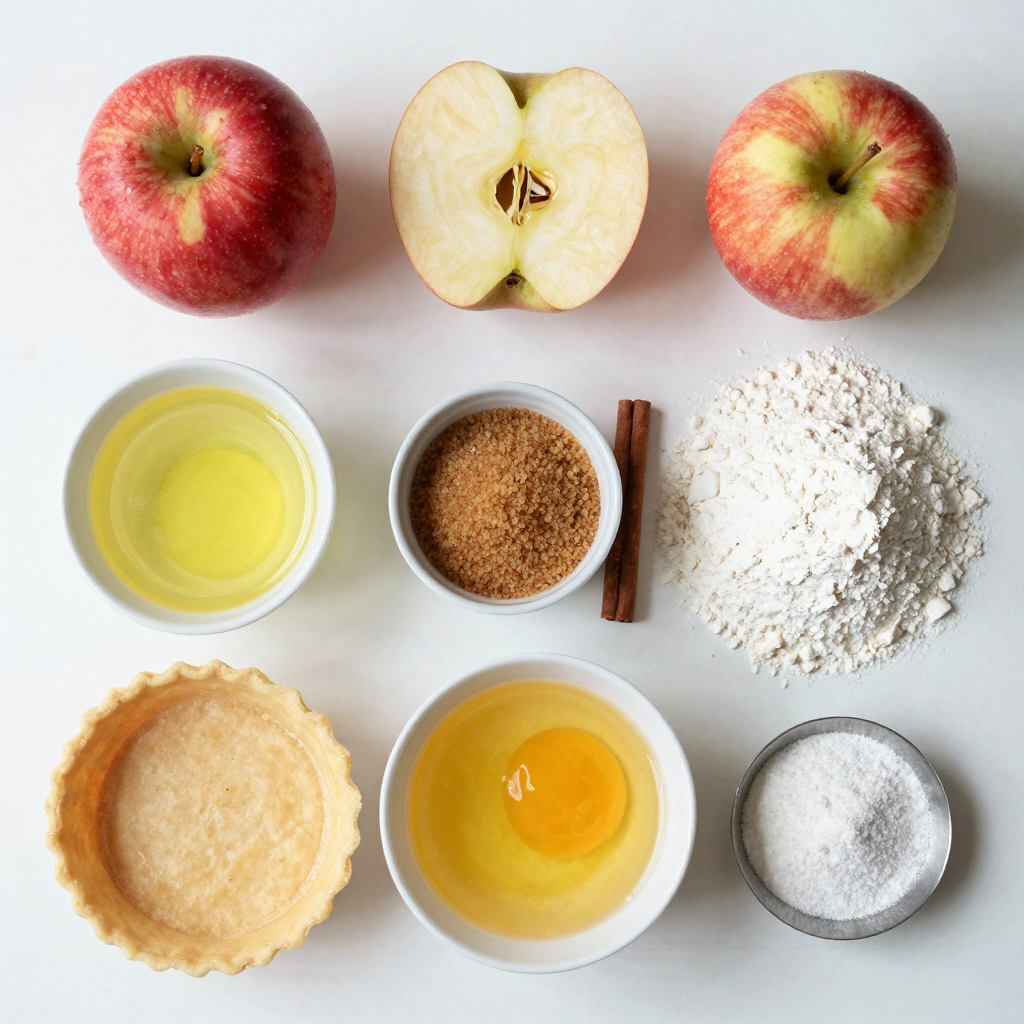
Detailed List of Ingredients
– 3 medium apples (Granny Smith or Honeycrisp)
– 1 tablespoon lemon juice
– 1/4 cup brown sugar
– 1 teaspoon ground cinnamon
– 1 tablespoon all-purpose flour
– 1 pre-made or homemade pie crust
– 1 egg (for egg wash)
– 1 tablespoon granulated sugar (for topping)
– Optional: Vanilla ice cream for serving
When making cinnamon sugar apple galettes, I choose the best ingredients. The apples are key. I love using Granny Smith or Honeycrisp apples. They add a nice tartness that balances the sweet flavors.
Lemon juice keeps the apples bright and fresh. It adds flavor and prevents browning. Brown sugar brings out the natural sweetness of the apples. Ground cinnamon gives a warm, cozy taste that makes these galettes special.
All-purpose flour helps thicken the filling. It keeps the juices from making the crust soggy. For the crust, I recommend a pre-made option for ease. If you’re feeling adventurous, you can make your own.
The egg wash gives the crust a beautiful golden color. Sprinkling granulated sugar on top adds a nice crunch. And for that extra treat, serve these galettes with a scoop of vanilla ice cream. It melts and makes the dessert even more delightful.
Gather these ingredients, and you’re ready to create a delicious dessert that will impress anyone!
Step-by-Step Instructions
Preparation Steps
– Preheating the Oven and Setting Up
First, set your oven to 375°F (190°C). This is the perfect heat for our galettes. Line a baking sheet with parchment paper to prevent sticking.
– Preparing the Apple Filling
In a large bowl, toss three thinly sliced apples with one tablespoon of lemon juice. Add 1/4 cup of brown sugar, 1 teaspoon of ground cinnamon, and 1 tablespoon of flour. Mix it well and let it sit for about 10 minutes. This helps the apples soak up the flavors.
– Rolling Out the Pie Crust
Take your pre-made pie crust and roll it out on a lightly floured surface. Aim for about 1/8 inch thick. Cut it into two large circles, around 8 inches each. This will be the base for your galettes.
Assembling the Galettes
– Creating the Galette Base
Place each pie crust circle on your lined baking sheet. Make a border of about 1 inch around the edge. Leave the center open for your apple filling.
– Adding the Apple Filling
Take half of the apple mixture and place it in the center of each circle. Spread it out, but keep space around the edges for folding.
– Folding the Edges and Egg Wash
Gently fold the edges of the pie crust over the apple filling. Create small pleats all around. In a bowl, whisk one egg to make the egg wash. Brush it onto the crust edges. Finally, sprinkle granulated sugar for a sweet crunch.
Baking Process
– Baking Time and Temperature
Bake your galettes in the preheated oven for 30 to 35 minutes. Look for a golden brown crust and tender apples. This means they are done.
– Cooling Instructions
Once baked, take them out and let them cool slightly. This helps set the filling and makes slicing easier. Enjoy your delicious galettes!
Pro Tips
- Choose the Right Apples: Opt for a mix of tart and sweet apples, like Granny Smith and Honeycrisp, to achieve a well-balanced flavor in your galettes.
- Don’t Overfill: Make sure to leave enough space at the edges of the crust when adding the apple filling to avoid overflow during baking.
- Egg Wash for Shine: Brushing the crust with egg wash not only gives it a beautiful golden color but also adds a nice sheen to your galettes.
- Serve Warm: Galettes are best enjoyed warm, and a scoop of vanilla ice cream on top makes for a delightful contrast in temperature and flavor.
Tips & Tricks
Selecting the Best Apples
Choosing the right apples makes a big difference. I recommend using a mix of Granny Smith and Honeycrisp apples.
– Granny Smith: They add a nice tartness that balances the sweetness.
– Honeycrisp: They provide a sweet, juicy crunch that enhances flavor.
Combining these two gives you the best taste and texture. You can also try Fuji or Braeburn apples for a different twist.
Perfecting the Crust
Rolling out the pie crust can be simple. Start with a cold crust. Dust your surface with flour to keep it from sticking.
– Roll it out to about 1/8 inch thick.
– Aim for even thickness to bake nicely.
To achieve a flaky texture, keep your dough cold. You can even use a few small pieces of butter in the crust. This creates layers that flake nicely when baked.
Enhancing Flavor
You can elevate the flavor with a few extra spices. A pinch of nutmeg or allspice can add warmth.
– Nutmeg: It pairs well with apples.
– Allspice: It gives a cozy, autumn flavor.
For sweetening adjustments, consider using maple syrup or honey. These can add a unique twist to your galettes. Adjust the amount based on your taste preferences. Don’t be afraid to experiment!
Variations
Alternative Fillings
You can make your galettes even better with different fillings.
– Adding Nuts or Raisins: Chopped walnuts or pecans add a nice crunch. Sweet raisins bring a chewy texture. Mix a handful into your apple filling for extra joy.
– Other Fruits to Consider: Apples are great, but you can use other fruits too. Peaches, pears, or berries work well. Just adjust the sugar based on the fruit’s sweetness.
Crust Options
The crust can change your galette’s flavor and texture.
– Gluten-Free Pie Crust Alternatives: If you need a gluten-free option, look for ready-made gluten-free crusts. You can also use almond flour or oat flour to make your own crust.
– Making Your Own Pie Crust: Making a crust at home is easy. Just mix flour, cold butter, and a pinch of salt. Add water slowly until you form a dough. Chill it for 30 minutes before rolling.
Serving Ideas
How you serve your galette can make it special.
– Pairing with Different Ice Cream Flavors: Vanilla is classic, but try cinnamon or caramel ice cream. The warm galette and cold ice cream create a delightful contrast.
– Serving with Whipped Cream or Caramel Sauce: A dollop of whipped cream adds lightness. Drizzling caramel sauce brings a sweet touch that pairs perfectly with the apples.
Storage Info
Storing Leftover Galettes
Refrigeration Tips
If you have leftover galettes, place them in an airtight container. Store in the fridge for up to three days. Make sure to let them cool completely before sealing. This helps keep the crust from getting soggy.
Freezing Instructions
To freeze, wrap each galette tightly in plastic wrap. Then, place them in a freezer-safe bag. They can last up to three months in the freezer. To reheat later, just thaw in the fridge overnight.
Reheating Guidelines
Best Methods for Reheating
The best way to reheat galettes is in the oven. Preheat your oven to 350°F (175°C). Place the galettes on a baking sheet and cover them with foil. Heat for about 10-15 minutes. This keeps the crust crisp and warm.
Maintaining Crispiness
To keep the crust crispy, avoid microwaving the galettes. The microwave can make the crust soggy. By reheating in the oven, you maintain that perfect crunch. It’s worth the extra time! Enjoy your delicious galettes just like when they were fresh!
FAQs
Can I use other types of apples for this recipe?
Yes, you can use other apples. Different apples give unique flavors. For a sweet taste, use Fuji or Gala apples. For a tart flavor, try Braeburn or Granny Smith. Mixing apple types can add depth to the taste.
How do I know when the galettes are done baking?
Look for a golden brown crust. The apples should be soft, not mushy. You can poke a fork into the apples to test them. If they are tender, the galettes are ready. A sweet aroma will fill your kitchen, too!
Can I make these galettes ahead of time?
Yes, you can prep these galettes in advance. Assemble them and cover tightly with plastic wrap. Store them in the fridge for up to 24 hours. When ready to bake, just remove the wrap and add the egg wash. You can also freeze unbaked galettes for later. Bake them directly from frozen, adding a few extra minutes to the bake time.
This blog post showed you how to make delicious apple galettes. We covered the ingredients, step-by-step instructions, and useful tips. You learned about picking the best apples and perfecting your crust. We even discussed fun variations and storage tips.
Using this guide, you can craft a tasty treat. Enjoy making these galettes that are sure to impress! Happy baking!
