Looking for a fun and festive treat to brighten your holidays? Grinch Hot Cocoa Bombs are the perfect blend of whimsy and warmth! Imagine rich chocolate melting into warm milk, revealing mini marshmallows and tasty surprises. In this guide, I’ll show you how to create these delightful cocoa bombs step by step, plus tips to customize them for your holiday fun. Let’s dive into the magic of making these Grinch-inspired treats!
Why I Love This Recipe
- Festive Fun: These Grinch Hot Cocoa Bombs are not only delicious but also add a playful and festive touch to your holiday gatherings.
- Customizable: You can easily modify the fillings with different flavors or types of marshmallows to suit your taste.
- Perfect Gift: They make a delightful homemade gift for friends and family during the holiday season.
- Interactive Experience: Watching the cocoa bomb melt in hot milk is a magical experience that everyone loves!
Ingredients
List of Ingredients
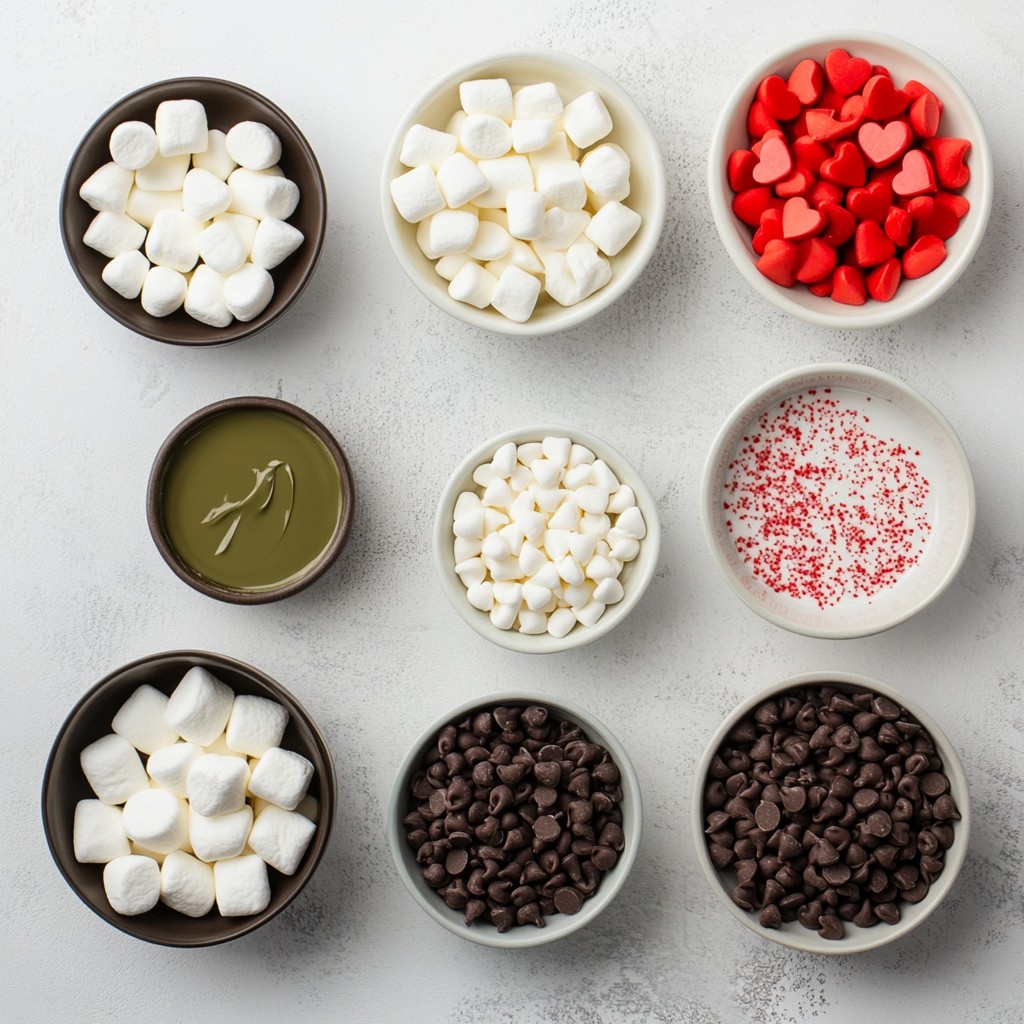
- 1 cup white chocolate chips
- 1 cup milk chocolate chips
- 1/2 cup hot cocoa mix
- 1/2 cup mini marshmallows
- Green candy melts
- Red heart sprinkles or edible glitter
- Silicone sphere molds
Recommended Ingredient Brands
For melting chocolate, I love using Ghirardelli or Wilton. They melt smoothly and taste great. For hot cocoa mix, Swiss Miss or Nestlé are my go-tos. They provide rich flavor and are widely available.
Optional Add-ins and Substitutes
You can switch up the toppings for variety. Try crushed candy canes or colorful sprinkles. For a dairy-free option, use dairy-free chocolate chips and coconut milk for your drink. This keeps it festive for everyone!
Step-by-Step Instructions
Melting the Chocolate
To melt white chocolate, I use a microwave-safe bowl. I heat the chocolate chips in 30-second intervals. After each interval, I stir until it becomes smooth. This helps avoid burning the chocolate.
For milk chocolate, I repeat the same steps. Be sure to use a separate bowl. This keeps the flavors distinct and bright.
Coating the Molds
I coat the inside of each hemisphere of the silicone molds. I use a spoon or a pastry brush for an even coat. Ensuring thorough coverage is key. This step helps the chocolate hold its shape.
After coating, I place the molds in the freezer for about 10 minutes. This time allows the chocolate to harden properly.
Assembling the Cocoa Bombs
Once the white chocolate is set, I carefully remove the hemispheres. I then coat the inside of the molds with milk chocolate. Just like before, I freeze the molds for another 10 minutes.
Next, I fill each milk chocolate hemisphere with a tablespoon of hot cocoa mix. I also add a teaspoon of mini marshmallows for extra fun. After that, I take the white chocolate hemispheres and press them on top gently. This forms the cocoa bomb.
Sealing the Bombs Securely
To seal the two halves together, I heat a plate in the microwave for about 30 seconds. I place one hemisphere on the plate for just a second. This melts the edge slightly. I then press the two halves together firmly to seal them.
Decorating Tips
I melt the green candy melts in another microwave-safe bowl. Then, I drizzle the green chocolate over the assembled cocoa bombs. This adds a festive touch. For the final touch, I sprinkle on red heart sprinkles or edible glitter.
Let the decorated bombs harden completely at room temperature. Enjoy making these fun treats!
Tips & Tricks
Ensuring Success with Melting
To melt chocolate well, avoid seizing. Seizing happens when moisture touches chocolate. Keep bowls and utensils dry.
When using a microwave, melt in short bursts. Heat for only 30 seconds at a time. Stir after each interval. This keeps the chocolate smooth.
Troubleshooting Common Issues
If your bombs don’t stick together, heat a plate for 30 seconds. Press one hemisphere on the warm plate briefly. This melts the edge slightly. Then, quickly press it together with the other half.
For cracks in chocolate, don’t worry! You can fix them. Melt a bit of chocolate and use it as glue. Apply it to the cracks and let it set.
Enhancing Flavor
You can add flavors to your hot cocoa mix. Try vanilla extract or peppermint. These flavors give a nice twist to the cocoa.
Seasonal spices work great too! Add a pinch of cinnamon or nutmeg for warmth. You could even try a dash of ginger for a fun kick!
Pro Tips
- Use Quality Chocolate: For the best flavor and texture, opt for high-quality chocolate chips. This will enhance the overall taste of your hot cocoa bombs.
- Chill Between Layers: Make sure to freeze each layer of chocolate completely before adding the next. This ensures a clean separation and prevents the layers from mixing.
- Experiment with Fillings: Feel free to get creative with the fillings! Add crushed peppermint, flavored syrups, or even flavored marshmallows for a unique twist.
- Give as Gifts: These Grinch Hot Cocoa Bombs make great holiday gifts! Package them in clear bags with festive ribbons for a delightful presentation.
Variations
Themed Cocoa Bombs
You can have a lot of fun with themed cocoa bombs! For Christmas, make them look like ornaments. Use red and green colors for your chocolate. Add some silver or gold sprinkles for that festive touch.
For other holidays, think outside the box. For Halloween, use orange and black chocolate. You can even add spooky designs. For Valentine’s Day, use pinks and reds. Heart shapes and sprinkles will make them special.
Flavor Variations
Want to change up the taste? Try mint hot cocoa bombs! Use peppermint extract in your hot cocoa mix. This adds a fresh kick. You can also mix in crushed peppermint candies. They’ll give a nice crunch.
How about peanut butter cocoa bombs? Just add peanut butter powder to your hot cocoa mix. It creates a rich, nutty flavor. You can also drizzle melted peanut butter on top for a treat.
Create Custom Designs
Make your cocoa bombs unique! Use different color themes to match your mood or party. Try a rainbow of colors or all pastels for spring.
You can also personalize them. Write names or initials with melted chocolate. This makes a great gift for friends and family. Everyone loves a treat made just for them!
Storage Info
How to Store Hot Cocoa Bombs
Store your Grinch hot cocoa bombs in an airtight container. This keeps them fresh and safe from moisture. I recommend using a clear container. This way, you can see those colorful treats! Place parchment paper between layers if stacking. This prevents them from sticking together.
Shelf Life
These delicious cocoa bombs last about two weeks when stored properly. Look for signs of spoilage like a change in color or texture. If they smell off, it's best to toss them. Fresh is always the way to go!
Freezing Options
Yes, you can freeze hot cocoa bombs! Just place them in a freezer-safe container. Make sure they are well-wrapped to avoid freezer burn. To thaw, move them to the fridge overnight. This keeps them from sweating. You can also let them sit at room temperature for about an hour before using. Enjoy your festive treat!
FAQs
What are Grinch Hot Cocoa Bombs?
Grinch Hot Cocoa Bombs are fun treats that melt into hot cocoa. They are made of chocolate and filled with cocoa mix and marshmallows. When you pour hot milk over them, they burst with flavor and joy. Their bright green color and festive sprinkles make them perfect for the holiday season.
How to use hot cocoa bombs?
1. Place the Bomb: Put one Grinch Hot Cocoa Bomb in a mug.
2. Pour Milk: Heat milk until hot, then pour it over the bomb.
3. Watch the Magic: The bomb will melt, releasing cocoa and marshmallows.
4. Stir and Enjoy: Mix well and sip your delicious cocoa.
Can I make these without silicone molds?
Yes, you can! If you don’t have silicone molds, use a muffin tin. Line the tin with plastic wrap. Then, coat it with chocolate like you would the molds. The plastic wrap helps you remove the bombs easily once set. You can also form them by hand, but it may be a bit tricky.
Where to buy pre-made Grinch Hot Cocoa Bombs?
You can find pre-made Grinch Hot Cocoa Bombs online at sites like Etsy or Amazon. Local bakeries may also sell them during the holiday season. Check your favorite shops for fun and festive options!
Making Grinch Hot Cocoa Bombs is simple and fun. We covered ingredients, like chocolate and cocoa mix, that make them delicious. I shared tips for melting chocolate and decorating your bombs creatively. You can try different flavors or themes to match any season.
In the end, these treats bring joy and warmth to all. With the skills you learned, get creative and delight your loved ones. Enjoy every sip and smile as your cocoa bombs burst with flavor. The joy of hot cocoa is now in your hands.
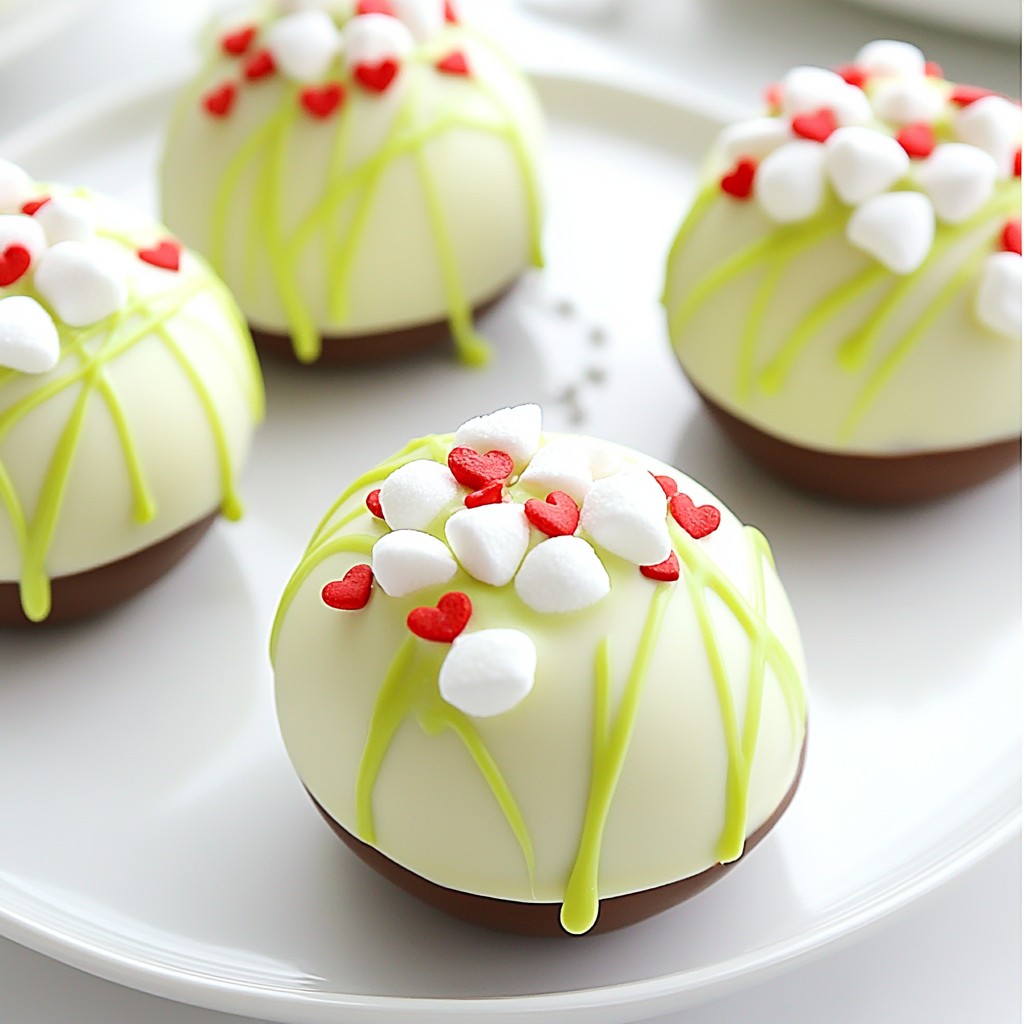
Grinch Hot Cocoa Bombs
Festive hot cocoa bombs decorated for the holidays.
Ingredients
Instructions
- 1
In a microwave-safe bowl, melt the white chocolate chips in 30-second intervals, stirring after each until smooth. Repeat the same process with the milk chocolate chips in a separate bowl.
- 2
Using a spoon or a pastry brush, evenly coat the inside of each hemisphere of the silicone molds with the melted white chocolate. Make sure to cover the sides thoroughly. Place the molds in the freezer for about 10 minutes until the chocolate hardens.
- 3
Once the white chocolate is set, carefully remove the molded hemispheres. Take the milk chocolate and coat the inside of the molds in the same way as the white chocolate. Freeze again for another 10 minutes.
- 4
Remove the molds from the freezer and working quickly, fill each milk chocolate hemisphere with a tablespoon of hot cocoa mix and a teaspoon of mini marshmallows. Next, take the previously made white chocolate hemispheres and gently press them on top to create a ball.
- 5
To ensure the two halves stick together, you can heat a plate in the microwave for about 30 seconds, then place the open end of one hemisphere onto the plate for a fraction of a second to melt the edge slightly. Quickly press them together.
- 6
Melt the green candy melts in a microwave-safe bowl. Drizzle the green melted chocolate over the assembled cocoa bombs. Finish with red heart sprinkles or edible glitter for a festive touch.
- 7
Allow the decorated hot cocoa bombs to harden completely at room temperature.
- 8
To use, place a hot cocoa bomb in a mug and pour hot milk over it. Stir and enjoy the delicious transformation!
Chef's Notes
Allow the cocoa bombs to harden completely before serving.


