Mini Crème Brûlée Cheesecakes Rich and Creamy Delight

WANT TO SAVE THIS RECIPE?

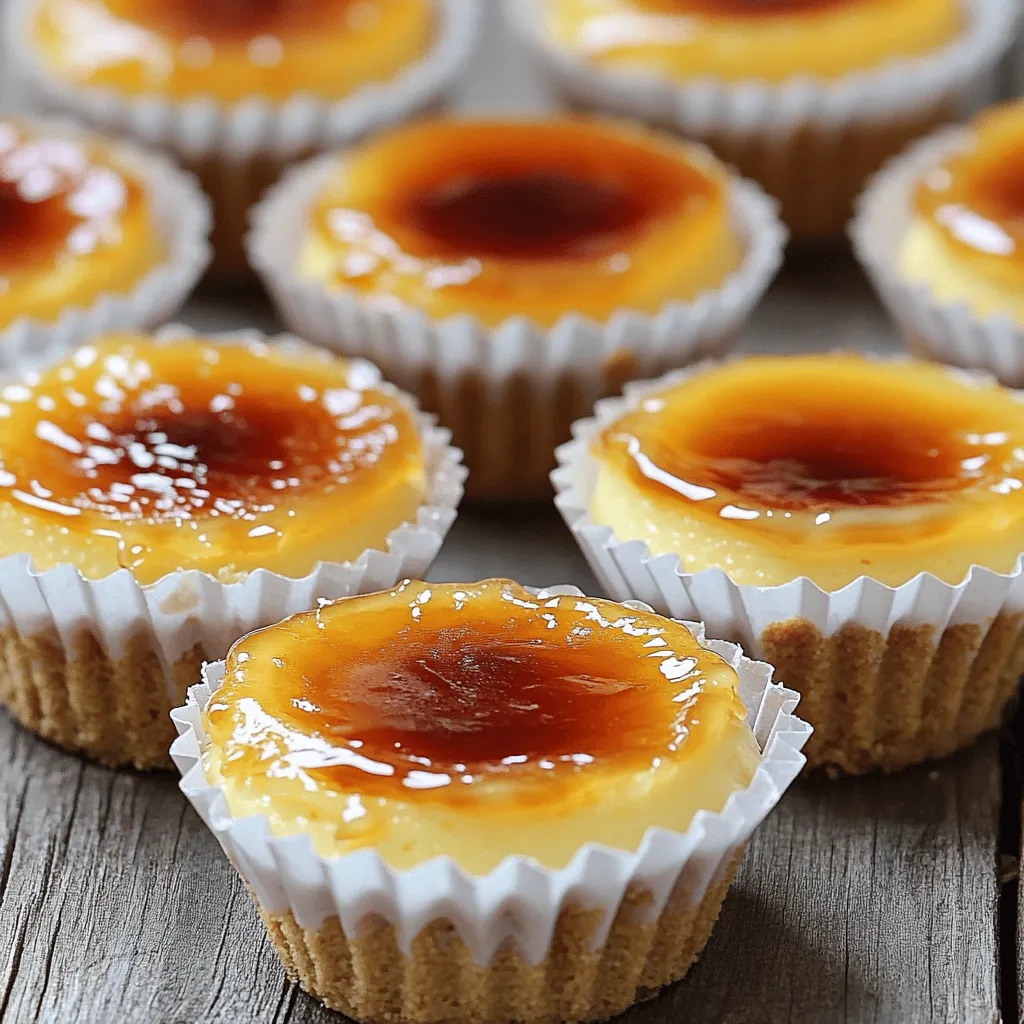
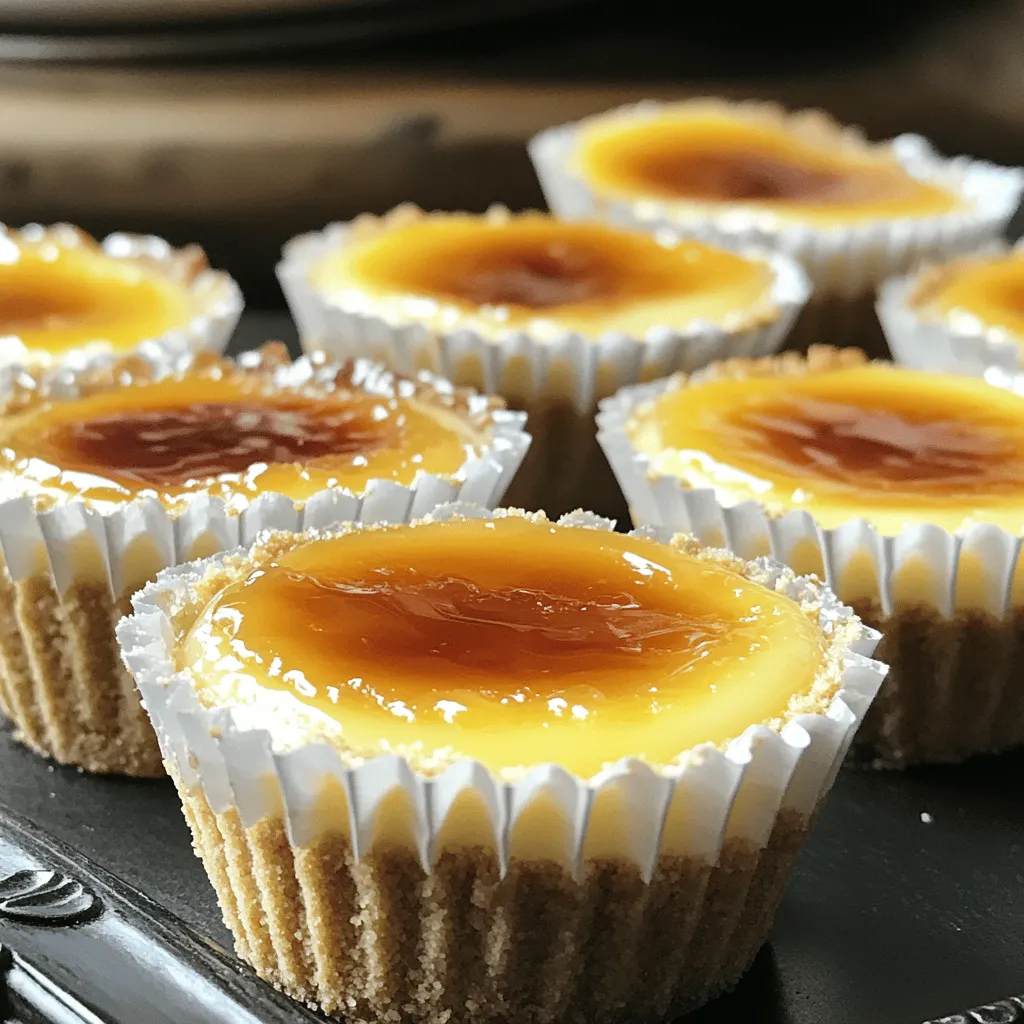
Looking for a dessert that’s both rich and creamy? You’ll love these Mini Crème Brûlée Cheesecakes! They blend the classic flavors of crème brûlée with the smoothness of cheesecake. In this post, I’ll walk you through the easy steps, from making the perfect graham cracker crust to caramelizing the top for that delightful crunch. Get ready to impress your guests with this tasty treat and enjoy every creamy bite!

Ingredients

To make Mini Crème Brûlée Cheesecakes, you’ll need a few simple ingredients. Here’s the breakdown of what you need:

List of Ingredients

For the crust:

– 1 cup graham cracker crumbs

– 3 tablespoons unsalted butter, melted

For the cheesecake filling:

– 2 cups cream cheese, softened

– ¾ cup granulated sugar

– 1 teaspoon vanilla extract

– 2 large eggs

– 1 cup heavy cream

– 1 tablespoon cornstarch

Sugar for caramelizing:

– Extra granulated sugar for the topping

These ingredients create a rich and creamy cheesecake with a crispy crust. Each part plays a key role in the final taste and texture. The graham cracker crust provides a sweet and crunchy base. The cream cheese filling is smooth and rich, while the caramelized sugar adds a delightful crunch on top. You can find the full recipe details [here](Link to Full Recipe).

Step-by-Step Instructions

Preheat the Oven

Begin by preheating your oven to 325°F (160°C). This step is crucial for even baking.

Prepare the Graham Cracker Crust

In a medium bowl, combine one cup of graham cracker crumbs with three tablespoons of melted unsalted butter. Stir until mixed well. Press this mixture firmly into the bottom of twelve muffin cups lined with paper liners. Bake for five minutes, then let them cool.

Mix the Cream Cheese Filling

In a large mixing bowl, beat two cups of softened cream cheese with an electric mixer on medium speed. Add three-quarters cup of granulated sugar gradually. Mix until smooth. Then, add one teaspoon of vanilla extract and one tablespoon of cornstarch. Mix well. Add two large eggs one at a time, mixing on low speed after each egg. Finally, pour in one cup of heavy cream and mix until smooth.

Fill the Muffin Cups

Carefully pour the cheesecake mixture over the cooled graham cracker crusts. Fill each muffin cup about three-quarters full. This helps give them a nice rise.

Baking Process

Place the muffin tin in the oven, baking for 20 to 25 minutes. The edges should be set, and the centers slightly jiggly. Turn off the oven, leaving the cheesecakes inside for an extra ten minutes. This step helps prevent cracks.

Cooling and Chilling the Cheesecakes

Once baked, remove the cheesecakes from the oven. Let them cool at room temperature for 30 minutes. Then, transfer them to the refrigerator. Chill for at least four hours, or overnight for the best results.

Caramelizing the Top

Before serving, sprinkle a thin layer of granulated sugar over each cheesecake. Use a kitchen torch to caramelize the sugar until it forms a golden crust. If you don’t have a torch, place them under the broiler for a few minutes. Watch closely to avoid burning!

Serving Suggestions

Allow the caramel to cool for a couple of minutes before serving. These mini crème brûlée cheesecakes are great on their own but can also pair well with fresh berries or a drizzle of chocolate sauce. For the full recipe, check out the details!

Tips & Tricks

How to Achieve Creamy Cheesecakes

To make your cheesecakes rich and creamy, start with softened cream cheese. Cold cream cheese can cause lumps. Use an electric mixer to beat it until smooth. Add the sugar slowly, mixing well. This helps to blend everything evenly. When you add the eggs, do it one at a time. Mix on low speed after each egg. This keeps the texture light and fluffy. Finally, add the heavy cream and mix just until combined.

Preventing Cracks in Your Cheesecakes

Cracks in your cheesecakes can be a bummer. To prevent this, do not overmix your batter. Overmixing adds too much air, leading to cracks. Bake your cheesecakes at a lower temperature, around 325°F. After baking, turn off the oven and leave the cheesecakes inside. This gradual cooling helps them set without cracking. Be patient and let them cool for at least 30 minutes at room temp before chilling them in the fridge.

Best Practices for Caramelizing Sugar

Caramelizing sugar gives your cheesecakes a beautiful top. Before you caramelize, sprinkle a thin, even layer of sugar over each cheesecake. Use a kitchen torch for the best results. Hold the torch a few inches above the sugar and move it in small circles. Watch closely to avoid burning. If you don’t have a torch, you can use a broiler. Place the cheesecakes under the broiler for a few minutes, but stay nearby. Burnt sugar is a no-go! For a full recipe, check out the full recipe section.

Variations

Flavoring Options for the Cheesecakes

You can easily change the flavor of your mini cheesecakes. I love adding a bit of lemon zest. It gives a fresh taste. You can also use almond extract instead of vanilla for a unique twist. Another option is to mix in chocolate chips or swirl in fruit puree. Each change makes the cheesecakes special.

Alternative Crust Suggestions

If you want to try a different crust, go for crushed cookies. Oreos work great for a chocolatey flavor. You can also use crushed nuts for a gluten-free option. Just mix them with melted butter, like with the graham cracker crumbs. Each crust adds its own charm to the cheesecake.

Toppings Beyond Caramel

Caramel is classic, but you can explore other toppings. Fresh berries, like raspberries or strawberries, add color and flavor. You can also use whipped cream for a light touch. How about drizzling chocolate or a fruit sauce on top? Each topping lets you customize your dessert, making it fun for every occasion. For the full recipe, check out Mini Crème Brûlée Cheesecakes.

Storage Info

How to Store Mini Crème Brûlée Cheesecakes

To keep your mini crème brûlée cheesecakes fresh, store them in the fridge. Place each cheesecake in an airtight container. If you don’t have one, use plastic wrap. This helps keep moisture in and prevents them from drying out. Make sure to keep them away from strong-smelling foods. The cheesecake can absorb those odors.

Freezing Instructions

You can also freeze these mini cheesecakes for later use. To freeze, wrap each cheesecake tightly in plastic wrap. Then, place them in a freezer-safe bag or container. This protects them from freezer burn. When you’re ready to enjoy them, just take them out and let them thaw in the fridge for several hours.

How Long Do They Last?

These cheesecakes can last up to 5 days in the fridge. If you freeze them, they can last up to 2 months. Just remember, the sooner you eat them, the better they taste! For the best flavor and texture, enjoy them fresh. For the full recipe, check out the earlier sections.

FAQs

Can I make Mini Crème Brûlée Cheesecakes ahead of time?

Yes, you can make these cheesecakes ahead of time. They taste even better after chilling. I suggest making them the day before. Just let them cool, then chill them for at least four hours. This gives the flavors time to blend.

What can I substitute for heavy cream?

You can use half-and-half or whole milk as a substitute. These options will change the texture a bit. The cheesecakes may not be as rich, but they will still be tasty. If you want a non-dairy option, try coconut cream. It adds a unique flavor while keeping it creamy.

How do I know when my cheesecakes are done baking?

Look for the edges to be set and the center to jiggle slightly. A good test is to gently shake the muffin pan. If the center moves but the edges are firm, they are ready. Remember, they will continue to cook after you take them out.

Is it possible to use a different type of sweetener?

Yes, you can use different sweeteners. For a lower-calorie option, try stevia or erythritol. Just check the conversion rates, as they differ from sugar. Keep in mind that these sweeteners might change the taste a bit, but they can work well.

Where can I buy Mini Crème Brûlée Cheesecakes?

You can find Mini Crème Brûlée Cheesecakes at many bakeries or specialty dessert shops. Some grocery stores may also carry them. If you want a homemade version, check my Full Recipe for a simple guide to making your own.

You now have a clear guide to making delicious Mini Crème Brûlée Cheesecakes. We covered everything from the ingredients to baking tips. I shared how to get creamy cheesecakes and avoid cracks. You also learned about tasty variations and proper storage.

With these steps, you can create these treats at home. Enjoy experimenting and impressing your friends with your baking skills!

To make Mini Crème Brûlée Cheesecakes, you'll need a few simple ingredients. Here’s the breakdown of what you need: - For the crust: - 1 cup graham cracker crumbs - 3 tablespoons unsalted butter, melted - For the cheesecake filling: - 2 cups cream cheese, softened - ¾ cup granulated sugar - 1 teaspoon vanilla extract - 2 large eggs - 1 cup heavy cream - 1 tablespoon cornstarch - Sugar for caramelizing: - Extra granulated sugar for the topping These ingredients create a rich and creamy cheesecake with a crispy crust. Each part plays a key role in the final taste and texture. The graham cracker crust provides a sweet and crunchy base. The cream cheese filling is smooth and rich, while the caramelized sugar adds a delightful crunch on top. You can find the full recipe details [here](Link to Full Recipe). Begin by preheating your oven to 325°F (160°C). This step is crucial for even baking. In a medium bowl, combine one cup of graham cracker crumbs with three tablespoons of melted unsalted butter. Stir until mixed well. Press this mixture firmly into the bottom of twelve muffin cups lined with paper liners. Bake for five minutes, then let them cool. In a large mixing bowl, beat two cups of softened cream cheese with an electric mixer on medium speed. Add three-quarters cup of granulated sugar gradually. Mix until smooth. Then, add one teaspoon of vanilla extract and one tablespoon of cornstarch. Mix well. Add two large eggs one at a time, mixing on low speed after each egg. Finally, pour in one cup of heavy cream and mix until smooth. Carefully pour the cheesecake mixture over the cooled graham cracker crusts. Fill each muffin cup about three-quarters full. This helps give them a nice rise. Place the muffin tin in the oven, baking for 20 to 25 minutes. The edges should be set, and the centers slightly jiggly. Turn off the oven, leaving the cheesecakes inside for an extra ten minutes. This step helps prevent cracks. Once baked, remove the cheesecakes from the oven. Let them cool at room temperature for 30 minutes. Then, transfer them to the refrigerator. Chill for at least four hours, or overnight for the best results. Before serving, sprinkle a thin layer of granulated sugar over each cheesecake. Use a kitchen torch to caramelize the sugar until it forms a golden crust. If you don’t have a torch, place them under the broiler for a few minutes. Watch closely to avoid burning! Allow the caramel to cool for a couple of minutes before serving. These mini crème brûlée cheesecakes are great on their own but can also pair well with fresh berries or a drizzle of chocolate sauce. For the full recipe, check out the details! To make your cheesecakes rich and creamy, start with softened cream cheese. Cold cream cheese can cause lumps. Use an electric mixer to beat it until smooth. Add the sugar slowly, mixing well. This helps to blend everything evenly. When you add the eggs, do it one at a time. Mix on low speed after each egg. This keeps the texture light and fluffy. Finally, add the heavy cream and mix just until combined. Cracks in your cheesecakes can be a bummer. To prevent this, do not overmix your batter. Overmixing adds too much air, leading to cracks. Bake your cheesecakes at a lower temperature, around 325°F. After baking, turn off the oven and leave the cheesecakes inside. This gradual cooling helps them set without cracking. Be patient and let them cool for at least 30 minutes at room temp before chilling them in the fridge. Caramelizing sugar gives your cheesecakes a beautiful top. Before you caramelize, sprinkle a thin, even layer of sugar over each cheesecake. Use a kitchen torch for the best results. Hold the torch a few inches above the sugar and move it in small circles. Watch closely to avoid burning. If you don’t have a torch, you can use a broiler. Place the cheesecakes under the broiler for a few minutes, but stay nearby. Burnt sugar is a no-go! For a full recipe, check out the full recipe section. {{image_2}} You can easily change the flavor of your mini cheesecakes. I love adding a bit of lemon zest. It gives a fresh taste. You can also use almond extract instead of vanilla for a unique twist. Another option is to mix in chocolate chips or swirl in fruit puree. Each change makes the cheesecakes special. If you want to try a different crust, go for crushed cookies. Oreos work great for a chocolatey flavor. You can also use crushed nuts for a gluten-free option. Just mix them with melted butter, like with the graham cracker crumbs. Each crust adds its own charm to the cheesecake. Caramel is classic, but you can explore other toppings. Fresh berries, like raspberries or strawberries, add color and flavor. You can also use whipped cream for a light touch. How about drizzling chocolate or a fruit sauce on top? Each topping lets you customize your dessert, making it fun for every occasion. For the full recipe, check out Mini Crème Brûlée Cheesecakes. To keep your mini crème brûlée cheesecakes fresh, store them in the fridge. Place each cheesecake in an airtight container. If you don’t have one, use plastic wrap. This helps keep moisture in and prevents them from drying out. Make sure to keep them away from strong-smelling foods. The cheesecake can absorb those odors. You can also freeze these mini cheesecakes for later use. To freeze, wrap each cheesecake tightly in plastic wrap. Then, place them in a freezer-safe bag or container. This protects them from freezer burn. When you’re ready to enjoy them, just take them out and let them thaw in the fridge for several hours. These cheesecakes can last up to 5 days in the fridge. If you freeze them, they can last up to 2 months. Just remember, the sooner you eat them, the better they taste! For the best flavor and texture, enjoy them fresh. For the full recipe, check out the earlier sections. Yes, you can make these cheesecakes ahead of time. They taste even better after chilling. I suggest making them the day before. Just let them cool, then chill them for at least four hours. This gives the flavors time to blend. You can use half-and-half or whole milk as a substitute. These options will change the texture a bit. The cheesecakes may not be as rich, but they will still be tasty. If you want a non-dairy option, try coconut cream. It adds a unique flavor while keeping it creamy. Look for the edges to be set and the center to jiggle slightly. A good test is to gently shake the muffin pan. If the center moves but the edges are firm, they are ready. Remember, they will continue to cook after you take them out. Yes, you can use different sweeteners. For a lower-calorie option, try stevia or erythritol. Just check the conversion rates, as they differ from sugar. Keep in mind that these sweeteners might change the taste a bit, but they can work well. You can find Mini Crème Brûlée Cheesecakes at many bakeries or specialty dessert shops. Some grocery stores may also carry them. If you want a homemade version, check my Full Recipe for a simple guide to making your own. You now have a clear guide to making delicious Mini Crème Brûlée Cheesecakes. We covered everything from the ingredients to baking tips. I shared how to get creamy cheesecakes and avoid cracks. You also learned about tasty variations and proper storage. With these steps, you can create these treats at home. Enjoy experimenting and impressing your friends with your baking skills!

Mini Crème Brûlée Cheesecakes

Indulge in the rich and creamy delight of Mini Crème Brûlée Cheesecakes! This simple recipe combines the classic flavors of crème brûlée with luscious cheesecake, featuring a crunchy graham cracker crust and a perfectly caramelized top. Follow easy step-by-step instructions for a show-stopping dessert that’s sure to impress your guests. Click through to discover the full recipe and treat yourself to this delicious creation today!

Ingredients
  

1 cup graham cracker crumbs

3 tablespoons unsalted butter, melted

2 cups cream cheese, softened

¾ cup granulated sugar

1 teaspoon vanilla extract

2 large eggs

1 cup heavy cream

1 tablespoon cornstarch

Extra sugar for caramelizing

Instructions
 

Preheat the Oven: Preheat your oven to 325°F (160°C).

    Prepare the Crust: In a medium bowl, mix the graham cracker crumbs with melted butter until well combined. Press this mixture firmly into the bottom of 12 muffin cups lined with paper liners. Bake for 5 minutes, then let cool while you prepare the filling.

      Mix the Cheesecake Filling: In a large mixing bowl, beat the softened cream cheese with an electric mixer on medium speed until smooth. Gradually add the granulated sugar and continue mixing until well incorporated.

        Add Flavors: Mix in the vanilla extract and cornstarch until fully integrated. Add eggs one at a time, mixing on low speed after each addition until just combined. Finally, add the heavy cream and mix until smooth.

          Fill the Cups: Pour the cheesecake mixture over the cooled graham cracker crusts, filling each muffin cup about ¾ full.

            Bake: Place the muffin tin in the oven and bake for 20-25 minutes, or until the edges are set and the centers are slightly jiggly. Turn off the oven and leave the cheesecakes inside for an additional 10 minutes to help them set without cracking.

              Cool and Chill: Remove the cheesecakes from the oven and let them cool at room temperature for 30 minutes. Then, transfer them to the refrigerator to chill for at least 4 hours or overnight for best results.

                Caramelize the Top: Before serving, sprinkle a thin layer of granulated sugar on top of each cheesecake. Using a kitchen torch, carefully caramelize the sugar until it forms a crisp, golden crust. (If you don’t have a torch, you can place them under the broiler for a few minutes, but watch closely!)

                  Serve: Allow the caramel to cool for a couple of minutes before serving.

                    Prep Time: 15 mins | Total Time: 5 hrs | Servings: 12

                      WANT TO SAVE THIS RECIPE?

                      Leave a Comment

                      Recipe Rating