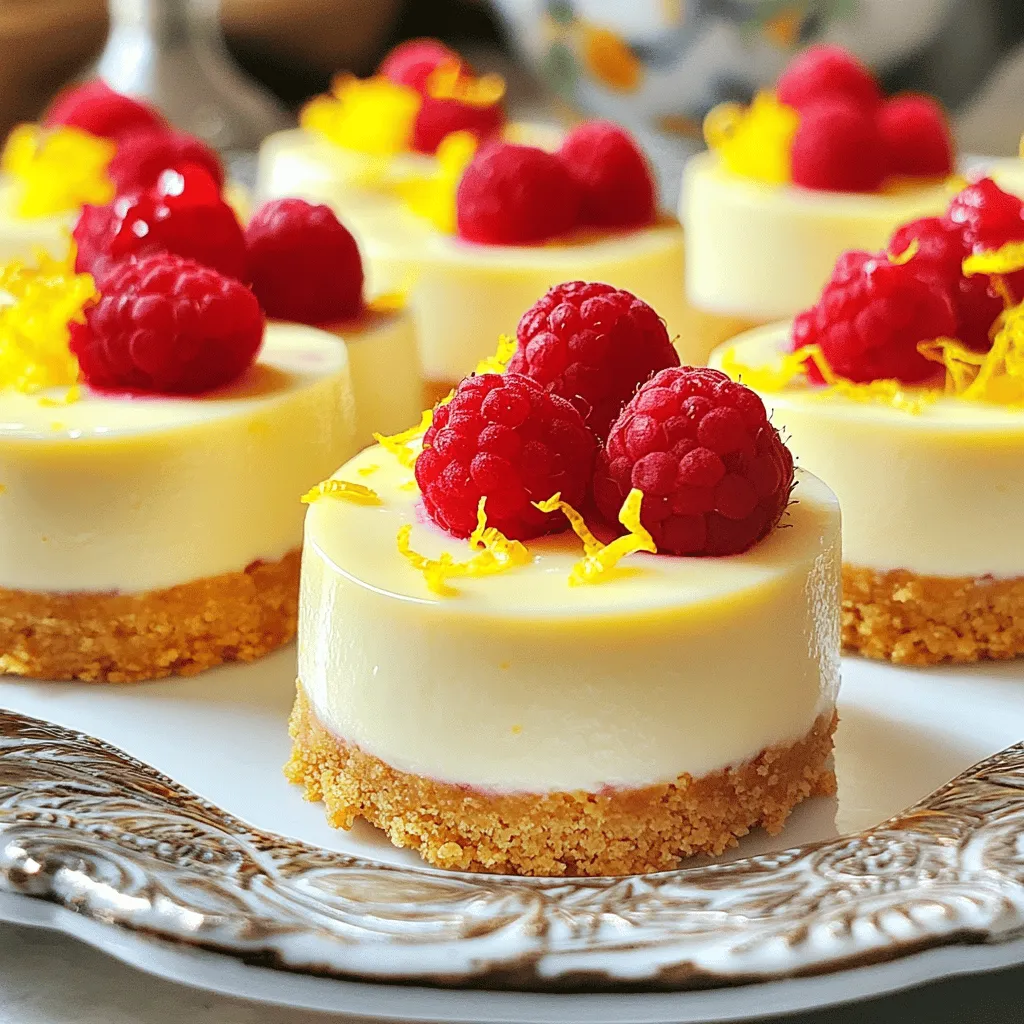
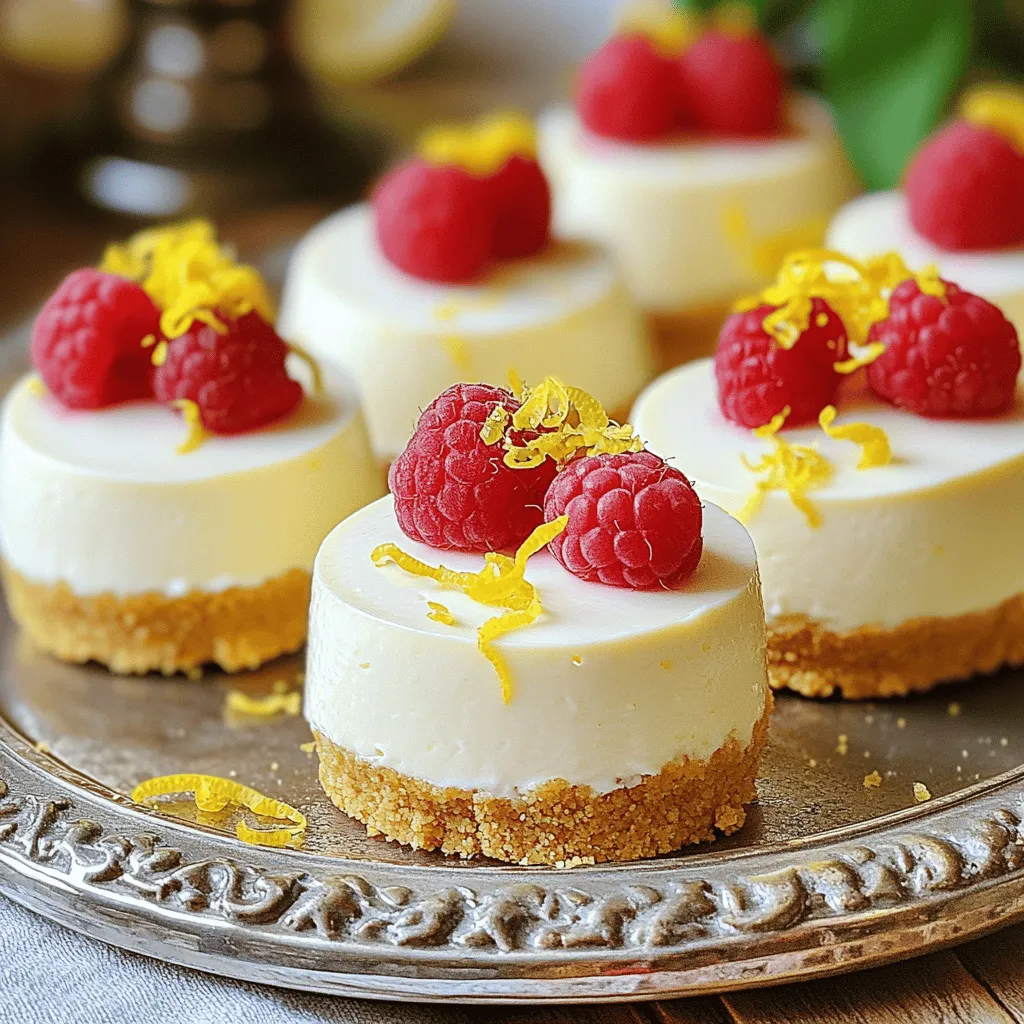
Craving a sweet yet zesty treat? Mini lemon cheesecakes are the answer! These bite-sized delights pack a punch of flavor without any fuss. I’ll guide you through making these easy, delicious cheesecakes, complete with tips for perfecting your recipe. Whether you’re planning a gathering or treating yourself, you’ll find that these mini desserts are a crowd-pleaser. Let’s dive in and get baking!You will need a mix of basic ingredients to create a sweet and tangy treat. These mini cheesecakes are perfect for any gathering or a sweet snack at home.
Detailed Ingredient List
– 1 cup graham cracker crumbs
– 1/4 cup unsalted butter, melted
– 2 tablespoons sugar
– 16 oz cream cheese, softened
– 1 cup powdered sugar
– 2 large eggs
– 1/4 cup fresh lemon juice
– Zest of 1 lemon
– 1 teaspoon vanilla extract
– Fresh raspberries or lemon slices for garnish (optional)
Each ingredient plays a key role. The graham cracker crumbs form a crispy crust. The cream cheese gives that rich, creamy texture. Fresh lemon juice adds a bright flavor that wakes up your taste buds.
Ingredient Substitutions
You can make some swaps if you need to. If you lack graham crackers, try crushed cookies or nuts. For a dairy-free option, use vegan cream cheese. If you want less sugar, reduce the powdered sugar or use a sugar substitute. You can also use lime juice instead of lemon juice for a fun twist.
These mini cheesecakes will impress everyone!Enjoy your baking!
Step-by-Step Instructions
Preparation and Preheating
First, you need to preheat your oven to 325°F (165°C). This step is crucial for even baking. While the oven warms up, line a muffin tin with paper liners. This will help you easily remove your mini cheesecakes later.
Creating the Crust
Next, gather your crust ingredients. You will need graham cracker crumbs, melted unsalted butter, and sugar. In a medium bowl, mix these ingredients until they are well combined. Once mixed, press about one tablespoon of this mixture into the bottom of each muffin liner. This forms a solid base for your mini cheesecakes.
Making the Cheesecake Filling
Now, it’s time to make the filling. In a large bowl, beat the softened cream cheese until it’s smooth. Use an electric mixer for best results. Gradually add the powdered sugar and mix until blended. Add in the eggs, one at a time, mixing well after each. Finally, stir in the fresh lemon juice, lemon zest, and vanilla extract. You want a smooth and creamy texture for the filling.
Baking and Cooling Process
Pour the cheesecake batter over the crusts in the muffin tin. Fill each cup about three-quarters full. Bake in the preheated oven for 15 to 18 minutes. The edges should be set, but the center can be slightly jiggly. After baking, turn off the oven but leave the cheesecakes inside with the door ajar for about 30 minutes. This cooling step helps prevent cracks. Once they are at room temperature, refrigerate them for at least two hours. They need to be chilled before serving.
Tips & Tricks
Perfecting the Texture
To get a creamy texture, use softened cream cheese. Cold cream cheese will create lumps. I recommend letting it sit out for about 30 minutes before mixing. Beat the cream cheese until smooth. Then, add the powdered sugar slowly. This helps keep things fluffy. For a silky finish, make sure to mix in the eggs one at a time. This keeps air in the batter, making it light and tasty.
Serving Suggestions and Pairings
Serve these mini lemon cheesecakes chilled for the best flavor. They pair well with fresh fruit. Try adding raspberries or lemon slices on top. They add color and flavor, making your dessert pop. You can also serve these with whipped cream or a drizzle of lemon curd. Each bite will taste like sunshine. For drinks, a refreshing iced tea or sparkling water complements the cheesecake perfectly.
Decorating Ideas
Get creative when decorating your mini lemon cheesecakes. Use a piping bag to add whipped cream on top for a fun look. A sprinkle of lemon zest brightens the dish. You might also add a mint leaf for a fresh touch. For a more festive vibe, consider edible flowers. They add beauty and charm to your dessert. Remember, a beautiful presentation makes every bite more enjoyable.
Variations
Flavor Variations
You can change up the flavor of your mini lemon cheesecakes. Try adding fresh berries, like strawberries or blueberries. Just mix in about a cup of pureed fruit to the batter. You can also opt for chocolate by adding melted chocolate to the cream cheese mixture. This twist makes for a rich and creamy treat. Each flavor gives a new taste to your dessert, making it fun to explore.
Alternative Crust Options
The crust can also be different. Instead of graham crackers, use crushed almonds for a nutty flavor. You can also try crushed cookies, like Oreos or ginger snaps. Each crust gives the cheesecake a new taste and texture. Simply follow the same steps for mixing and pressing the crust into the muffin tins.
Mini Cheesecake Cupcakes for Special Occasions
Mini cheesecakes can be perfect for special events. Dress them up like cupcakes! After baking, top each cupcake with whipped cream or frosting. Add sprinkles or edible glitter for a festive touch. This makes them fun for birthdays or parties. People love these cute bites, and they are easy to share.
Storage Info
Best Practices for Storing Mini Cheesecakes
To keep your mini lemon cheesecakes fresh, store them in the fridge. Use an airtight container to protect them from odors and moisture. If you have leftover cheesecakes, place a piece of plastic wrap directly on the surface. This prevents air from getting in and keeps them moist. Always let your cheesecakes cool to room temp before covering them. This helps with proper storage.
Freezing Instructions
You can freeze mini lemon cheesecakes for longer storage. First, cool them completely. Then, wrap each cheesecake in plastic wrap tightly. After that, place them in a freezer-safe bag. Label the bag with the date. They should last about three months in the freezer. To enjoy them, thaw overnight in the fridge. This keeps the texture nice and creamy.
Shelf Life and Signs of Spoilage
Mini lemon cheesecakes last about five days in the fridge. After that, they may not taste as fresh. Signs of spoilage include an off smell, discoloration, or a watery texture. If you notice these signs, it’s best to throw them away. Always trust your senses. When in doubt, don’t eat it! These tips will help you enjoy your delightful treats longer.
FAQs
Can I make Mini Lemon Cheesecakes ahead of time?
Yes, you can make Mini Lemon Cheesecakes ahead of time. They chill well in the fridge. I often prepare them a day before serving. This lets the flavors meld beautifully. Just cover them tightly with plastic wrap. You can also freeze them if needed. Just remember to thaw them in the fridge before serving.
What can I substitute for cream cheese?
If you’re out of cream cheese, use mascarpone or ricotta. Both give a smooth texture. Greek yogurt is another option, but it will change the taste slightly. Softened tofu is a great vegan option. Blend it well to ensure a creamy mix. Each swap will make your cheesecake unique.
How do I know when the cheesecakes are done baking?
Check the edges of your cheesecakes. They should be set and firm. The center can be slightly jiggly. This means they will continue to set as they cool. If they puff up too much, they may overbake. Watch them closely during the last few minutes. This helps you get that perfect texture.
You learned how to make mini lemon cheesecakes with easy steps. We covered the ingredients, substitutions, and how to bake. You now have tips to perfect the texture and ideas for serving. Explore flavor variations and crust options for fun twists.
Remember to store them correctly for the best taste. Enjoy your delicious treats!


