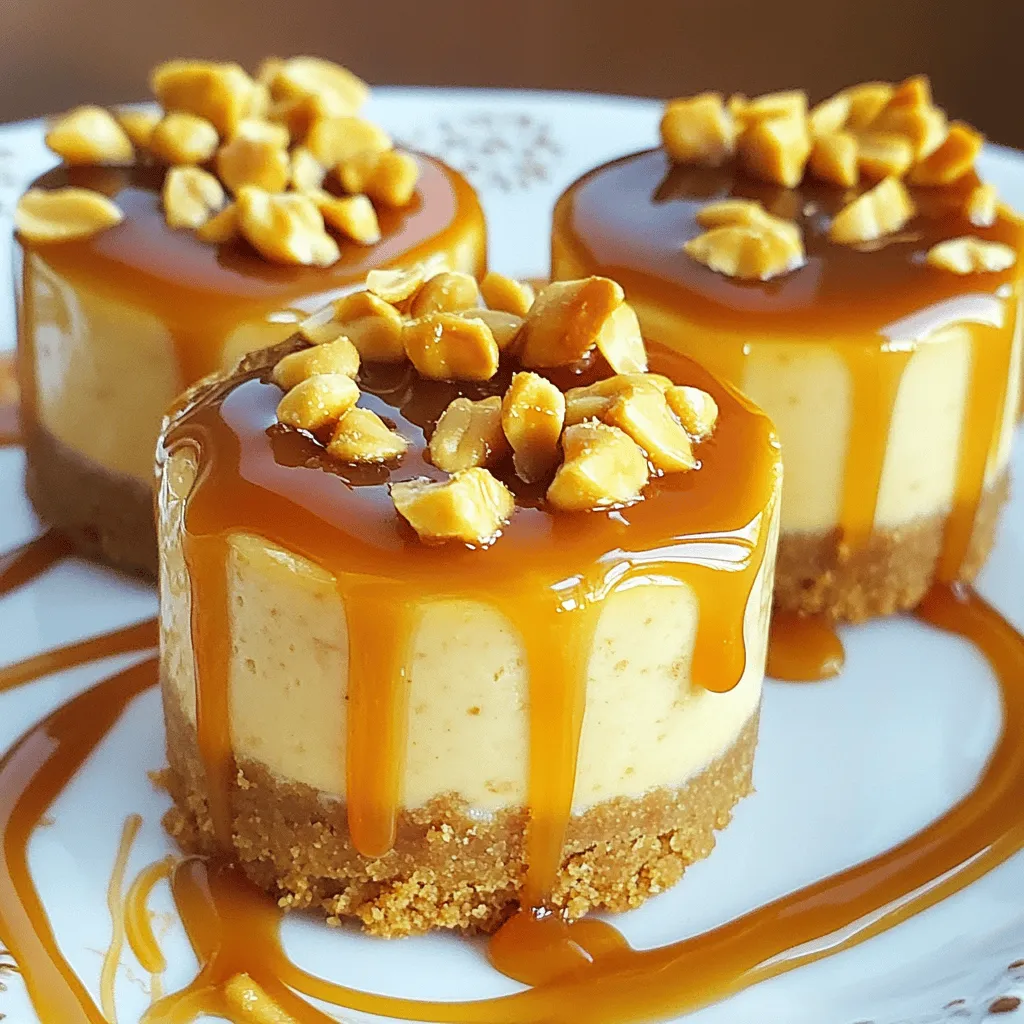
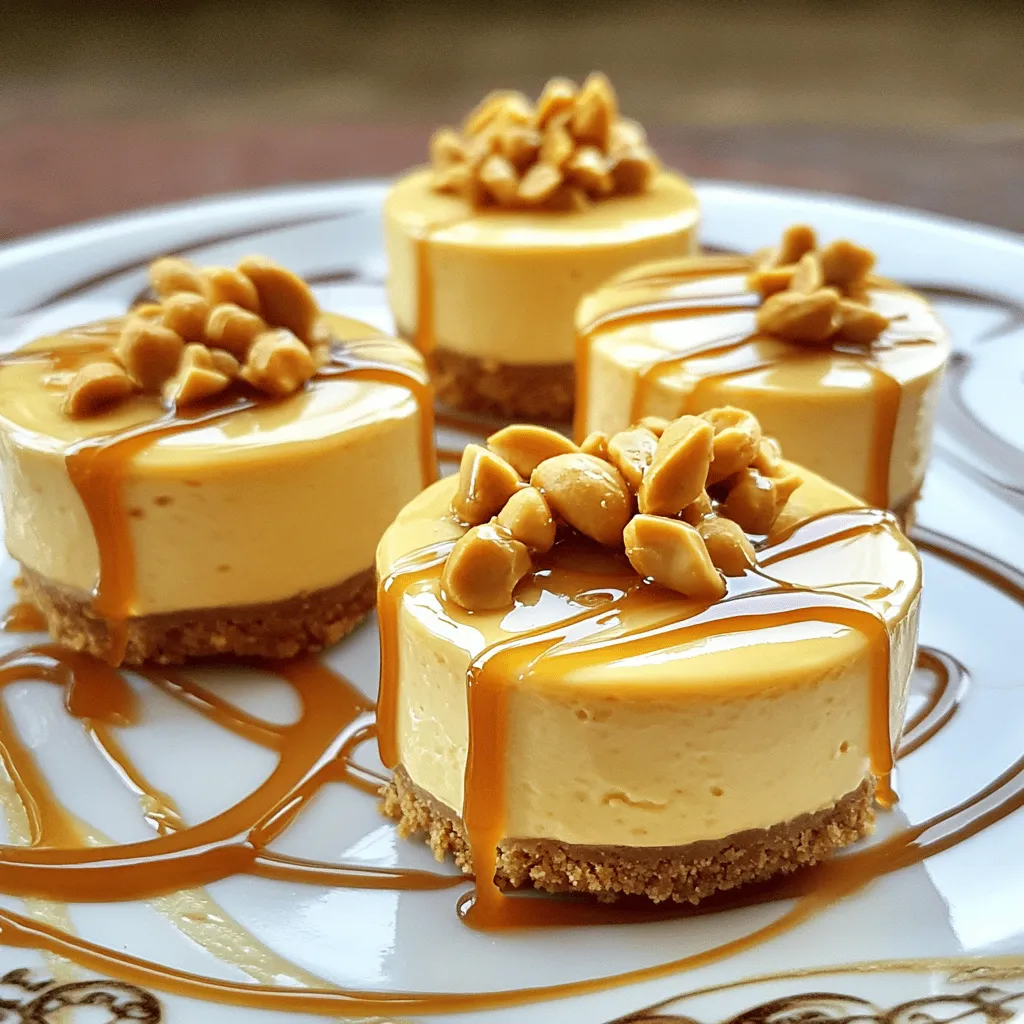
If you love peanut butter and desserts, you’re in for a treat! These Peanut Butter Caramel Mini Cheesecakes are the perfect mix of rich flavors and creamy texture. Whether you’re a novice or a pro in the kitchen, I’ll guide you through each easy step. Plus, I’ll share tips and tricks to make them just right. Get ready to impress your friends and family with this delightful sweet!
Ingredients
Essential Ingredients for Peanut Butter Caramel Mini Cheesecakes
To create these tasty treats, you will need the following ingredients:
– 1 cup graham cracker crumbs
– 1/4 cup unsalted butter, melted
– 2 tablespoons sugar
– 8 oz cream cheese, softened
– 1/2 cup peanut butter
– 1/2 cup powdered sugar
– 1 teaspoon vanilla extract
– 1 cup heavy whipping cream
– 1/4 cup caramel sauce (plus extra for drizzling)
– Pinch of salt
– Chopped peanuts for garnish
Each ingredient plays a key role. The graham cracker crumbs form a crunchy base, while the cream cheese creates a smooth texture. Peanut butter adds rich flavor, and the caramel sauce brings sweetness.
Substitutions and Alternatives
If you need alternatives, here are some ideas:
– Use almond butter or cashew butter instead of peanut butter for a different taste.
– Swap graham crackers for digestive biscuits or gluten-free crumbs for a gluten-free option.
– Replace cream cheese with Greek yogurt for a lighter cheesecake filling.
These swaps can still yield a delicious result while fitting your needs.
Garnishes and Toppings
For added flair, consider these garnishes:
– Drizzle extra caramel sauce on top for a sweet touch.
– Sprinkle chopped peanuts for crunch and visual appeal.
– Add a dollop of whipped cream to enhance presentation.
These simple toppings can elevate your mini cheesecakes and make them even more delightful.
Step-by-Step Instructions
Prepping the Oven and Muffin Tin
First, you need to get your oven ready. Set it to 325°F (160°C). Grab a mini muffin tin and line it with paper liners. This will help you easily remove the cheesecakes later.
Preparing the Crust
In a medium bowl, mix together the graham cracker crumbs, melted butter, and sugar. Combine them until the crumbs look wet. This will make a tasty crust. Spoon about one tablespoon of this mixture into each muffin liner. Press down firmly to make an even layer.
Making the Cheesecake Filling
Now, let’s make the filling. In a large bowl, beat the softened cream cheese until it’s smooth. Add the peanut butter, powdered sugar, vanilla extract, and a pinch of salt. Mix it all together until you have a creamy filling.
Whipping the Cream
In another bowl, whip the heavy cream until stiff peaks form. This means it should hold its shape well. Gently fold the whipped cream into your peanut butter mixture. Do this carefully so you keep the light and fluffy texture.
Filling the Cups and Baking
Spoon the peanut butter cheesecake filling into each crust. Fill them about three-quarters full. Bake these mini cheesecakes for 10 to 12 minutes. The edges will set, but the center might jiggle a little. That’s okay!
Cooling and Chilling Process
After baking, let the cheesecakes cool at room temperature for about 15 minutes. Then, put them in the fridge for at least two hours, or overnight if you can wait. This chilling time helps them set up nicely. When you’re ready, take them out and enjoy.
Tips & Tricks
Achieving the Perfect Texture
To get the right texture, ensure your cream cheese is soft. Let it sit out for about 30 minutes before mixing. This helps it blend smoothly. When you whip the cream, beat it until stiff peaks form. This adds air and lightness to your filling. Fold the whipped cream into the peanut butter mixture gently. This keeps the filling fluffy and creamy.
Flavor Enhancements
For a richer taste, use high-quality peanut butter. You can also mix in a bit of chocolate. Add cocoa powder or melted chocolate to the filling for a chocolate twist. Drizzling extra caramel sauce on top boosts the sweetness. A pinch of sea salt can balance the flavors, making each bite pop. Consider adding a splash of coffee or espresso to deepen the flavor.
Presentation Tips
Presentation matters! Serve each cheesecake on a decorative plate. Drizzle extra caramel sauce around the cheesecakes for flair. Sprinkle chopped peanuts on top for crunch. You can also use whole peanuts to add a nice touch. Arrange your cheesecakes in a circle for a stunning display. This simple trick makes your treat look professional and inviting.
Variations
Nut-Free Alternatives
You can swap the peanut butter for sun butter or almond butter. These nut-free options work great and still taste amazing. Make sure to check for allergies before serving. You can also use cookie butter for a sweet twist. This adds a unique flavor without nuts.
Different Flavor Profiles
Feeling adventurous? Try different flavors! Swap peanut butter for chocolate hazelnut spread. This will give your cheesecakes a rich, chocolatey taste. You can also mix in fruit purees, like strawberry or raspberry, for a fruity twist. Vanilla or caramel can replace peanut butter for a different dessert experience.
Adapting for Dietary Restrictions
For gluten-free options, use gluten-free graham crackers. This keeps the crust tasty without gluten. You can also create a dairy-free version. Use vegan cream cheese and coconut cream instead of heavy cream. Check labels carefully to ensure all ingredients meet dietary needs.
Storage Info
Best Practices for Storing Mini Cheesecakes
To keep your peanut butter caramel mini cheesecakes fresh, store them in an airtight container. This helps prevent any odors from other foods. If you have leftovers, you can stack them with parchment paper between layers. This avoids sticking. Always place them in the fridge. They taste best chilled!
Freezing Instructions
You can freeze these mini cheesecakes for later enjoyment. First, let them cool completely. Then, place them in a single layer on a baking sheet. Freeze until solid. Afterward, transfer them to a freezer-safe container. They can last up to three months in the freezer. When ready to eat, thaw them in the fridge overnight.
Shelf Life and Reheating
These mini cheesecakes last about five days in the fridge. If you want to reheat them, do so gently. Place them in the microwave for just a few seconds. This warms them without melting the texture. Enjoy them cold or warm, but they shine best when chilled.
FAQs
Can I use natural peanut butter?
Yes, you can use natural peanut butter. It gives a rich taste. Make sure it’s creamy and well-mixed. Natural peanut butter may be a bit runnier, so your filling might be softer. If you want a firmer cheesecake, you might add a bit more powdered sugar.
How can I make this recipe chocolate-flavored?
To make chocolate-flavored mini cheesecakes, blend in cocoa powder. Start with 1/4 cup of unsweetened cocoa powder. Mix it in with the cream cheese and peanut butter. You can also use chocolate ganache instead of caramel. This will give a rich, sweet flavor.
What should I do if my cheesecakes are too soft?
If your cheesecakes are too soft, they may need more chilling time. Make sure they are in the fridge for at least two hours. You can also add more cream cheese next time. This will help with the firmness.
Where can I purchase ready-made Peanut Butter Caramel Mini Cheesecakes?
You can find ready-made mini cheesecakes at some bakeries and grocery stores. Look for gourmet shops or specialty dessert places. Some online retailers may offer them too, allowing you to order for special occasions.
Can I make these ahead of time?
Yes, you can make these ahead of time. They keep well in the fridge for up to four days. Just cover them with plastic wrap. You can also freeze them for up to three months. Thaw in the fridge before serving.
These Peanut Butter Caramel Mini Cheesecakes are easy to make and delicious. I shared key ingredients, steps, and tips to help you succeed. Remember, you can customize flavors and follow storage tips for lasting freshness. Whether it’s for a party or a treat for yourself, these mini cheesecakes will impress. Enjoy making and sharing this dessert with friends and family. You’ll love how simple it is to create a tasty dessert that fits your needs.


