Spring is the perfect time to embrace fresh, vibrant flavors. In this article, I’ll show you how to create delicious and nutritious spring veggie power bowls. Packed with fresh ingredients, these bowls are not only colorful but also filled with health benefits. You’ll learn step-by-step instructions to make them, plus tips for meal prep and storage. Ready to brighten your plate this spring? Let’s dive in!
Why I Love This Recipe
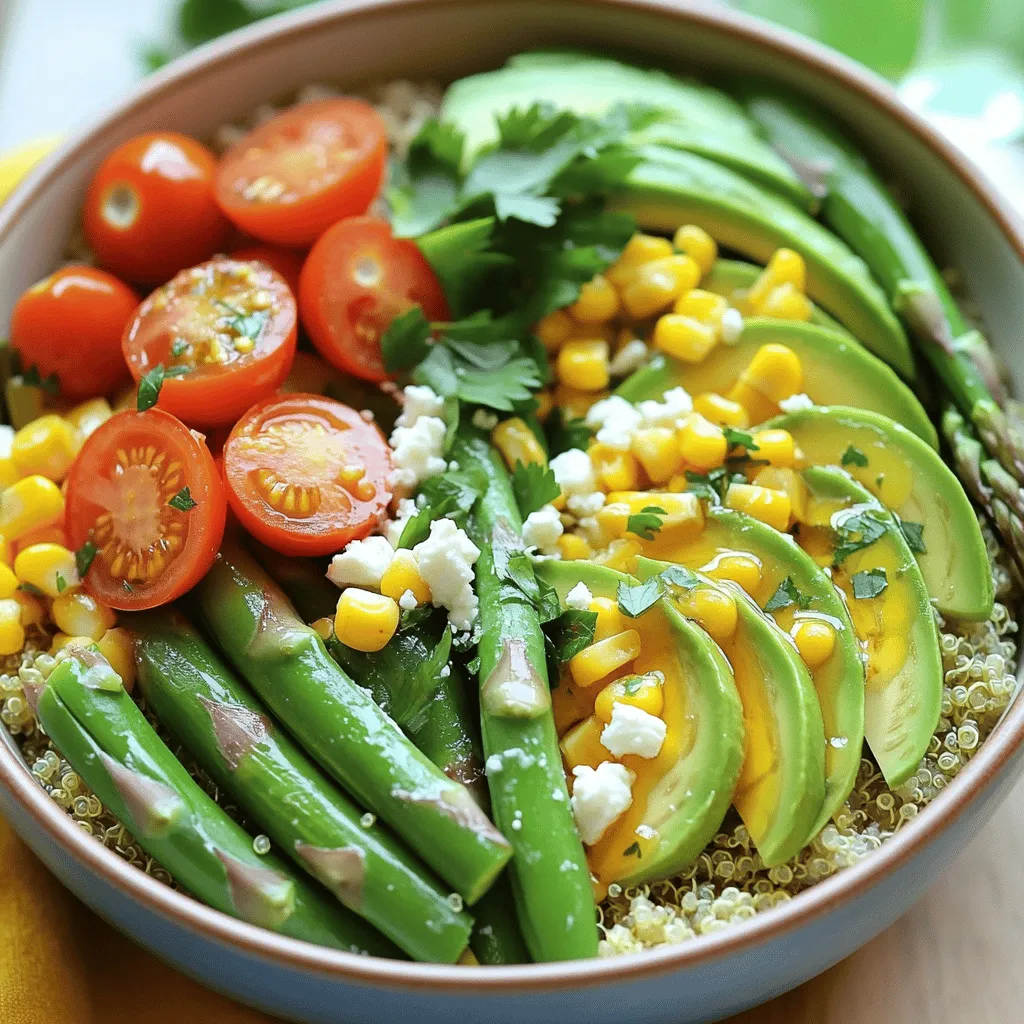
- Fresh and Vibrant Ingredients: This power bowl is packed with seasonal vegetables, making each bite colorful and nutritious.
- Quick and Easy to Prepare: With a total time of just 30 minutes, this recipe is perfect for busy weeknights.
- Customizable: You can easily swap in your favorite veggies or proteins, allowing for endless variations.
- Healthy and Satisfying: The combination of quinoa, veggies, and healthy fats from avocado keeps you full and energized.
Ingredients
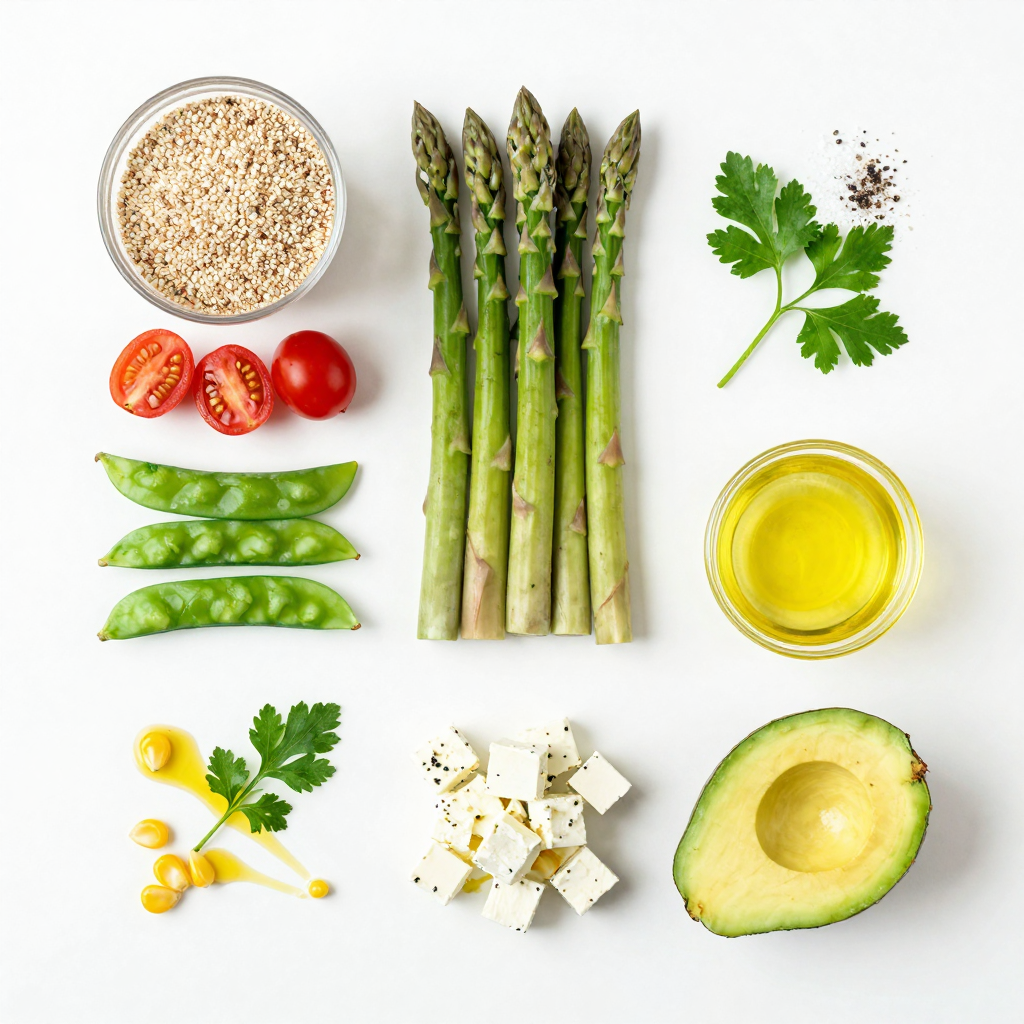
List of Fresh Ingredients
– 1 cup quinoa, rinsed
– 2 cups vegetable broth (or water)
– 1 cup cherry tomatoes, halved
– 1 cup asparagus, trimmed and cut into 2-inch pieces
– 1 cup snap peas, trimmed
– 1 cup corn kernels (fresh, frozen, or canned)
– 1 avocado, sliced
– 1/4 cup feta cheese, crumbled (optional)
– 1/4 cup fresh parsley, chopped
– 2 tablespoons extra virgin olive oil
– 1 tablespoon lemon juice
– Salt and pepper to taste
Nutritional Benefits of Each Vegetable
Each vegetable in this bowl brings its own perks.
– Quinoa is a great source of protein. It has all nine essential amino acids.
– Cherry tomatoes add a juicy burst and are full of vitamins A and C.
– Asparagus is rich in fiber and helps with digestion.
– Snap peas bring a sweet crunch and are low in calories.
– Corn gives a pop of sweetness and has fiber for gut health.
– Avocado is full of healthy fats that support heart health.
– Feta cheese adds flavor and calcium, if you choose to use it.
– Fresh parsley is packed with antioxidants and adds a bright taste.
Alternatives for Seasonal Variations
If you want to change things up, use what’s in season or what you have.
– Swap asparagus for zucchini or broccoli. Both work well when sautéed.
– Use bell peppers instead of snap peas for extra color and crunch.
– Sweet potatoes can replace corn for a different texture and taste.
– Try spinach or kale instead of parsley for a leafy green boost.
– Change up your grains! Use brown rice or farro if you want variety.
These choices make your bowls fun and unique. You can mix and match to fit your taste or what you have on hand.
Step-by-Step Instructions
Cooking the Quinoa
Start by rinsing 1 cup of quinoa under cold water. This helps remove the bitter coating. In a medium pot, combine the rinsed quinoa with 2 cups of vegetable broth. Bring it to a boil over high heat. Once boiling, lower the heat to low. Cover the pot and let it simmer for about 15 minutes. The quinoa will absorb the liquid and become fluffy. When it’s done, remove it from heat and fluff it with a fork. Set it aside while you cook the veggies.
Sautéing the Vegetables
Next, grab a large skillet and heat 2 tablespoons of olive oil over medium heat. Once hot, add 1 cup of trimmed and cut asparagus and 1 cup of trimmed snap peas. Sauté them for about 3-4 minutes. You want them tender but still crisp. Then, add in 1 cup of halved cherry tomatoes and 1 cup of corn kernels. Continue to sauté for another 2-3 minutes until everything is warmed through. Season with salt and pepper to taste. Remove the skillet from heat.
Assembling the Power Bowls
Now it’s time to put your power bowls together! Start with a generous scoop of the fluffy quinoa as the base in each bowl. Next, add the sautéed vegetable mix on top. Slice 1 avocado and arrange it nicely on each bowl. If you like, sprinkle 1/4 cup of crumbled feta cheese on top for extra flavor. Finally, drizzle 1 tablespoon of lemon juice over everything and garnish with 1/4 cup of chopped fresh parsley. Enjoy your beautiful Spring Veggie Power Bowls!
Pro Tips
- Perfectly Cooked Quinoa: Rinse the quinoa thoroughly before cooking to remove its natural coating, which can make it taste bitter. This enhances the nutty flavor and ensures a fluffy texture.
- Seasoning Vegetables: Season the vegetables while sautéing to build layers of flavor. A pinch of salt and a dash of pepper during cooking can elevate the taste significantly.
- Avocado Freshness: To keep avocado slices from browning, squeeze a little lemon juice on top just before serving. This adds flavor and keeps them looking vibrant.
- Colorful Presentation: Arrange the ingredients in the bowl in a visually appealing way. Group similar colors together and use bright bowls to make the dish more inviting.
Tips & Tricks
Making Ahead for Meal Prep
To make meal prep easy, cook your quinoa ahead. Store it in the fridge for up to four days. You can also sauté the veggies in advance. Just keep them in a sealed container. This lets you grab your meals quickly during busy weeks. When ready to eat, combine everything in a bowl. You can warm it up in the microwave or eat it cold.
Enhancing Flavor with Seasonings
Flavor is key in any dish. For these power bowls, I love to use fresh herbs. Mint and basil add bright notes. You can also try spices like cumin or paprika. A dash of garlic powder brings warmth too. If you want more zing, add hot sauce or chili flakes. Taste as you go to find what you like best.
Presentation Tips for an Appealing Look
How you present your food matters. It makes meals more fun! Use colorful bowls to show off your fresh veggies. Arrange the ingredients in layers for a beautiful effect. A sprinkle of parsley on top adds a nice touch. You could even add lemon wedges on the side. This adds color and a hint of freshness.
Variations
Protein Additions
Adding protein to your Spring Veggie Power Bowls makes them more filling. You can use chicken, tofu, or beans. For chicken, grill or roast it first. Then, slice it and add it on top. If you choose tofu, press it to remove extra moisture. Cube and sauté it until golden. Black beans or chickpeas can also boost protein. They add flavor and nutrition without much fuss.
Different Grain Bases
The grain base is key to your power bowl. Quinoa works well, but you can swap it out. Brown rice is a great option. It has a nutty taste and adds fiber. Farro is another choice; it’s chewy and packed with nutrients. If you want something gluten-free, try millet or cauliflower rice. Each grain brings a unique flavor and texture.
Customizing the Dressing for Different Flavors
The dressing can change the whole dish. You can stick with lemon juice and olive oil, but feel free to mix it up. For a creamy touch, try tahini or yogurt. A splash of soy sauce gives it an Asian twist. Want some heat? Add a pinch of chili flakes or sriracha. For herby flavors, mix in fresh herbs like dill or basil. Experiment with ratios until you find your perfect blend.Each variation lets you create a new dish each time. Enjoy the process of making it your own!
Storage Info
How to Properly Store Leftovers
To keep your Spring Veggie Power Bowls fresh, store them in airtight containers. Divide the bowls into individual portions for easy access. Make sure to let them cool to room temperature before sealing. This way, you avoid condensation that can make your veggies soggy.
Reheating Tips for Best Taste
When reheating, use the microwave or a skillet. If using the microwave, heat in short bursts. Stir between intervals to ensure even warming. If you prefer a skillet, add a splash of water and cover to steam the veggies gently. This keeps them crisp and tasty.
Shelf Life of Ingredients
Most of the ingredients in your power bowl last about 3 to 5 days in the fridge. Quinoa stays fresh for up to a week. However, fresh veggies like asparagus and snap peas taste best when eaten within 2 to 3 days. Store avocado slices separately to avoid browning. Always check for freshness before eating.
FAQs
Can I use frozen vegetables instead of fresh?
Yes, you can use frozen vegetables. They are often frozen at their peak freshness. This means they can be as good as fresh ones. Just remember to thaw them first. You may need to cook them a bit less. This will help keep them crisp. Using frozen veggies can save time. Plus, it makes meal prep easy.
What other vegetables can I add to my power bowls?
You can add many vegetables to your power bowls. Here are some tasty options:
– Zucchini, sliced
– Bell peppers, chopped
– Broccoli florets
– Carrots, shredded
– Radishes, thinly sliced
– Spinach or kale, torn
Mix and match to fit your taste. Each veggie adds unique flavors and nutrients.
How do I make this recipe vegan?
To make this recipe vegan, skip the feta cheese. You can also add a plant-based protein. Try chickpeas or black beans for great taste. Another option is to use a vegan cheese. This will keep the creamy texture. You can still enjoy the fresh veggies and quinoa for a balanced meal.
This post covered how to create tasty power bowls. We explored fresh ingredients, their health perks, and the best ways to mix flavors. You learned to cook quinoa, sauté vegetables, and assemble bowls easily. I also shared tips for making meals ahead and keeping them fresh. Remember, you can switch proteins, grains, and dressings for your taste. Enjoy your creative cooking and delicious meals!