Introduction
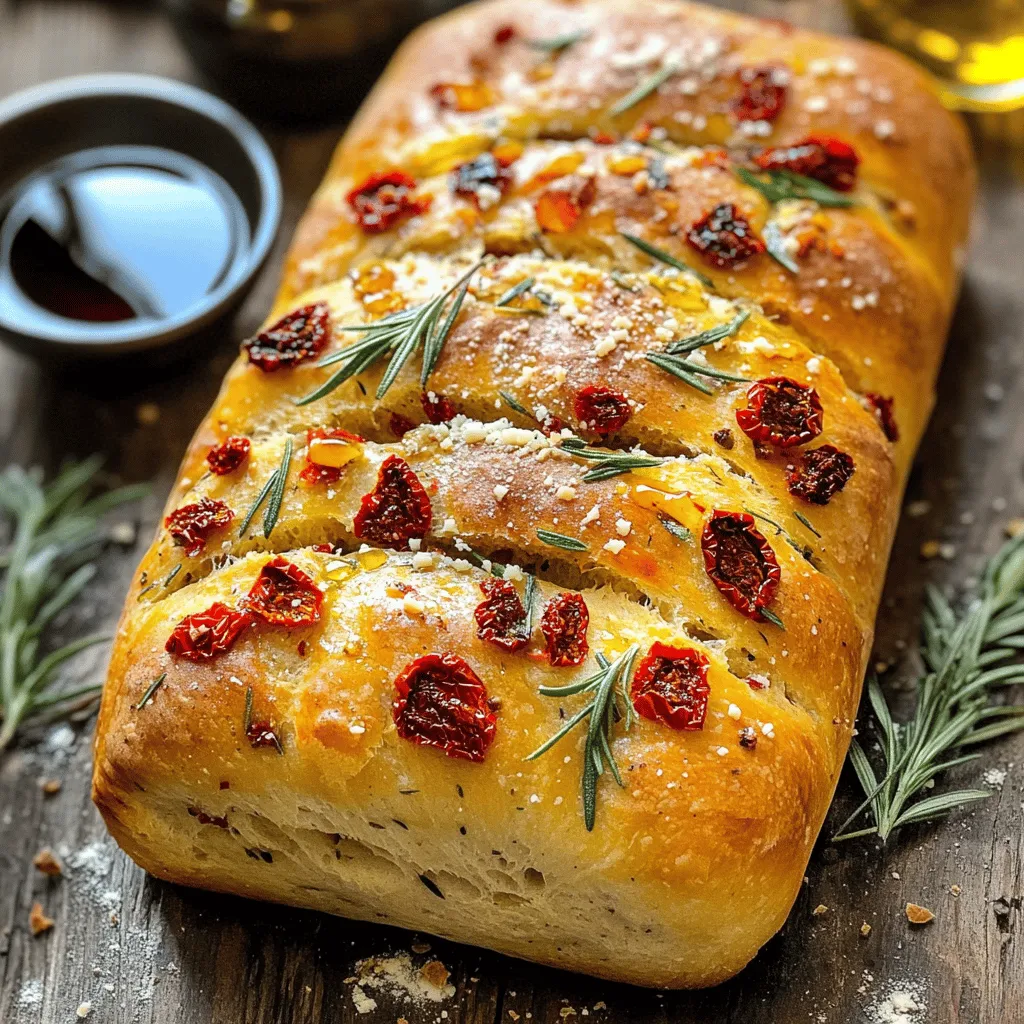
Artisan bread, with its crusty exterior and soft, flavorful interior, has become a beloved staple in kitchens around the world. The allure of freshly baked bread is undeniable; it fills the home with a warm, inviting aroma and creates a sense of comfort and satisfaction. Among the myriad of artisan bread recipes available, the combination of sun-dried tomatoes and rosemary stands out for its unique and robust flavors. This recipe takes the essence of traditional bread-making and elevates it with the rich, tangy notes of sun-dried tomatoes and the fragrant, earthy scent of fresh rosemary.
Homemade bread is not just a culinary endeavor; it is an experience that brings people together. Whether it’s a family gathering, a cozy dinner with friends, or a simple meal at home, serving warm, freshly baked bread enhances the dining experience and creates lasting memories. Furthermore, making bread at home allows for creativity and personalization, letting bakers experiment with flavors and textures while ensuring quality ingredients are used.
In this article, we will explore the process of making sun-dried tomato and rosemary artisan bread, delving into its background, ingredients, and step-by-step instructions to ensure your baking journey is successful.
Understanding Artisan Bread
Artisan bread is defined by its handcrafted nature, with a strong emphasis on traditional methods and high-quality ingredients. Unlike mass-produced bread, artisan bread is often made in small batches, allowing for greater attention to detail and flavor development. The characteristics of artisan bread include a thick, crusty crust and an airy, open crumb structure, which is achieved through a longer fermentation process.
One of the significant benefits of making artisan bread at home is the control it gives bakers over the ingredients. Store-bought bread often contains preservatives and additives that may not align with personal dietary preferences or health goals. By making bread from scratch, you can ensure that only fresh, wholesome ingredients are used, resulting in a product that is not only delicious but also nutritious.
Quality ingredients play a crucial role in the success of artisan bread. The choice of flour, yeast, and additional flavorings can significantly impact the texture and taste of the final loaf. For instance, using high-protein bread flour can yield a chewier texture, while all-purpose flour might result in a softer crumb. The use of fresh herbs and flavorful additions, such as sun-dried tomatoes, not only enhances the taste but also adds visual appeal to the bread.
Ingredients Breakdown
To create the perfect sun-dried tomato and rosemary artisan bread, it’s essential to understand the role of each ingredient in the recipe. Here’s a breakdown of what you’ll need:
– Bread Flour: The backbone of any bread recipe, bread flour contains a higher protein content than all-purpose flour, which helps develop gluten. This gluten structure is what gives the bread its chewy texture and allows it to rise properly.
– Instant Yeast: This type of yeast is preferred for its convenience and speed. It doesn’t require proofing, meaning you can mix it directly into your dry ingredients. Instant yeast helps the dough rise quickly, resulting in a lighter loaf.
– Sun-Dried Tomatoes: These flavorful additions provide a burst of tanginess and a hint of sweetness. They also add moisture and color to the bread. When selecting sun-dried tomatoes, opt for those that are packed in oil for added richness and flavor.
– Fresh Rosemary: This fragrant herb complements the savory notes of the sun-dried tomatoes beautifully. Fresh rosemary adds an aromatic quality to the bread, making it a delightful accompaniment to soups, salads, and cheeses.
– Salt: Essential for flavor, salt also strengthens the gluten structure and helps control the fermentation process. It’s important not to skip this ingredient, as it enhances the overall taste of the bread.
– Water: The hydration level of the dough affects its texture and structure. Using warm water can help activate the yeast more effectively, leading to a better rise.
– Optional Ingredient – Parmesan Cheese: For those looking to add an extra layer of flavor, grated Parmesan cheese can be incorporated into the dough. It provides a savory, nutty taste that pairs well with the other ingredients.
Understanding the purpose of each ingredient is vital for achieving the desired flavor and texture in your artisan bread. Now that we’ve covered the ingredients, let’s move on to the critical step-by-step instructions for making this delicious sun-dried tomato and rosemary artisan bread.
Step-by-Step Instructions
Creating artisan bread may seem daunting, but with the right guidance and a bit of patience, it can be a rewarding experience. Below are detailed instructions to help you navigate the bread-making process successfully.
Step 1: Activating the Yeast
While instant yeast does not require proofing, it’s still beneficial to understand its activation. Begin by measuring out the warm water (around 110°F or 43°C). Add the instant yeast directly to the water and let it sit for a few minutes. This step ensures the yeast is active and ready to work its magic, producing carbon dioxide that will help the dough rise.
Step 2: Mixing the Dough
In a large mixing bowl, combine the bread flour and salt. Whisking these dry ingredients together helps to evenly distribute the salt, which is important for consistent flavor. Next, add the activated yeast mixture to the flour and salt. Using a wooden spoon or your hands, mix the ingredients until they come together to form a shaggy dough. At this point, you can also incorporate the sun-dried tomatoes and chopped fresh rosemary into the mixture, ensuring they are evenly distributed throughout the dough.
Step 3: Kneading the Dough
Once the ingredients are combined, it’s time to knead the dough. Transfer it to a lightly floured surface and use the heel of your hand to push the dough away from you, then fold it back over itself. Rotate the dough a quarter turn and repeat this process. Kneading helps to develop the gluten, creating a strong structure for the bread. Continue kneading for about 8-10 minutes or until the dough becomes smooth and elastic. If the dough feels too sticky, sprinkle a small amount of flour as needed, but be careful not to add too much, as it can make the bread dense.
Step 4: First Rise
After kneading, shape the dough into a ball and place it in a lightly oiled bowl, turning it to coat with oil. Cover the bowl with a clean kitchen towel or plastic wrap and let it rise in a warm, draft-free location. This first rise, or bulk fermentation, typically takes about 1 to 1.5 hours, or until the dough has doubled in size.
Step 5: Shaping the Loaf
Once the dough has risen, gently punch it down to release the gases. Turn it out onto a lightly floured surface and shape it into a round or oval loaf, depending on your preference. For a more rustic look, you can create a free-form loaf, or use a banneton for a more defined shape. Place the shaped dough onto a parchment-lined baking sheet or into a pre-floured banneton, seam side up. Cover it again and let it rise for another 30 to 45 minutes.
Step 6: Preheating the Oven
While the dough is undergoing its second rise, preheat your oven to 450°F (232°C). To create steam in the oven (which is crucial for a crusty exterior), place a shallow pan on the bottom rack while the oven preheats. This will allow you to add water just before baking to create a steamy environment, which helps achieve that desirable crust.
With these detailed steps, you are well on your way to baking your own sun-dried tomato and rosemary artisan bread. The combination of flavors and the joy of homemade bread will surely impress your family and friends, making this recipe a delightful addition to any meal. Stay tuned for the next part, where we will cover the final steps, baking techniques, and tips for achieving the perfect loaf.
First Rise: What Happens During Fermentation
The first rise, also known as fermentation, is a crucial step in bread-making. During this period, the yeast activates and begins to consume the sugars present in the dough, producing carbon dioxide gas and alcohol. This process is essential as it contributes to the bread’s flavor and texture. The carbon dioxide gas creates tiny bubbles in the dough, which will expand during baking, resulting in a light and airy loaf.
For your Sun-Dried Tomato & Rosemary Artisan Bread, allow the dough to rise in a warm, draft-free environment for about 1 to 2 hours, or until it has doubled in size. Cover the bowl with a damp cloth to retain moisture, which further aids the fermentation process. This is the time when the flavors meld together, and you can already start to envision the aromatic bread that will soon fill your kitchen.
Shaping the Loaf: Techniques for Creating a Perfect Shape
Once your dough has finished its first rise, it’s time to shape it. Shaping is vital not just for aesthetics but also for ensuring that the bread rises evenly. Begin by gently deflating the dough on a lightly floured surface, being careful not to knock out too much air.
To shape the loaf, follow these steps:
1. Pre-shape: Divide the dough into two equal pieces if you prefer smaller loaves. Gently shape each piece into a rough ball. Let it rest for 10-15 minutes, covered with a kitchen towel. This resting period allows the gluten to relax, making the final shaping easier.
2. Final shaping: For a round loaf, take one round and gently flatten it into a disc. Fold the edges toward the center, then flip it over so the seam is on the bottom. For a batard shape, roll the dough gently into an oval and taper the ends. Use your hands to create tension on the surface by pulling the dough towards you on the working surface.
3. Place in proofing basket: If you have a proofing basket, place the shaped dough seam side up for a rustic look. Alternatively, you can use a bowl lined with a floured kitchen towel.
Second Rise: Preparing the Dough for Baking
After shaping, the dough needs a second rise, which typically lasts about 30-60 minutes. This final rise allows the dough to relax and expand further, enhancing its texture. During this time, preheat your oven to 450°F (232°C) to ensure that it reaches the ideal temperature for baking your bread.
To check if the dough has risen adequately, perform the “poke test.” Gently press your finger into the dough; if the indentation springs back slowly, it’s ready for the oven. If it springs back quickly, give it a bit more time.
Baking: Understanding Oven Temperature and Doneness Indicators
Baking bread is both an art and a science. The high temperature helps to create an initial burst of steam, allowing the bread to rise further, a process known as “oven spring.” For your artisan bread, place a baking stone or a heavy baking sheet in the oven while it’s preheating. This will provide a nice, even heat to the bottom of the loaf.
When you’re ready to bake, carefully invert the dough onto a parchment-lined baking sheet or directly onto the hot baking stone. To achieve a crispy crust, you can create steam in the oven by placing a pan of hot water at the bottom of the oven or spraying water into the oven with a spray bottle right after you place the bread inside.
Bake the bread for 25-30 minutes, or until it’s golden brown and sounds hollow when tapped on the bottom. An internal thermometer should read around 200°F (93°C) for fully cooked bread.
Tips for Perfecting Your Bread
Ideal Conditions for Rising Dough
Creating the right environment for your dough to rise is essential. Aim for a warm, humid area, about 75°F to 80°F (24°C to 27°C). If your kitchen is cool, you can place the dough in an oven with just the light on or near a radiator. Alternatively, a simple solution is to fill a bowl with hot water and place it on a lower rack in the oven with the dough above.
Kneading Techniques for Gluten Development
Proper kneading helps develop gluten, which gives bread its structure. You can knead by hand or use a stand mixer with a dough hook. If kneading by hand, use the “push and fold” method: push the dough away from you with the heel of your hand, fold it over, and rotate it. Repeat this for about 8-10 minutes, or until the dough is smooth and elastic.
Common Mistakes to Avoid in Bread-Making
Many novice bakers struggle with bread-making due to common pitfalls. Here are a few to watch out for:
1. Skipping the first rise: This can lead to dense bread. Always allow the dough to double in size.
2. Using too much flour: Adding excess flour can result in a dry loaf. Measure accurately and add flour gradually.
3. Not preheating the oven: Baking in a cold oven will prevent the bread from rising correctly.
Flavor Variations: Adding Herbs or Cheeses
While the sun-dried tomatoes and rosemary give this artisan bread its unique flavor, feel free to experiment! Consider adding minced garlic, grated cheese, or other herbs like thyme or basil. For a twist, incorporate olives or roasted red peppers for added depth.
Presentation and Serving Suggestions
Ideas for Serving the Artisan Bread: Dips, Spreads, or Pairings
Your Sun-Dried Tomato & Rosemary Artisan Bread is versatile and pairs wonderfully with a variety of dips and spreads. Here are some serving suggestions:
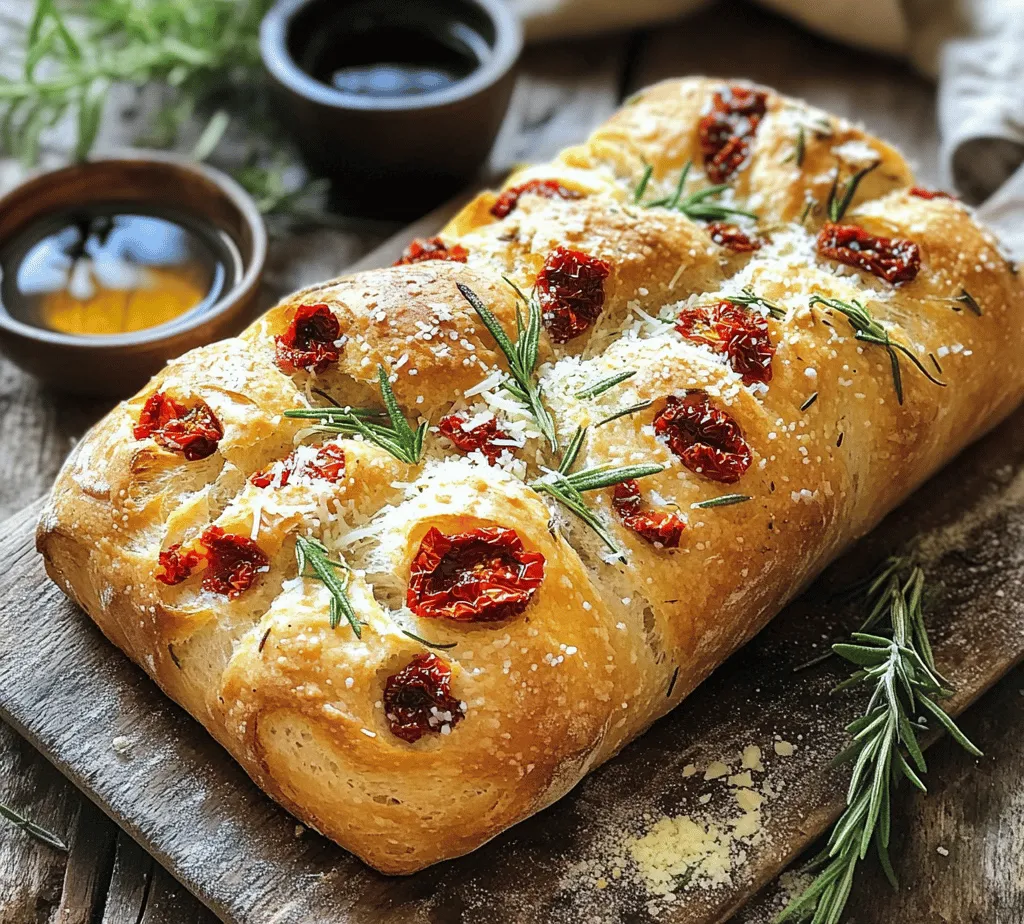
– Olive oil and balsamic vinegar: A classic pairing that enhances the flavors of the bread.
– Hummus: A creamy, flavorful spread that complements the bread’s texture.
– Herbed cream cheese or goat cheese: These spreads add richness and enhance the savory notes of the bread.
Creating a Visually Appealing Bread Platter
To make your artisan bread even more inviting, consider creating an appetizing bread platter. Slice the bread into thick pieces and arrange it on a wooden board. Accompany it with small bowls of dips, some fresh herbs for garnish, and perhaps a selection of cheeses and cured meats. This presentation adds a touch of elegance to any meal.
Incorporating the Bread into Meals: Breakfast, Lunch, and Dinner Options
This artisan bread can be enjoyed any time of the day.
– Breakfast: Serve with a poached egg and a sprinkle of fresh herbs for a delicious start to your day.
– Lunch: Use the bread for sandwiches filled with roasted vegetables, fresh greens, and a drizzle of pesto.
– Dinner: Pair with a hearty soup or stew, allowing the bread to soak up the flavors.
Nutritional Information
Overview of the Nutritional Benefits of the Ingredients Used
Homemade bread offers numerous nutritional benefits over store-bought options. The primary ingredients in your Sun-Dried Tomato & Rosemary Artisan Bread—whole wheat flour, sun-dried tomatoes, and fresh herbs—provide a rich source of vitamins, minerals, and fiber.
– Whole Wheat Flour: It is higher in nutrients and fiber compared to white flour, promoting digestive health.
– Sun-Dried Tomatoes: These are rich in antioxidants and vitamins, particularly vitamin C and lycopene, which have been linked to various health benefits.
– Rosemary: This herb is packed with antioxidants and anti-inflammatory compounds, contributing to overall wellness.
Healthier Aspects of Homemade Bread Compared to Store-Bought Options
Making bread at home allows you to control the ingredients and avoid preservatives and additives commonly found in store-bought products. Plus, you can customize your bread to suit dietary preferences, such as using gluten-free flour or reducing salt.
Tips for Making the Recipe More Nutritious
To boost the nutritional profile of your artisan bread:
– Add seeds: Incorporate chia or flaxseeds into the dough for added omega-3 fatty acids and fiber.
– Use alternative flours: Experiment with almond or oat flour for additional nutrients.
– Incorporate vegetables: Finely chop and add vegetables like spinach or zucchini for extra vitamins and minerals.
Conclusion
Baking your own Sun-Dried Tomato & Rosemary Artisan Bread at home is not just about creating a delicious loaf; it’s about the joy of the process and the satisfaction of sharing it with loved ones. There’s a unique sense of accomplishment that comes from kneading dough and watching it transform into a beautiful, fragrant bread.
As you embark on this baking journey, remember that the possibilities are endless. Feel free to experiment with the recipe by adding your favorite flavors or trying different shapes. Each loaf you bake will be a testament to your culinary creativity and love for good food.
So gather your ingredients, roll up your sleeves, and dive into the comforting world of bread-making. With each batch, you will not only create a delightful treat for the palate but also memories that will linger long after the last crumb has been enjoyed. Happy baking!