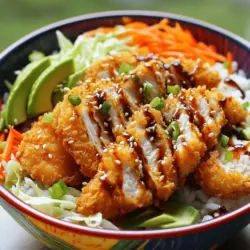
Japanese Katsu Bowls
Satisfy your cravings with a mouthwatering Japanese Katsu Bowl that's both flavorful and easy to make! This recipe features crispy chicken, fluffy jasmine rice, fresh veggies, and a drizzle of tangy tonkatsu sauce, creating a delicious meal in no time. Perfect for beginners or seasoned cooks, follow the step-by-step guide to assemble your bowl. Ready to cook?