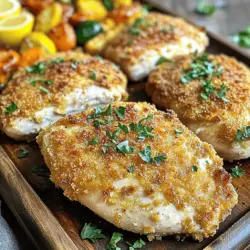
Melt In Your Mouth Chicken Breasts
Discover how to create the juiciest, most flavorful chicken with my Melt In Your Mouth Chicken Breasts recipe! With just a few simple ingredients and straightforward steps, you'll impress your family at dinner. Learn how to choose the best chicken, get tips for perfecting that melt-in-your-mouth texture, and explore delicious variations. Click through to make mealtime more exciting with this easy and tasty recipe!