Go Back
- 1 cup creamy peanut butter - 1/2 cup unsweetened cocoa powder - 1/4 cup maple syrup or honey - 1/4 cup coconut oil, melted - 1 teaspoon vanilla extract - 1/4 teaspoon salt - 1/2 cup mini chocolate chips (optional) The main ingredients are simple. Creamy peanut butter gives a rich taste. Cocoa powder adds a deep chocolate flavor. Maple syrup or honey sweetens it perfectly. Melted coconut oil helps bind everything together. A hint of vanilla extract enhances the flavors. The salt balances the sweetness. Mini chocolate chips can add some fun texture. You can switch out some ingredients if needed. For sweeteners, try agave or stevia. These are good if you want low sugar. If you don’t have peanut butter, almond or cashew butter works well. Both give a different taste but stay creamy. For dairy-free options, use coconut oil and ensure your chocolate chips are dairy-free. This way, everyone can enjoy the fudge! - In a medium bowl, mix the creamy peanut butter, cocoa powder, maple syrup, melted coconut oil, vanilla extract, and salt. - Whisk until the mixture is smooth. Make sure there are no lumps from the cocoa powder. - If you want extra texture, fold in the mini chocolate chips. Distribute them evenly. - Line an 8x8 inch baking dish with parchment paper. Leave some paper hanging over the sides. This makes it easy to lift the fudge out later. - Pour the fudge mixture into the lined baking dish. Use a spatula to spread it evenly. - Place the dish in the refrigerator. Chill it for at least 2 hours, or until firm to the touch. - Use a sharp knife to cut the fudge into squares or rectangles. - For a pretty presentation, serve the fudge on a decorative plate. Garnish with a sprinkle of sea salt or whole peanuts. - Overmixing the fudge: Mixing too much can make the fudge tough. Stir just until combined. - Not allowing enough chill time: The fudge needs time to set. Chill for at least two hours. - Ensuring proper measurement of ingredients: Use measuring cups for accuracy. This helps create the right texture. - Importance of using room temperature ingredients: Room temperature ingredients blend better. They help create a smooth mixture. - Adding a pinch of sea salt: A little salt makes the flavors pop. It balances the sweetness. - Using high-quality cocoa powder: Good cocoa powder brings rich flavor. Opt for unsweetened varieties for best results. {{image_2}} You can make this fudge even better with fun add-ins. Try adding nuts like walnuts for crunch. Seeds like chia can also be great. They add texture and a healthy boost. You can also play with flavor extracts. A touch of mint gives it a fresh taste. Almond extract adds a nice twist too. Just a little goes a long way! Looking for a healthier option? Use sugar-free chocolate chips instead of regular ones. This way, you cut down on sugar but keep the taste. You can also reduce the sweetener amount. This helps if you want a less sweet fudge. Just remember, it may change the texture slightly. Celebrate the seasons with special flavors! For fall, add pumpkin spice for a cozy vibe. In winter, try peppermint to make it festive. You can also dress up your fudge for special days. Use colorful toppings like sprinkles or nuts. These little extras make your fudge look as good as it tastes! To keep your fudge fresh, use an airtight container. Glass containers work well, but plastic ones are fine too. Make sure the lid seals tight to avoid air. Store your fudge in the fridge. This keeps it firm and tasty. If you want to save some for later, freezing is great. Cut the fudge into squares before freezing. Place pieces in a single layer on a baking sheet. Once frozen, transfer them to a freezer bag. Remove as much air as you can from the bag. For thawing, take out a square and leave it in the fridge overnight. This helps it keep its creamy texture. In the fridge, your fudge lasts about a week. After that, it may lose flavor and texture. Look for signs of spoilage: if it smells off or has a dry feel, it’s time to toss it. Keeping it stored well helps you enjoy it longer! Yes, you can make this fudge vegan! To do this, simply replace the honey with maple syrup. Maple syrup is a great plant-based sweetener. Use a vegan chocolate chip if you add those. This keeps the fudge tasty and friendly for plant-based diets. The fudge takes about 2 hours to set in the fridge. Factors like the thickness of your fudge and the fridge's temperature can change this time. If your fudge is thick, it might take longer. Check it after 2 hours. It should feel firm to the touch. You can use natural peanut butter, but it will change the fudge's texture. Natural peanut butter is thicker and can make the fudge grainy. Creamy peanut butter gives a smooth and rich taste. If you prefer natural, mix it well to ensure a good blend. This blog post covered all you need for making no-bake chocolate peanut butter fudge. We talked about main ingredients, simple steps for preparation and assembly, and helpful tips to avoid mistakes. Remember, you can mix in your favorite flavors and store the fudge safely. Experiment with variations and have fun! With this knowledge, you can create tasty treats for any occasion. Happy fudging!

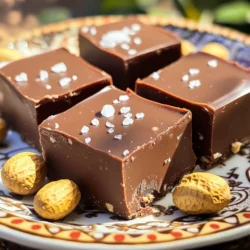
No-Bake Chocolate Peanut Butter Fudge

Indulge in the rich and creamy delight of this decadent no-bake chocolate peanut butter fudge! Made with simple ingredients like peanut butter, cocoa powder, and maple syrup, this treat is easy to whip up and perfect for any occasion. In just 10 minutes of prep, you can create a delicious dessert that will impress your friends and family. Click through to explore the full recipe and satisfy your sweet cravings today!

Ingredients
  

1 cup creamy peanut butter

1/2 cup unsweetened cocoa powder

1/4 cup maple syrup (or honey)

1/4 cup coconut oil, melted

1 teaspoon vanilla extract

1/4 teaspoon salt

1/2 cup mini chocolate chips (optional, for added texture)

Instructions
 

In a medium mixing bowl, combine the creamy peanut butter, unsweetened cocoa powder, maple syrup, melted coconut oil, vanilla extract, and salt.

    Whisk together until smooth and well combined, ensuring there are no lumps from the cocoa powder.

      If using, fold in the mini chocolate chips, distributing them evenly throughout the fudge mixture.

        Line an 8x8 inch square baking dish with parchment paper, leaving some overhang to make removing the fudge easier later.

          Pour the fudge mixture into the prepared baking dish and spread it out evenly using a spatula.

            Place the dish in the refrigerator for at least 2 hours, or until the fudge is set and firm to the touch.

              Once chilled and set, lift the fudge out using the parchment paper overhang and cut into squares or rectangles.

                Prep Time: 10 minutes | Total Time: 2 hours 10 minutes | Servings: About 16 squares

                  - Presentation Tips: Serve the fudge squares on a decorative plate, garnished with a sprinkle of sea salt or a few whole peanuts for an extra touch. Store any leftovers in an airtight container in the fridge for up to a week. Enjoy!