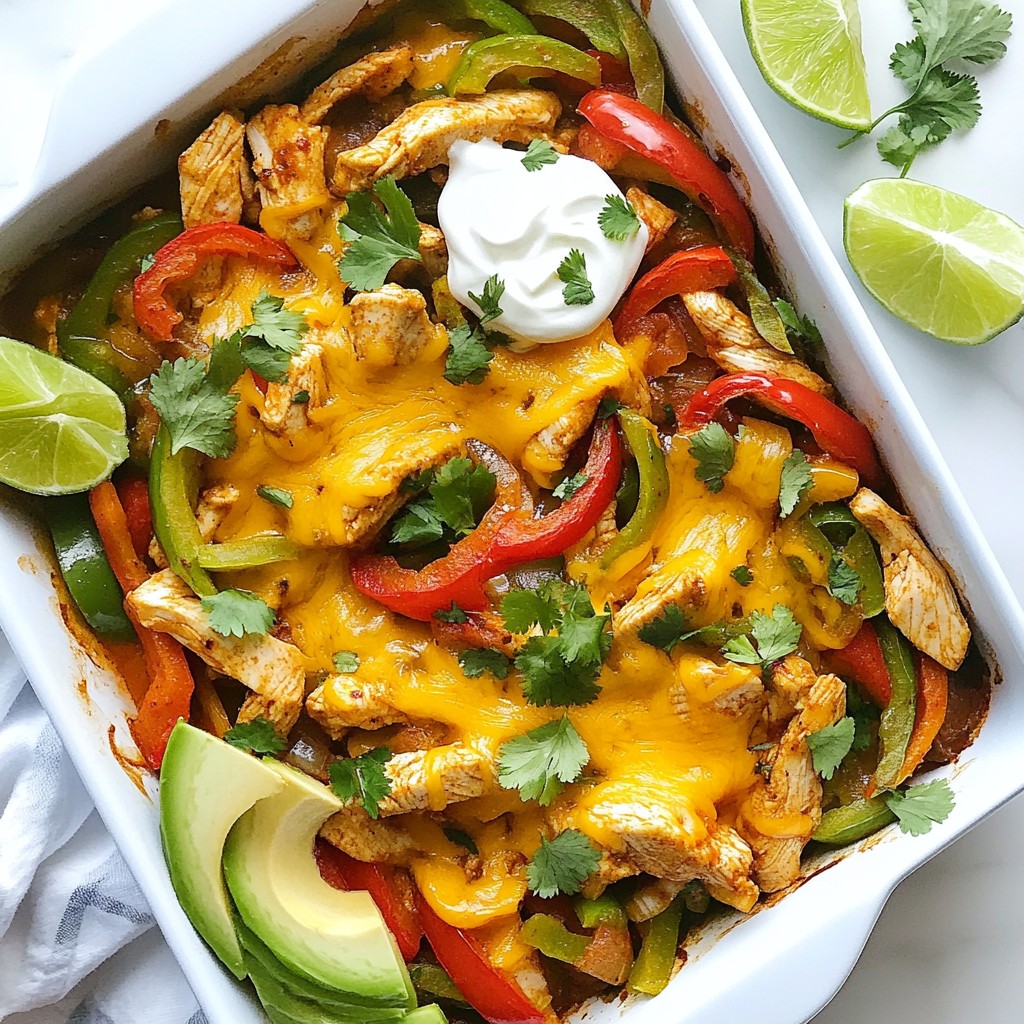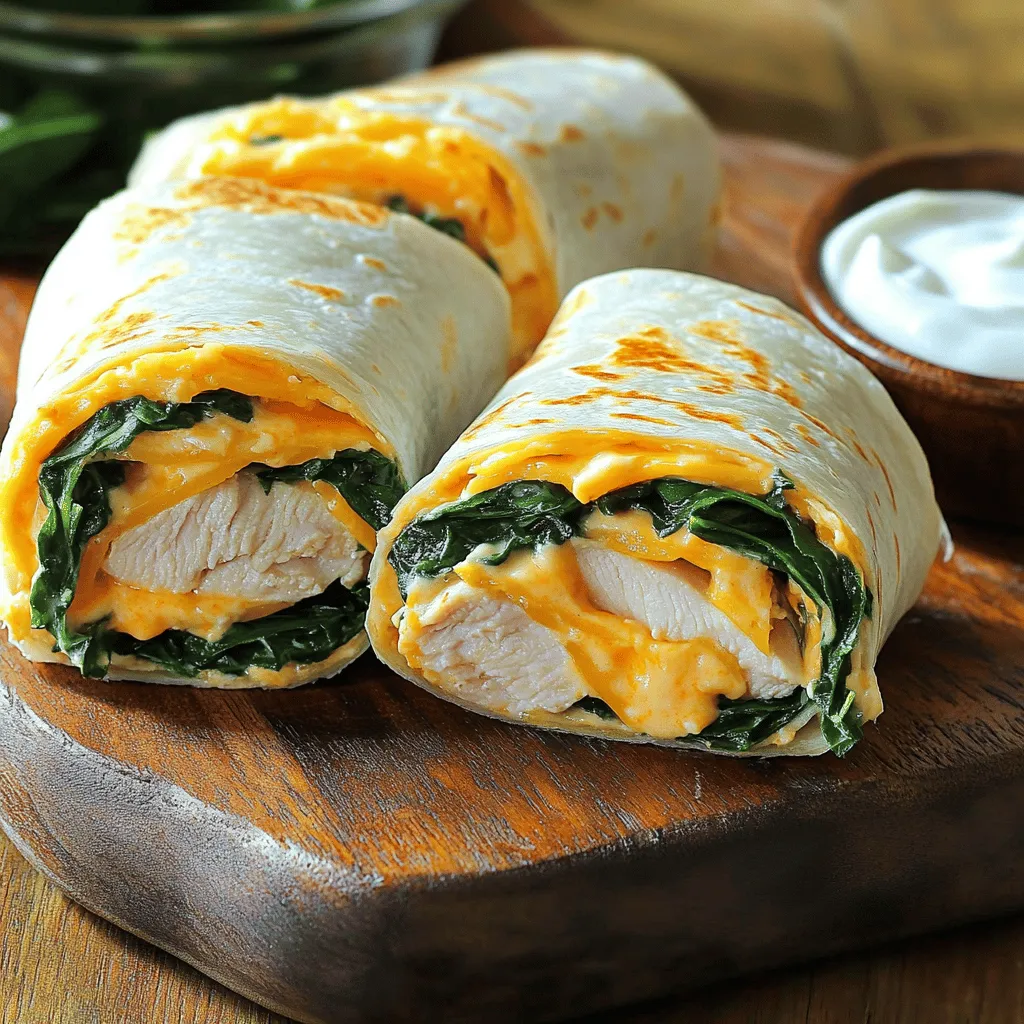
Get ready to savor the deliciousness of Cheesy Garlic Chicken Wraps! This easy meal combines mouthwatering flavors with simple steps, perfect for busy days or family dinners. You don’t need fancy skills to whip these wraps up. Whether you’re looking for a quick lunch or a fun dinner, I’ll guide you through every step. Let’s dive in and enjoy some cheesy goodness together!
Ingredients
Main Ingredients for Cheesy Garlic Chicken Wraps
To make Cheesy Garlic Chicken Wraps, you need key ingredients that bring flavor and nutrition. Here’s what you will need:
– 2 large chicken breasts, sliced into thin strips
– 1 tablespoon olive oil
– 3 cloves garlic, minced
– 1 teaspoon smoked paprika
– Salt and pepper to taste
– 1 cup shredded cheddar cheese
– 1 cup fresh spinach leaves
– 4 large whole wheat tortillas
– ½ cup Greek yogurt (or sour cream)
– 2 tablespoons fresh parsley, chopped (for garnish)
These simple ingredients work well together. The chicken offers protein, while garlic adds a rich taste. The cheese gives that lovely melt, making every bite special.
Optional Ingredients for Customization
You can customize your wraps based on your taste. Here are some optional ingredients to think about:
– Sliced bell peppers for crunch
– Avocado for creaminess
– Jalapeños for a spicy kick
– Different herbs like cilantro or basil
– Black beans for added fiber
Feel free to mix and match. This flexibility helps you create wraps just how you like them.
Nutritional Information
Cheesy Garlic Chicken Wraps are not only tasty but also balanced. Here’s a rough breakdown for one serving:
– Calories: 400
– Protein: 30g
– Carbohydrates: 40g
– Fat: 15g
– Fiber: 5g
These wraps provide a good mix of protein, carbs, and healthy fats. They make a great meal for lunch or dinner.
Step-by-Step Instructions
Preparation of Chicken and Garlic
First, gather your ingredients. You need chicken, garlic, and some spices. Start by heating olive oil in a large skillet over medium heat. Once hot, add the sliced chicken breasts. Season them with smoked paprika, salt, and pepper. Cook the chicken for about 5 to 7 minutes. You want it to turn golden brown and cook all the way through. Then, add the minced garlic to the skillet. Sauté the garlic with the chicken for just 1 to 2 minutes. This will make your kitchen smell amazing! Once done, sprinkle shredded cheddar cheese over the chicken. Cover the skillet for 2 to 3 minutes to let the cheese melt nicely.
Assembling the Wraps
Now it’s time to put everything together. Lay out your large whole wheat tortillas on a clean surface. Spread a generous tablespoon of Greek yogurt (or sour cream) on each tortilla. This adds creaminess and flavor. Next, add a handful of fresh spinach leaves on top. Then, scoop some of the cheesy garlic chicken onto each tortilla. Be sure to get a good amount of chicken and cheese in each wrap. Carefully roll each tortilla tightly. Make sure to fold in the sides as you roll to keep all the yummy filling inside.
Cooking Tips for Perfect Texture
If you want extra crunch, grill the wraps. You can use a panini press or a skillet. Place the wraps seam-side down and grill for about 2 to 3 minutes per side. This will give your wraps a crispy exterior and a warm, gooey inside. After grilling, slice the wraps in half diagonally. For a nice touch, garnish with fresh parsley. Serve the wraps on a wooden cutting board to show off their cheesy goodness. If you want, add a small bowl of extra Greek yogurt for dipping.
Tips & Tricks
Best Practices for Cooking Chicken
To cook chicken well, start with even pieces. I slice my chicken breasts into thin strips. This helps it cook fast and evenly. Heat the olive oil before adding the chicken. This locks in juices and keeps it tender. Cook until the chicken is browned, about 5-7 minutes. Always check that it’s cooked through. Use a meat thermometer; it should read 165°F.
Enhancing Flavor with Seasonings
Seasoning makes a big difference. I always use garlic for a tasty kick. Minced garlic added near the end of cooking brings out the best flavor. Smoked paprika adds a nice warmth and depth. Salt and pepper are must-haves, but feel free to get creative! You can try adding chili flakes for heat or herbs like oregano for extra flavor.
Presentation and Serving Suggestions
For a great presentation, serve the wraps on a wooden cutting board. Cut them in half to show off the melty cheese and chicken inside. I like to add a small bowl of Greek yogurt on the side for dipping. Fresh parsley on top makes it look even better. These small touches make the meal feel special. Enjoy your tasty wraps!

Variations
Substituting Chicken with Other Proteins
You can easily swap chicken for other proteins. Try turkey for a leaner option. Shrimp adds a nice seafood twist. Tofu works well for a plant-based dish. Just make sure to adjust cooking times.
Vegetarian Options for Cheesy Garlic Wraps
To make these wraps vegetarian, skip the chicken completely. Use mushrooms instead for a hearty texture. Bell peppers and zucchini add color and flavor too. You can also use beans for protein.
Different Cheese Choices for Unique Flavor
Cheddar cheese is great, but feel free to experiment. Mozzarella gives a nice stretch. Feta adds a tangy taste that pairs well with veggies. Pepper jack brings a spicy kick if you like heat. Mixing different cheeses can create a unique flavor.Enjoy making these wraps your own!
Storage Info
How to Store Leftover Wraps
To keep your cheesy garlic chicken wraps fresh, first let them cool. Place the wraps in an airtight container. Lay a piece of parchment paper between each wrap to prevent sticking. This way, you can enjoy them later without losing any flavor or texture. Store the container in the fridge. They will stay good for about 3 days.
Reheating Instructions
When you’re ready to eat your leftovers, reheating is key. You can use a microwave or a skillet. For the microwave, place a wrap on a plate and cover it with a damp paper towel. Heat for about 30 seconds to 1 minute until hot. If you prefer the skillet, heat it over medium heat. Place the wrap in the skillet and cook for 2-3 minutes on each side. This keeps the wrap nice and crispy.
Freezing for Future Meals
If you have extra wraps, freezing is a great option. Wrap each one tightly in plastic wrap. Then, place the wrapped wraps in a freezer bag. Make sure to remove as much air as possible. Labels are helpful! Write the date on the bag. These wraps can last in the freezer for up to 3 months. When you’re ready to eat, thaw them in the fridge overnight before reheating. Enjoy every bite of your cheesy garlic chicken wraps!
FAQs
How to make Cheesy Garlic Chicken Wraps gluten-free?
To make Cheesy Garlic Chicken Wraps gluten-free, switch the tortillas. Use gluten-free tortillas from the store. Check the label to ensure they are safe. All other ingredients in the recipe are gluten-free. This way, you can enjoy the same great taste without gluten.
Can I make Cheesy Garlic Chicken Wraps ahead of time?
Yes, you can make Cheesy Garlic Chicken Wraps ahead of time. Prepare the chicken filling and store it in the fridge. Wrap it in tortillas just before serving. This keeps the wraps fresh and tasty. You can also heat them up if you want them warm.
What sides pair well with Cheesy Garlic Chicken Wraps?
Many sides work well with Cheesy Garlic Chicken Wraps. Here are a few tasty options:
– Fresh salad with mixed greens
– Crispy sweet potato fries
– Steamed veggies like broccoli or carrots
– A light yogurt dip for extra flavor
These sides add color and balance to your meal.
How long do the wraps last in the fridge?
The wraps last about 3 days in the fridge. Store them in an airtight container. If you notice any moisture, use a paper towel to absorb it. This helps keep the wraps fresh. For the best flavor, eat them within two days.
Cheesy garlic chicken wraps are easy and fun to make. We covered the needed ingredients, from chicken to seasonings. You can mix it up with different proteins or vegetarian choices. I shared key cooking tips to help you get the best texture. Also, remember how to store your leftovers so they last longer.
Now, it’s time to create your delicious wraps! Enjoy trying new flavors and making this dish your own. Happy cooking!